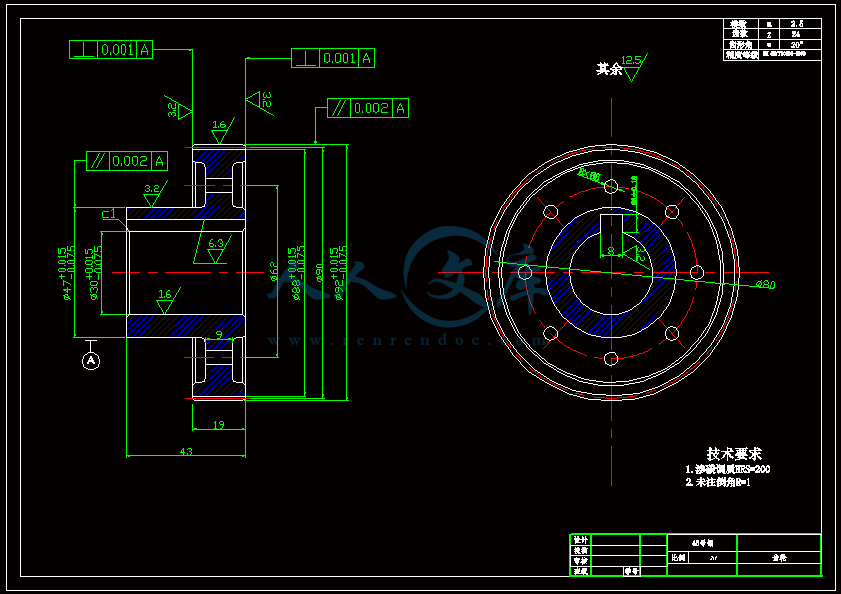
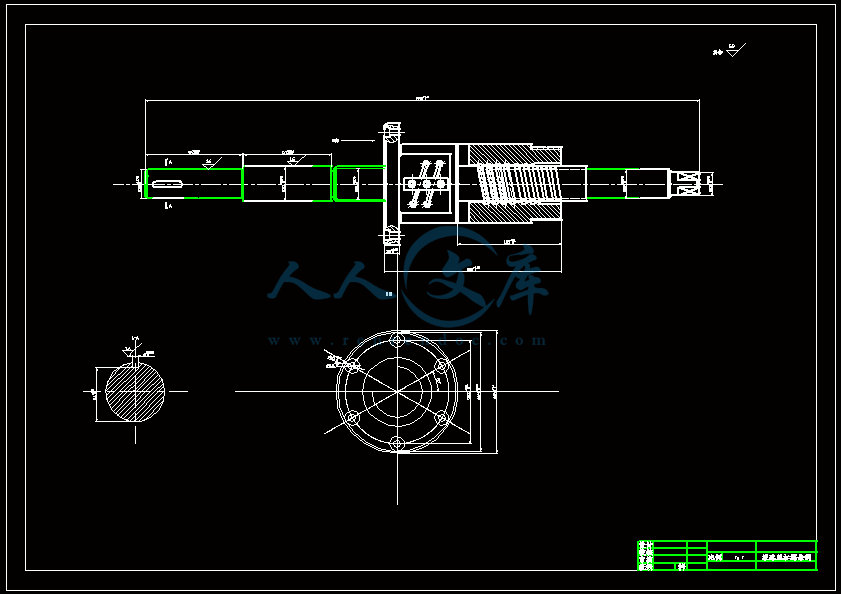
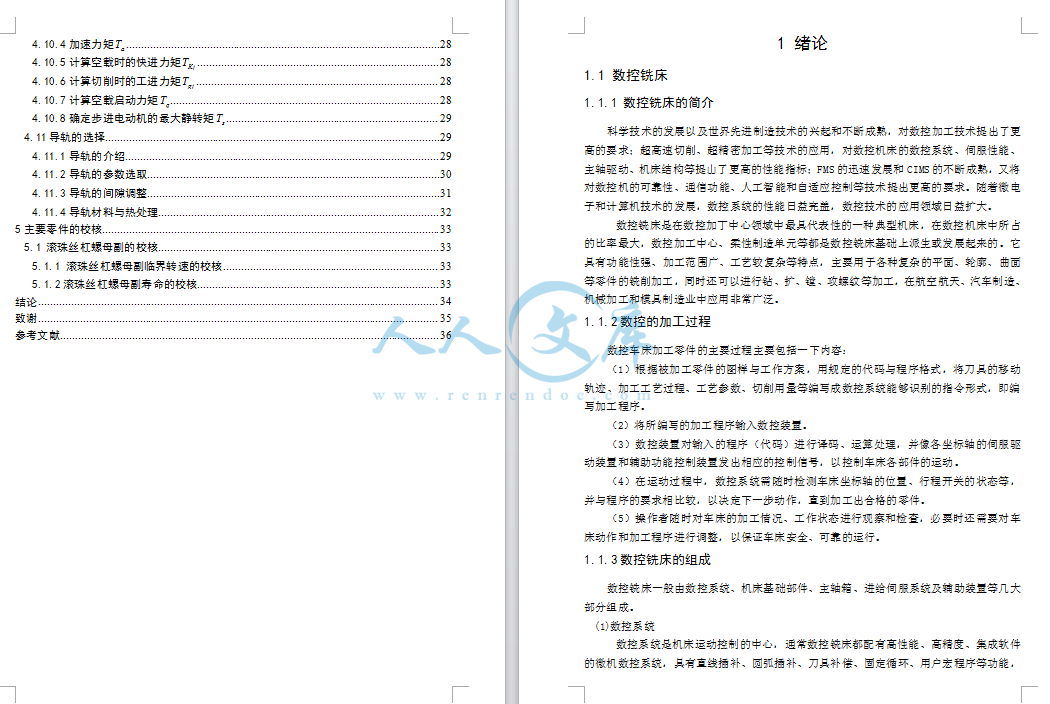
数控铣床Z轴进给系统设计【含6张CAD图纸、说明书】
收藏
资源目录

压缩包内文档预览:
编号:12506952
类型:共享资源
大小:2.54MB
格式:ZIP
上传时间:2018-12-31
上传人:机****料
认证信息
个人认证
高**(实名认证)
河南
IP属地:河南
50
积分
- 关 键 词:
-
含6张CAD图纸、说明书
数控
铣床
进给
系统
设计
cad
图纸
说明书
仿单
- 资源描述:
-


- 内容简介:
-
THE DEVELOPMENT AND APPLICATION OF PERFORMANCE TESTING DEVICES FOR CNC MACHINE TOOLS Wenyuh Jywe Professor, Department of Automation Engineering, National Huwei Institute of Technology, Huwei, Yunlin, Taiwan, 632 Address: 64 Wenhua Road, National Huwei Institute of Technology Huwei, Yunlin, Taiwan, R.O.C Email: Jywe.tw Abstract: The testing devices for performance testing on a CNC machine tool were developed. A small-radius contouring device was employed for checking the dynamic performance of a CNC machine tool. This device was composed of a laser diode and a quadrant sensor. For checking geometric error of a CNC machine tool, a long-radius contouring device was employed. The optic encoder contouring systems were also represented. Experimental work was carried out in the paper. Copyright2002IFAC Keywords: Contouring; Geometric error; CNC machine tool; Quadrant sensor; Optic scale measuring system; Planar encoder 1. INTRODUCTION J.B. Bryan (1982) developed the first ball bar system for the contouring test. However, in this system, the uncertainty is high due to the friction between the master balls and the magnetic sockets and no accurate contouring radius was given. Knapps system (1983,1983) used the circle comparison standard disc mounted on the tested table of the machine tool and the 2D-probe. Y. Kakinov (1985), Y. Kakino, Y Ihara, A.Kamei (1986) and Y. Kakinov, Y.Ihara and Y. Nakastsu (1987). Y.Kakino, Y. Ihara and Y.Nakastu (1986) provided some methods by using the ball bar system to calibrate a coordinate measuring machine and CNC machine tools. W. Knapp (1986,1988) described the rules to reduce the errors due to the stick-slip and others. M. Burdekin and J. Park (1988) modified the original ball bar system by employing a four-rod linkage. M. Burdekin and W. Y. Jywe (1992) provided a method to diagnose the contouring error and to adjust the parameters of the CNC controller to optimize the performance of the tested CNC machine tool. J.C.Ziegert and Chritopher (1994) described the laser ball bar system by guiding a fiber with a laser interferometer. Wenyuh Jywe (2001) provided the application of the developed linkage to verify the contouring error of a CNC lathe and also provided the method to compensate for the error. The above contouring systems provided the general purpose of a contouring test. With the high cost of the measuring device, they still cannot provide proper contouring systems for various purposes. Thus, in this paper, some simple and low cost contouring systems are developed individually for different test purposes. They are summarized and represented as followed: 1. The laser diode and the quadrant sensor contouring system for small radius contouring (less than 4 mm in the contouring radius). 2. The optic scale contouring system for large-radius contouring and for the volumetric error test (Up to 300 mm in the contouring radius). 3. The optic scale contouring system for the volumetric error test. 4. The self- supported ball bar system for contouring test under cutting situation. 2. THE LASER DIODE AND THE QUADRANT SENSOR CONTOURING SYSTEM (QSCS) Fig.1 describes the laser diode and quadrant sensor measuring system, composed of a laser diode, an optic lenses, a shield, a quadrant sensor, a signal propose, an A/D interface card and a PC. The quadrant sensor output 4 channels of voltages while the laser light is projected on it. Due to the limitation of the size of the quadrant detector, only up to 4 mm contouring radius is available. However, there is good enough for checking the dynamic performance of the CNC Copyright 2002 IFAC 15th Triennial World Congress, Barcelona, Spain machine tool. Fig1 The principle the quadrant sensor for performance test of a machine tool A V B V C V D V X Y Diode Laser Fig2 The working principle of a laser-diode and a quadrant sensor As shown in Fig.2, The laser diode provides a laser light and the light is focused and projected on the quadrant. The quadrant outputs four channel signals in term of voltages. From the projected point on the quadrant sensor, the position in X-axis and in Y-axis can be obtained. Let VA, VB, VC and VD represent the output voltages of the sensor. Fig.3 shows the calibration diagram to obtain the positions in X-axis and in Y-axis. XXx BA BA bDa VV VV += + X D X b BA BA VV VV + (a) YYY DC DC bDa VV VV += + YD Yb DC DC VV VV + (b) Fig3: The calibrating diagram of an axis of a quadrant sensor After the calibrating, the constants will be saved in be PC and be employed for the further applications. Fig.4 The test result on a CNC vertical milling machine with a FANUC- Series OM controller 3. 1The experimental tests by using QSCS As shown in Fig.4, the quadrant sensor working range is about 6mm6mm after the calibration. A CNC vertical milling machine with a FANUC series OM controller is tested. The contouring feed rate is selected at 10, 2100 and 3200 mm/min individually. A 2mm circular contouring radius is set for three runs for both clockwise and anti-clockwise. The repeatability for each 3 runs is very good in the actual test. The contouring radius reduces when feed rate increases. At a feed rate of 3200 mm/min, the radius error is about -0.7mm. Also, the contouring error result in Fig.4 shows a 45 ellipse path. All these contouring errors in Fig.4 are corresponding to those shown in the manual (1990) provided by Fanuc Co. 3.THE OPTIC SCALE MEASURING SYSTEM In this section an optic scale measuring system is developed. Basically, the system is employed for contouring test on a CNC machine tool. However, the volumetric error test of employing this system is also studied. Then the method to employ this system for squareness errors test is represented. 3.1The optic scale measuring system for the contouring test Fig.5 indicates the optic scale measuring system for CNC machine tool performance test. An optic scale is fixed on the supporting block. The reading head is guided by the guiding bar and moved by the moving bar. One linear bearing is fixed between the supporting block and the moving bar while the other one is fixed between the optic reading head and the guiding bar. One master ball is connected to a magnetic bar, which is fixed on the CNC machine tool spindle while the other master ball and magnetic bar element is fixed on a magnetic base, which is set on the testing CNC machine tool table. Fig.5 The structure of the optic measuring system During a test, the relative displacement between two master balls is sampled. For a circular contouring test, the contouring center is set at the ball center of the spindle while the table is moved in the two axes of the machine tool at the same time. The contouring motion causes the optic scale to move along the optic reading head. Therefore, the sample can be obtained and sent to the PC via a counter interface card. Furthermore, software is written to simple, record and to analyze the data. Fig.6 The structure of using the optic measuring system for volumetric error test 4.THE OPTIC SCALE MEASURING SYSTEM FOR THE VOLUMETRIC ERROR TEST According to ISO203-2 or ANSI B5 standard, for CNC machine tool positioning test, a simple position test can be executed, in general, by an expensive laser interferometer system. For different measuring areas, different setting-ups are necessary. As previous study by Wenyuh Jywe (2000), a sphere volumetric error can be carried out by a ball bar system. In that system, only the position error and backlash on the surface of the sphere can be obtained due to the limitation of the working range of the LVDT (Linear Variable Differential Transformer), which is employed on the ball bar system. In summary, the optic scale measuring system takes both advantages of the two measuring systems. 1. In one setting-up, a hollow spherical volumetric error of a CNC machine tool can be carried out. 2. The cost of this optic scale system is low. It is easy to operation. 3. For different sizes of CNC machine tools, different ranges of optic scales are always available. Fig. 6 shows the sampling path of the hollow sphere volume of a CNC machine tool. In one-setting up, the center of the master ball of the optic scale linkage is set about at the center of the volume of the tested CNC machine tool. Then possible even spacing arrangement is taken to identify the sampling path. For example, the sphere is cut into 5 planes. Each plane is evenly cut into 6 lines (360 /60 ). Each line includes 8 sampling points (240mm/30mm = 8). Thus in one setting-up 240 sampling points (5x6x8 = 240) can be taken. To test the backlash and the repeatability 3x2 runs are needed. Thus 240x6 runs = 1440 sampling points are taken. It takes 2 seconds for each sampling. Thus, it takes about one hour (including setting up time) to carry out this work. Fig.7 The test arrangement for squareness errors tests of YZ and ZX plane In this test arrangement in Fig.7, a horizontal XY plane contouring is carried out. Then, with the same setting-up and the same optic scale measuring system, let the spindle move up in Z-axis at a distance (offset). The second contouring test is then executed. With this optic scale measuring system, it is not necessary to change the linkage or the setting-up during this squareness test. If no squareness error exists the same analyzed initial setting-up errors (eccentricity) in both contouring tests will be obtained. Under this arrangement, the second sampled data must be modified before analysis. Therefore, )cos( )( )( AngleSet outputTransducer dataModified = Where, ) )2( )1 ( (cos 1 dtestnlinklongofLength teststlinkshortofLength AngleSet = After the sampling the original sample data with short link and the modified data with long link are analyzed by the least square fitting. The two individual analyzed initial set-up errors are used for the calculation of the squareness error. Squareness at ZX plane )(tan 121 Offset XX = Squareness at YZ plane )(tan 121 Offset YY = Where () is the analyzed center of the first contouring test 11,Y X Where () is the analyzed center of the second contouring test 22,Y X Offset is the movement distance in Z-axis after the first contouring test 4.1The planar encoder contouring device for CNC machine tools The principle of the planar encoder A planar encoder system, such as Renishaw RGX grid plate, has been developed for applications such as semiconductor and electronics manufacturing equipment. The system uses read head with 2 orthogonal sensors that read a chegure-patterned grid in both X and Y directions simultaneously. The system with good dynamic response can provide up to 0.1 m resolution in positioning. Fig.8 shows the arrangement of the contouring test by using a simple planar encoder. This planar encoder provides positioning information in each axis for a 2D contouring. During the test, the planar encoder is set on the CNC machine tool. The reading head is fixed with the spindle of the CNC machine tool. The software of the computer via a counter card can read the sampling data. This sample-contouring device provides the following features. 1. During a contouring test, the individual contouring error in each axis can be obtained. This is useful for analyzing and compensating the contouring error. 2. The contouring area can be up to 300mm x 300mm with the selection of 0.1 m to 1m resolutions within this area, various contouring paths can be arranged. 3. It is easy for setting-up and operation. Fig.8 The planar encoder for contouring test 4.2 The test results A simple contouring test is carried out on a XY plane of a vertical CNC machine tool with 0M Fanuc controller. The contouring result is shown in Fig.9.The anti-clockwise and clockwise contouring tests at 20 mm radius can meet ISO 230-1and 230-2 requirements. From the results, the absolute radius error can be found easily. For general contouring systems, only out of roundness is given. Furthermore, the error in each axis can also be found individually if necessary. This is useful for analysis purpose. Fig.9: The contouring result with a planar encoder 4. THE SELF-SUPPORTED-LINKAGE SYSTEM (SLS) In this section, a self-supported linkage is developed for the application of contouring test under cutting condition. The proposed SLS is shown schematically in Fig.10. The system is composed of one high precision reference spheres rigidly mounted at spindle, four rods, a L-type fixed part, a fixed part, the magnetic base, a rotating axis and a non-contact sensor. A carbon fiber transducer link containing one non-contact sensor (eddy current sensor) is located between the reference spheres. The sensor output represents the change in center distance of the sphere as the machine performs a circular contouring operation. The additional supporting link between the fixed part and the rotating axis provides the whole linkage to be held in the horizontal plane during the test. A Special thanks was given to National Science Council, Taiwan, and Republic of China to support the work. (Number NSC- 89 - 2212- E 150 - 030) Fig.10.The structure of the self-supported linkage contouring system 5.1.The SLS for contouring test with cutting condition The SLS are herein used for testing the dynamic performance of CNC machine tools during the cutting process. The SLS cannot only be used for testing CNC machine tools under non-cutting situation, but also can be extended to test the dynamic performance during cutting process. It is of importance for the in-processing measurement. The SLS was employed to test the dynamic performance of a vertical CNC machine center (YG-FV6000 series) with a Fanuc OM controller. The test conditions are shown below: 1.The high-speed cutter (12 mm, SL4SE HS-CO) 2.Specimen (SS41) 3.Cut-width 12mm and cut-depth 1mm 4.Feed rate 50 (mm/min),Clockwise 5.Spindle speed 800r.p.m 5. Contouring radius 135 mm 6. DISCUSSION AND CONCLUSION For different purposes of the tests, proper measuring tool should be applied. In this paper four contouring systems are provided. With the similar software and the low cost of the hardware these systems provide good solutions for the application. The features of these systems can listed as followed. 1.The quadrant sensor contouring system provides short radius contouring. The dynamic error can be checked by the system successfully. 2.The optic scale measuring system provides long working range contouring. Thus both contouring and volumetric test can be arranged in the provided methods. The hollow sphere volumetric error test by this system and the methods for squareness errors in one setting-up are studied. For in - processing measuring, the self- supported- linkage system was developed for the contouring test with/without cutting condition. The system was verified by a simple model and experimental result. In summary, in this paper, the provided systems and measuring methods are useful for different test purposes on a CNC machine tool. ACKNOWLEDGMENTS REFERENCES J.B. Bryan, ”A Simple Method for Testing Measuring Machines and Machine Tools,” Prec. Eng., Vol.4, No.2, pp. 61-69.1982 W. Knapp, ”Test of the three-dimensional uncertainty of Machine Tools and Measuring Machines and its Relation to Machine Errors” Annals of CIRP, Vol.32, NO.1, pp.459-464 (1983) W. Knapp, ”Circular test for Three Coordinate Measuring Machine Tools,”Prec.Eng.Vol.5, No.3, pp.115-124 (1983) Y. Kakino, “Compensation of 3-Dimensional Coordinate Measuring Machine and Evaluation of Double Ball Bar Test by Error Vector Analysis” Journal of JSPE, Vol.51, NO.6 ,pp.1244-1250 (1985) Y.Kakino,Y.Ihara and Y. Nakatsu,” The Measurement of Motion Errors of NC Machine Tools and Diagnos
- 温馨提示:
1: 本站所有资源如无特殊说明,都需要本地电脑安装OFFICE2007和PDF阅读器。图纸软件为CAD,CAXA,PROE,UG,SolidWorks等.压缩文件请下载最新的WinRAR软件解压。
2: 本站的文档不包含任何第三方提供的附件图纸等,如果需要附件,请联系上传者。文件的所有权益归上传用户所有。
3.本站RAR压缩包中若带图纸,网页内容里面会有图纸预览,若没有图纸预览就没有图纸。
4. 未经权益所有人同意不得将文件中的内容挪作商业或盈利用途。
5. 人人文库网仅提供信息存储空间,仅对用户上传内容的表现方式做保护处理,对用户上传分享的文档内容本身不做任何修改或编辑,并不能对任何下载内容负责。
6. 下载文件中如有侵权或不适当内容,请与我们联系,我们立即纠正。
7. 本站不保证下载资源的准确性、安全性和完整性, 同时也不承担用户因使用这些下载资源对自己和他人造成任何形式的伤害或损失。

人人文库网所有资源均是用户自行上传分享,仅供网友学习交流,未经上传用户书面授权,请勿作他用。
 川公网安备: 51019002004831号