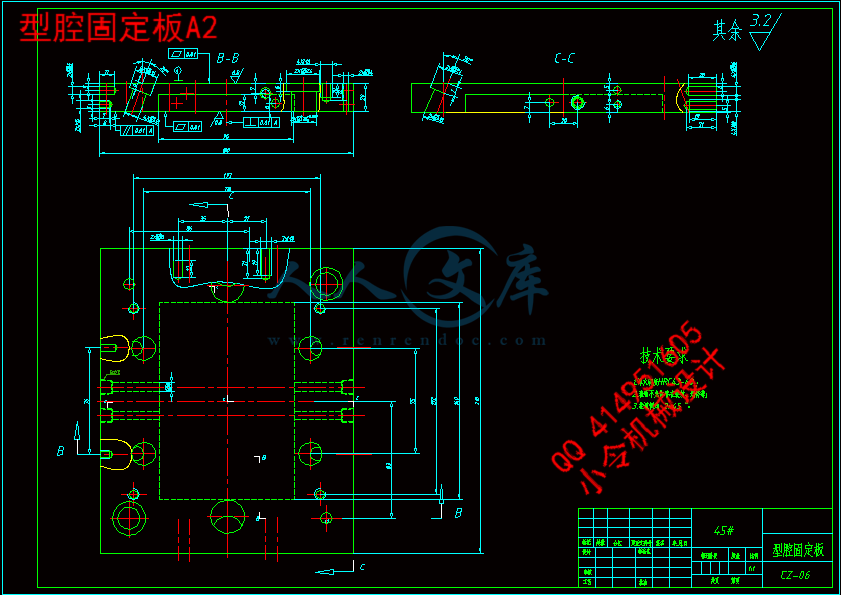
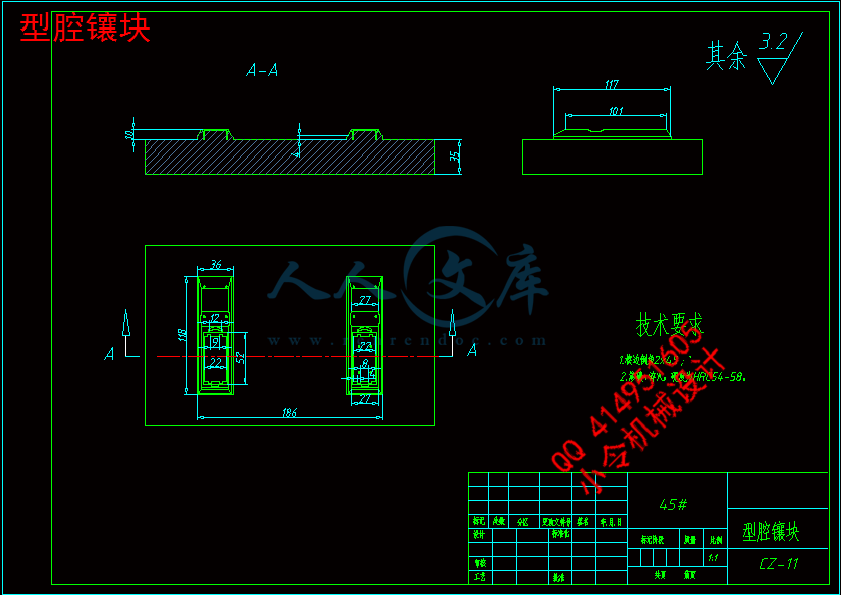
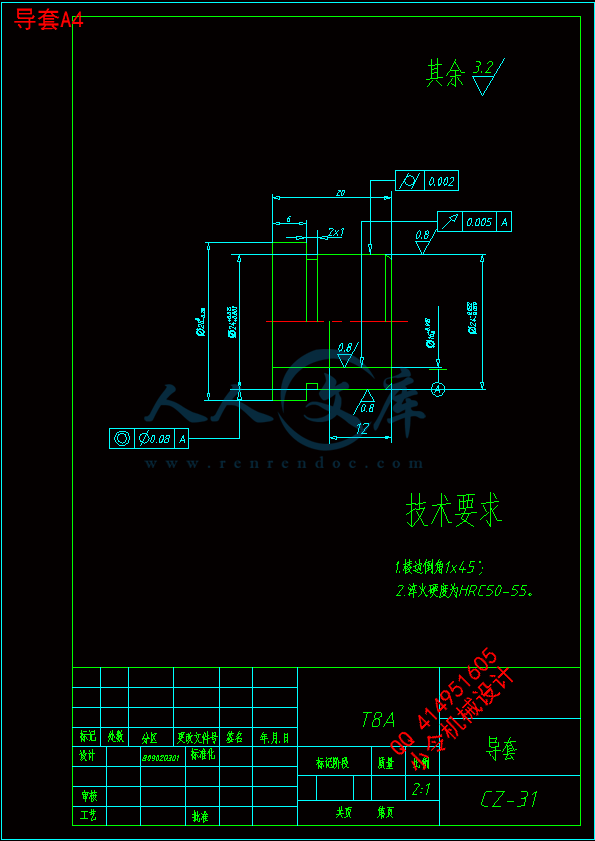
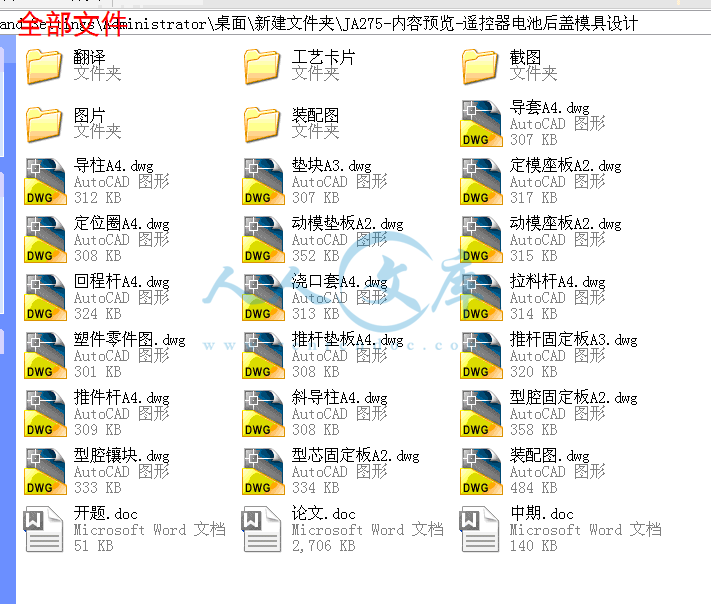
论文.doc

遥控器电池后盖模具设计【19张CAD图纸+WORD毕业论文】【注塑模具类】

收藏

资源目录
跳过导航链接。
压缩包内文档预览:(预览前20页/共65页)
预览图 预览图 预览图 预览图 预览图 预览图 预览图 预览图 预览图 预览图 预览图 预览图 预览图 预览图 预览图 预览图 预览图 预览图 预览图 预览图
编号:438601    类型:共享资源    大小:3.65MB    格式:RAR    上传时间:2015-06-03 上传人:好资料QQ****51605 IP属地:江苏
45
积分
关 键 词:
遥控器 电池 模具设计 cad 图纸 word 毕业论文 注塑 模具
资源描述:

摘要

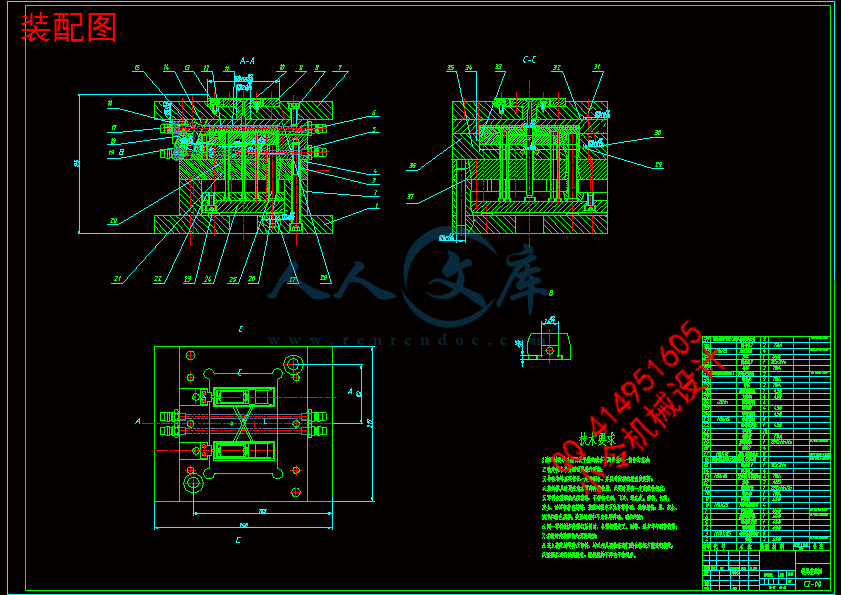
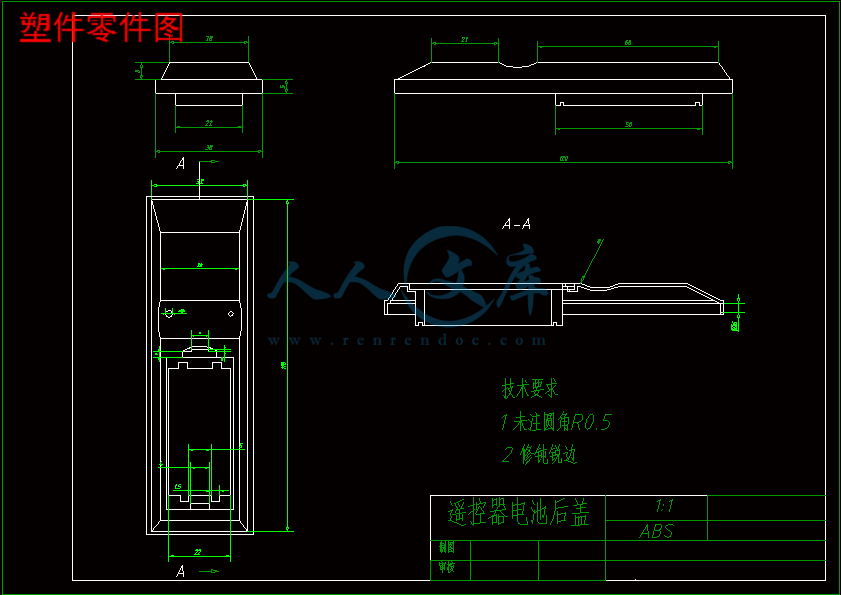
本文详细介绍了遥控器电池后盖注塑模具的设计,共分十四节,主要包括:塑件材料的分析与设计方案的论证;注塑机的选择;模具结构的设计;成型零件的设计;导向机构的设计;脱模机构的设计;侧向分型与抽芯机构的设计等。

   本次设计为一模两腔,塑件材料选用了丙烯腈-丁二烯-苯乙烯共聚物(即工程材料ABS),浇口形式选用了侧浇口,模具结构为直接分型——推杆推出机构。通过以下计算和设计是可行的,并可以应用到实际生产中。

本次设计主要是对一种塑料遥控器电池后盖进行模具设计。本文先介绍了注射模具国内外的发现状况及发展趋势,其次介绍了注射成型原理和工艺过程;根据塑件要求选择合适的注塑机,进而选择合适的浇注系统与冷却系统;通过计算,对导向机构、脱模机构和侧向分形与抽芯机构进行设计。

该模具的凸凹模均采用嵌入式的型腔和型芯,精度高,节省材料,改善了模具加工的工艺性,降低了模具的生产成本。该模具采用单分型面设计,通过滑块和斜导柱实现开合模动作,模具运动平稳可靠。塑件能顺利脱模,该模具总体结构设计合理,模具的制造成本低。成型的壳体塑件质量合格稳定,使塑件质量符合设计和使用要求。


关键词:遥控器电池后盖;注塑模具;侧抽芯机构;导向机构;脱模机构

The Design of the Telecontroller Injection Mold

Abstract

   This paper introduced the design of telecontroller,and consisted 14 parts.Mainly include analysis of plastic material and argumentation of design project; selecting injection machine; devising mold structure;devising molding parts; devising oriented framework; devising stripping framework; devising side parting and pulling framework.

   The mold is consisted of two cavities. The plastic material select acrylonitrile butadiene-styrene copolymer (i.e.engineering material ABS). The sprue form choose a side gate, die structure for direct classification--push rod pushing mechanism.By the following calculation and design is feasible, and can be applied to practical production.  

The design is mainly remote control battery cover of a plastic mold design. This paper first describes the situation and development trend of the injection mold found at home and abroad, followed by injection molding principle and process; plastic parts require the injection molding machine, and then select the appropriate gating system and cooling system;, oriented agencies, stripping agencies and lateral fractal design core-pulling mechanism.

The mold punch and die are embedded in the cavity and core, high precision, material savings, improved mold process, reducing the cost of production of the mold. The mold with a single parting surface design, mold opening and closing action slider and Bevel Pillar, the mold movement is smooth and reliable. Plastic parts smooth stripping overall structure of the mold design, mold manufacturing costs low. The molding of the plastic parts of the housing of acceptable quality and stability, so that the quality of plastic parts comply with the design and use requirements.


Key Words:   telecontroller; Injection Mold; Devising Side Parting; Devising Oriented Framework;  Pulling Framework


目  录

1绪论1

1.1题目背景1

1.2题目国内外相关研究情况1

1.3中国与国外先进技术的差距2

1.4塑料模具发展走势2

2塑件材料分析与方案论证4

2.1塑件材料的选择及其结构分析4

2.2ABS的注射成型工艺4

2.3塑件收缩率与模具尺寸的关系6

2.4方案论证7

3注射机的选择11

3.1确定零件的体积11

3.2选择注射机及注射机的主要参数11

 3.2.1注射机的类型11

 3.2.2注射机的主要技术参数12

 3.2.3注塑机的校核13

4模具结构设计15

4.1浇注系统15

 4.1.1浇注系统的作用15

 4.1.2浇注系统布置15

4.2浇注系统设计15

 4.2.1浇口套的设计:15

 4.2.2冷料井设计17

 4.2.3分流道的设计18

4.3浇口设计18

 4.3.1浇口的类型19

 4.3.2浇口的位置19

5成型零件设计20

5.1分型面的设计20

5.2成型零件应具备的性能21

5.3成型零件的结构设计21

 5.3.1凹模(型腔)结构设计21

 5.3.2型芯的结构设计21

5.4成型零件工作尺寸计算22

 5.4.1影响塑件尺寸和精度的因素22

 5.4.2成型零件工作尺寸的计算23

 5.4.3成形型腔壁厚的计算25

6导向机构的设计27

6.1导向机构的作用27

6.2导柱导向机构27

 6.2.1导向机构的总体设计27

 6.2.2导柱的设计28

 6.2.3导套的设计28

7脱模机构的设计30

7.1脱模机构的结构组成30

 7.1.1脱模机构的设计原则30

 7.1.2脱模机构的结构30

 7.1.3脱模机构的分类30

7.2脱模力的计算31

7.3简单脱模机构31

 7.3.1顶杆脱模机构的设计要点31

 7.3.2顶杆的形状32

 7.3.3顶杆强度的计算32

7.4复位装置33

8侧向分型与抽芯机构的设计34

8.1侧向分型与抽芯机构的分类34

8.2斜滑块侧向分型与抽芯机构34

 8.2.1斜滑块侧向分型与抽芯机构设计要点34

8.3斜导柱的计算35

 8.3.1抽拔力的计算35

 8.3.2抽芯距的计算35

8.4斜滑块的设计36

8.5开模结构设计37

9排气系统的设计38

10温度调节系统的设计39

10.1温度调节系统的作用39

 10.1.1温度调节系统的要求39

 10.1.2温度调节系统对塑件质量的影响39

10.2冷却系统的机构40

 10.2.1模具冷却系统的设计原则40

 10.2.2模具冷却系统的结构41

11塑料模具用钢42

11.1注塑模材料应具备的要求42

11.2模具材料选用的一般原则42

11.3本模具所选钢材及热处理42

12模具工作过程44

13模具的可行性分析44

13.1本模具的特点45

13.2市场效益及经济效益分析45

14总结46

参考文献47

致谢48

毕业设计(论文)知识产权声明49

毕业设计(论文)独创性声明50

附录51


1  绪论

1.1题目背景

塑料注射模具是成型塑料制件的一种重要工艺装备,在塑料制品的生产中起着关键的作用。塑料模具工业从起步到现在,历经半个世纪,有了很大发展,模具水平有了较大提高。在成型工艺方面,多材质塑料成型模、高效多色注射模、镶件互换结构和抽芯脱模机构的创新设计方面也取得较大进展。气体辅助注射成型技术的使用更趋成熟,如青岛海信模具有限公司、天津通信广播公司模具厂家在29—34英寸电视机外壳以及一些厚壁零件的模具上运用气辅技术,一些厂家还使用了C-MOLD气辅软件,取得较好的效果。如上海新普雷斯等公司就能为用户提供气辅成型设备及技术。在制造技术方面,CAD/CAM/CAE技术的应用水平上了一个新台阶,以生产家用电器的企业为代表,陆续引进了相当数量的CAD/CAM系统。如美国EDS的UGⅡ、美国Parametric Technology公司的Pro/Engineer、美国CV公司的CADS5、美国Delta cam公司的CADS5、美国Delta cam公司的Doct5、日本HZS公司的 CRADE、以色列公司的Cimatron、美国AC-Tech等[1]。

整体来看,中国塑料模具无论是在数量上,还是质量、技术和能力等方面都有了很大的进步,但与国民经济发展的需求、世界先进水平相比,差距任然很大。一些大型、精密、复杂、长寿命的中高档塑料模具每年仍需大量进口。在总量供不应求的同时,一些低挡塑料模具却供过于求,市场竞争激烈,还有一些技术含量不太高的中高档塑料模具也有供过于求的趋势。
内容简介:
Int J Adv Manuf Technol (2001) 17:453461 2001 Springer-Verlag London Limited Three-Dimensional Kernel Development for Injection Mould Design T. L. Neo and K. S. Lee Department of Mechanical and Production Engineering, National University of Singapore, Singapore Today, many software “plug-ins” have been developed on high-level 3D modelling platforms to facilitate processes such as FEM analysis, CAM, injection mould design, simulation and visualisation. Such an arrangement is advantageous in many ways. However, it is not without shortcomings. Ideally, these “plug-ins” could also be developed using low-level 3D kernels for higher flexibility and better portability. This paper examines the various issues and methodologies related to the development of such 3D-based applications. The emphasis is placed on the software aspect. First, a methodology for the development of 3D-based applications is proposed. The idea is then implemented by developing an injection mould design application using a low-level 3D kernel called Parasolid. Based on design concepts used in an established mould design application, IMOLD, the development of a mould base design module is illustrated. An object-oriented programming language has been chosen for the development of the software on a Windows NT platform. Keywords: 3D kernel; Computer-aided design (CAD); Injection mould design; Parasolid 1. Introduction Three-dimensional CAD systems have increasingly been used to speed up the product realisation process. One of the first steps involved in the automation of the product design process is the creation of the component parts in a 3D modelling application. The 3D model, upon creation, is called the digital master copy. This 3D digital model forms the key to a wide spectrum of process automation. Creating the 3D digital model of component parts is only the very first step. There are several other secondary tasks that must to be done before the part can be manufactured. Such tasks include finite-element analysis, jigs and fixtures design, injection mould design, computer-aided manufacturing, simul- Correspondence and ofprint requests to: K.-S. Lee, Department of Mechanical and Production Engineering, National University of Singa-pore, 119260 Singapore. E-mail: mpeleeksK.sg ation, and visualisation. Today, many application Plug-ins have been developed on high-level 3D modelling platforms to facili-tate these secondary tasks. The 3D-modelling platform provides the plug-in software with a library of functions as well as an established user interface and style of programming. As a result, the development times for these plug-ins are significantly reduced. Such an arrangement is advantageous in many ways. However, it has its shortcomings, especially in the long run. In order to develop a plug-in for established software, the developers must adhere to the many constraints imposed. There is a need to be consistent with the style of the parent software. The developers must be able to achieve any functionality they need with only the set of library functions provided. Most end-users need both the parent software and the plug-in. In many cases, however, they may be more interested in using only the plug-in software. An example of such a situation is in injection mould design. These users, however, must purchase the entire software package which includes many features and functions that they do not need. Such a large program is often very demanding on the hardware, which also means higher cost. The plug-in software is also very dependent on developments in the parent software. Whenever a new version is updated for the parent software, the plug-in developers have to follow-up on the changes. These shortcomings may not exist if these applications were developed on a low-level platform. Ideally, these plug-ins could be developed using low-level 3D kernels for higher flexibility and better portability. In many instances, such a move is both feasible and advantageous. Traditionally, injection mould design is carried out directly on a CAD system. The entire injection mould, consisting of perhaps hundreds of components, is modelled and assembled on CAD systems such as AutoCAD, Pro/Engineer, and Unigraphics. As the injection mould design process is recursive, it is very time-consuming to re-model and re-assemble the design. In this aspect, 3D CAD systems such as Pro/Engineer and Unigraphics, which are feature-based, have a significant advantage over 2D CAD systems such as AutoCAD. To further speed up the injection mould design process, plug-ins were developed on these 3D systems to automate certain stages of the design process. Examples of such add-on applications include IMOLD (Intelligent Mold Design and Assembly Sys- tem, developed at the National University of Singapore, based on Unigraphics), Expert Mold Designer (based on CADKEY) and Moldmaker (based on EUCLID). As each is based on a specific CAD system, there is no plug compatibility. In 1994, Mok and Cheung 1 presented work on the devel-opment of an injection mould design application based on Unigraphics. In 1997, Shah 2 proposed a 3-tier architecture for standardising communications between geometric modelling kernels and applications that require geometric modelling services. His objective is to achieve plug compatibility between 3D applications that are based on Parasolid 3 (a 3D kernel, developed at the University of Cambridge) and ACIS. This, however, involved an extensively developed 3-tier modelling husk. In this paper, the author attempts to develop a lightweight injection mould design application using a low-level 3D kernel directly. The focus is on the flexibility and speed of the software development. Design concepts and procedures were taken from IMOLD 4,5, a complete mould design and assembly 3D application. Although the discussion is limited to injection mould design only, the methodology applied can easily be applied in other 3D-based applications that are of a similar nature. A combination of developer tools was chosen for this purpose. Before the methodology is discussed, brief introductions to some of these tools are first presented. They are, IMOLD, Parasolid version 10.1, Visual C v e r s i o n 6.0, and the Microsoft Foundation Classes. 2. IMOLD as a Mould Design Application IMOLD (Intelligent Mold Design and Assembly) is an established 3D-based application that is dedicated to injection mould design. It is developed on top of an advanced CAD system called Unigraphics. The development is carried out using the applications programming interface (API) provided. The software enables mould designers to create a design rapidly by providing the tools that are commonly needed. Standard components parts, that are often required in the design, have been pre-created in the software and can be readily used by the designer. This reduces the design time significantly. The mould design process is divided into several stages, providing the designer with a consistent method of creating the mould design. They are, namely: 1. Data preparation. 2. Filling system design. 3. Mould base design. 4. Inserts and parting design. 5. Cooling system design. 6. Slider and lifter design. 7. Ejection system design. 8. Standard parts library. Each stage can be considered as an independent module of the program. The 3D-based requirements for each module vary only slightly. The success in developing the mould base module implies feasibility in developing all the other modules. 3. Parasolid as a 3D Kernel Parasolid is designed to be the centre or “kernel” of any system that is based on 3D model data. It is essentially a solid modeller, which can be used to: 1. Build and manipulate solid objects. 2. Calculate mass and moments of inertia, and perform clash detection. 3. Output the objects in various ways, including pictorially. 4. Store the objects in some sort of database or archive, and retrieve them later. Parasolid is one of the most advanced 3D kernels among CAD applications. It is the 3D kernel of Unigraphics and Solid-Works. Its unique tolerant modelling functionality enables it to accept data stored in other modeller formats. Parasolid model files are thus very potable. It is, therefore, a superior platform for the development of stand-alone applications. The 3D-based application interacts with Parasolid through one of its three interfaces (see Fig. 1). These are called the Parasolid kernel (PK) interface, the kernel interface (KI) and the downward interface. The PK interface and the kernel interface sit “on top” of the modeller (side-by-side), and are the means by which the application models and manipulates the objects, as well as controls the functioning of the modeller. The downward interface lies “beneath” the modeller, and is called by the modeller when it needs to perform data-intensive or system type operations. It consists of three parts: frustrum; graphical output (GO); and foreign geometry. These are briefly explained below. 3.1 The KI and PK Interface The KI and the PK are interfaces for the programmer to access the modelling capabilities in the Parasolid kernel. They are standard libraries of modelling functions. The programmer calls these modelling functions in their programs. As the KI is to be phased out soon, we chose to use the PK interface. Fig. 1. Parasolid components. 454 T. L. Neo and K. S. Lee 3D Kernel Development for Injection Mould Design 455 3.2 The Frustrum The frustrum is a set of functions, which must be written by the applications programmer. The kernel calls them when data must be saved or retrieved. When using Parasolid, the applications programmer must first decide how to manage the storage of data, which Parasolid outputs through the frustrum. Transferring data through the frustrum usually involves writing to, or reading from, files. The format and location of the files is determined when writing the frustrum functions. 3.3 The Graphical Output (GO) The graphical output is another set of functions, which is to be written by the applications programmer. When a call is made to the PK rendering functions, the graphical data generated are output through the GO interface. The graphical data are then passed to a 3D rendering package. OpenGL, a software interface to graphic cards, is a rendering package that is used for our purpose. 3.4 The Foreign Geometry The foreign geometry provides functionality for the development of customised geometrical types such as in-house curves and surfaces. These are used together with the standard geometrical types for modelling within Parasolid. 4. Object-Oriented Programming Using Visual C a n d the Microsoft Foundation Classes Object-oriented programming (OOP) has been the undisputed option for software developers. It is among the most advanced developmental tools available. The Microsoft Visual Studio is such a software package. It features several developmental tools that are meant for Internet-based and Windows-based programming. Among these tools are the Visual C ( V C ) and the Microsoft Foundation Classes (MFC). The V C i s a powerful development tool for object-oriented programming, whereas the MFC is a framework of C c l a s s e s that are dedicated to Windows-based programming. Together, these provided the applications programmer with powerful development features and functionalities such as auto-code generation, and wizard-based operations. These greatly improved productivity. The entire user-interface for our program is developed using the V C a n d the MFC. 5. System Design The direct development of a 3D-based add-on application using a 3D kernel requires several issues to be addressed. They consist of 3 main stages at the highest level. First, the identification of the crucial features and functions required for the plug-in application. Secondly, the development of the design for the application framework. Lastly, the design and develop-ment of the individual modules in the framework with appropriate developmental tools. 5.1 Identification of Essential Modules Parasolid, as a 3D kernel, provides only a number of libraries and a conceptual framework for 3D application development. It is thus necessary for the developers to identify and develop the other essential facilities that are provided in a 3D CAD system. In order to identify the required facilities, it is important to understand the discrepancies between the two. Table 1 summarises the main differences in the facilities provided by a 3D kernel and a 3D CAD system. Some of these facilities, such as features and parametric modelling, are both time-consuming and technically demanding to develop. As most plug-ins do not use all the facilities of the parent software, it is possible to develop only those required by the plug-ins using low-level 3D kernels, producing a standalone version. Items 7 to 9 in Table 1 are prerequisites for the development of 3D-based applications using Parasolid. By studying the requirements of the plug-in application, other essential facilities can be identified. A framework for the application is then proposed, based on the facilities provided by the Parasolid kernel. 5.2 Framework for 3D-Based Applications A framework is developed with reference to the facilities provided by the developmental tools and the requirements of the application. It is designed so that there are minimum dependencies between individual code modules. This may result in a small degree of code duplication. In exchange, there is better portability of the program codes, greater ease of maintenance and a better prospect for future expansion. The overview of this framework is illustrated in Fig. 2. The details of the various modules are discussed in the following sections. 5.2.1 Windows-Based User-Interface (A) Parasolid does not provide the programmer with a userinterface. Thus, the development of the 3D-based application at every single stage will involve designing the user-interface from scratch. The necessary developments involve: 1. Environmental setting and display of the 3D-based appli-cation. 2. Interactive graphical interface and execution procedure for all application functionality. 5.2.2 3D Developer Layer (B) Since different 3D-based applications require 3D-facilities to different extent, the framework must provide for these variations. A 3D developer layer (See Fig. 2, Item B) is conceptualised to handle such variations. It is a library of objects or classes that are developed, based on the Parasolid kernel. The extent of development depends on the requirements of the Table 1. Summary of facilities provided by a 3D kernel and a CAD system. Facilities 3D kernel 3D CAD system 1. Basic 3D modelling Low-level and general functions provided High-level and specific functions provided 2. Assemblies Several library functions provided Complete system provided 3. Feature-based modelling Not provided Established feature set provided 4. Parametric modelling Not provided Often provided 5. Free-form modelling Low-level functions provided Often provided 6. Drafting Not provided Complete system provided 7. Interactive user-interface Not provided Always provided 8. Visualisation of 3D objects Conceptual framework and several library Completely developed functions provided 9. File management system Conceptual framework and several library Completely developed functions provided Fig. 2. Overview of 3D-based application. application identified in the previous section. Besides catering for variations in application requirements, the 3D developer layer also acts as a programming interface for non-Parasolid developers. Such an interface can also be re-used for subsequent development of other 3D-based applications. The 3D developer layer essentially consists of three main sections. They are used for 3D modelling and assembly, 3D visualisation and 3D data management, respectively. I. 3D Modeling and Assembly. The 3D modelling and assembly module is the most important and elaborate of all three sections. It is analogous to the application-programming interface (API) provided by most CAD systems. The module consists of a library of 3D-based objects or classes, which are used for the development of the core application modules. The basic 3D functionality that is required by most 3D applications must be developed first. Depending on the requirements of the individual 3D-based application, other more advance features are subsequently added. II. 3D Visualisation. The display of 3D objects in a Windows client area requires a software graphics interface. The graphical output together with a selected graphical interface, are used for the rendering of 3D objects in the 3D-based application, as well as the management of the viewing projections and transformations. Here, a library of classes is developed for such purposes. III. 3D Data Management. The 3D data management module is developed on top of the frustrum. The frustrum is the module in the Parasolid kernel that facilitates archiving and access of 3D part files. A library of classes are developed using the frustrum for handling: 1. 3D object file format. 2. File management operations such as opening and saving a 3D object file. 5.2.3 Application Modules (C) These are the actual 3D-based application modules that sit between the 3D developer layer and the application userinterface. The design of these modules depends mainly on the nature of the applications and often differs greatly. The main bulk of the developmental work is carried out in this area. The ease of the development, however, depends on the capabilities of the 3D developer layer. 5.2.4 Other Software Modules (D) Very often, the 3D-based application may require functionality from other existing software modules or application modules. Therefore, such a link may exist. An example of such a requirement is illustrated in the implementation section of this paper. 5.3 Development of Individual Modules Each module to be developed is studied and analysed before a suitable design is produced. The ease of development depends greatly on the design of the framework and the developer tools selected. The next section illustrates the implementation of the 456 T. L. Neo and K. S. Lee above methodology on a 3D-based injection mould base design and assembly application. 6. Implementations Applying the system design, a 3D-based injection mould design application is developed. This is achieved using the develop-mental tools mentioned in the earlier sections. The mould base module is chosen for illustration, as it requires the widest range of 3D functionality, including the generation of assemblies. 6.1 Framework of Application and the Requirements of Each Module A framework for the application is designed with reference to the developmental work identified. Figure 3 illustrates the framework for the Mold Base design application. The details of the requirements in each module are discussed as follows: 6.1.1 Windows NT User-Interface (A) Mould base design is an iterative process. The Mould designer first selects a standard mould base from the catalogue, and then repeatedly makes modifications to the dimensions of the mould base until all the design requirements are met. It is, therefore, necessary to consider an interactive user-interface for such purpose. Using the Visual C a n d the MFC, a Windows-based interface is developed. These include: 1. Creation, display and management of menu bar items, context menu items and toolbar buttons for easy access to functionality of the application. 2. Creation, display and management of dialogue boxes to guide the user or to obtain user input. Fig. 3. Overview of the injection mould base design application. Fig. 6. Cavity plate B. Fig. 7. A“Hoppt” two-plate mould base 3. Creation, display, and management of various views in the display area, for illustration. 4. Mouse driven interaction. 5. The design of the sequence of operation (including user interaction) for each function. The resulting application, as shown in Fig. 4, is a typical Windows-based application with a user-friendly interface. 6.1.2 3D Developer Layer (B) The 3D-based requirements of mould base design is analysed and the modules to be developed are identified. The modelling requirements for 3D-based mould base design are: 1. Creation of primitives such as blocks, cylinders, cones, prisms, and toruses. 2. Creation of blends and chamfers. 458 T. L. Neo and K. S. Lee 3D Kernel Development for Injection Mould Design 459 Fig. 8. Customisation of bottom screw dimensions. 3. Boolean operations: unite and subtract. 4. Transformation operations: translation and rotation. 5. Management of object attributes such as name and colour. 6. Creation of instances. 7. Creation of assemblies and subassemblies. As these are not too extensive, it is possible to develop a basic modelling set. With the detailed development of the individual modules, more functions are then added to the 3D developer layer. The overall requirements in each module are illustrated in the following sections. I. 3D Modelling and Assembly. A mould base is essentially an assembly of many components such as plates, bushes, pins, and screws. To facilitate mould base design, the designer must be provided with a library of ready-made mould base components. By selecting a particular dimension, a standard mould base will be generated. To facilitate these, a library of 3D-based functions, corresponding to the requirements mentioned in Section 6.1.2, are identified and developed. As the codes are object-oriented, they can easily be expanded to accommodate other mould design modules when required. II. 3D Visualisation. Using the functions provided in the graphical output, together with OpenGL as the graphical interface, several functions are developed for 3D rendering, view projections and view transformations. These include: 1. Rendering 3D parts with selected colours (Fig. 6). 2. Rendering 3D assemblies with selected colours (Figs 7 and 8 for rendering in shaded and wireframe modes, respectively). 3. Rendering other 3D entities on screen with selected colours. 4. Rendering individual components with a different colour in a mould base assembly. 5. Interactive view transformation such as rotation, translation, and zoom. 6. Assembly tree display and manipulation. III. 3D Data Management. Portability is one of the benefits of developing a stand-alone application. It is thus important to adopt an open format for maximum portability. The native Parasolid file format (.xmtFtxt) is thus used instead of a new file format. Data management requirements of a mould base module include the following: 1. Open, Save, Save As and Close Parasolid part files. 2. Open, Save, Save As and Close Parasolid assembly files. 3. Import and Export part files. 6.1.3 Mould Base Modules (C) In order to facilitate the automatic generation of standard mould base assemblies, the application must provide a library of mould base components, whose dimensions depend on standard values found in catalogues. To facilitate design, subsequent modifications to these dimensions have been enabled. The details of this module will be discussed in Section 6.2. 6.1.4 Database Support (D) A standard mould base requires almost a hundred parameters to completely represent the dimensions and positions of the individual components. Many of these parameters are interrelated and can be derived from others. A database file is thus required to store the catalogue-based parameters of standard mould bases. Microsoft Access database format is used, as there are facilities in the MFC for direct access to Access Database files. Using the Data Access Objects (DAO) in the MFC, a set of functions is developed for the extraction and management of these relevant parameters from the database. Fig. 9. Sample code for the mould base designer. 6.2 Development of the Mould Base Design Module base assembly generator, and the mould base selection and customisation module. A fourth section, called the mould base The mould base module consists of three major sections, parameters manager, is also developed to provide database namely, the mould base component library generator, the mould support for the application. These are illustrated in Fig. 5. The 460 T. L. Neo and K. S. Lee 3D Kernel Development for Injection Mould Design 461 details of each section are discussed in the following. I. Component Library Generator. With support from the 3D developer layer, standard components for mould bases are created and stored in the component library. By specifying the appropriate dimensions, these components can be generated and used by the mould base assembly generator when required. Figure 6 illustrates a cavity plate created by the components library generator. II. Assembly Generator. Using the 3D developer layer and the component library generator, standard mould bases are assembled and stored in the assembly library. When supplied with a particular parameter set from the database support, specific standard mould base assembly can be automatically generated. Figure 7 shows a “HOPPT” two-plate mould base created by the assembly generator. III. Parameters Manager. The parameters manager acts as a link between the mould base application module and the database support. When a specific standard mould base is selected, the corresponding parameter set for the mould base assembly is extracted from the database file and sent to the component library generator and the assembly generator. Besides this, the parameters manager also allows the parameters to be modified by the users for design purposes. Figure 8 illustrates the modifications of bottom screw dimensions through the interactive user-interface. IV. Mould Base Designer. The mould base designer serves two main purposes. First, to allow the user to select standard mould bases from the assembly generator. Secondly, to facilitate mould base design, by allowing the mould designer to modify dimensions of the selected mould base. The sample code for the function call to generate the mould base in this modu
温馨提示:
1: 本站所有资源如无特殊说明,都需要本地电脑安装OFFICE2007和PDF阅读器。图纸软件为CAD,CAXA,PROE,UG,SolidWorks等.压缩文件请下载最新的WinRAR软件解压。
2: 本站的文档不包含任何第三方提供的附件图纸等,如果需要附件,请联系上传者。文件的所有权益归上传用户所有。
3.本站RAR压缩包中若带图纸,网页内容里面会有图纸预览,若没有图纸预览就没有图纸。
4. 未经权益所有人同意不得将文件中的内容挪作商业或盈利用途。
5. 人人文库网仅提供信息存储空间,仅对用户上传内容的表现方式做保护处理,对用户上传分享的文档内容本身不做任何修改或编辑,并不能对任何下载内容负责。
6. 下载文件中如有侵权或不适当内容,请与我们联系,我们立即纠正。
7. 本站不保证下载资源的准确性、安全性和完整性, 同时也不承担用户因使用这些下载资源对自己和他人造成任何形式的伤害或损失。
提示  人人文库网所有资源均是用户自行上传分享,仅供网友学习交流,未经上传用户书面授权,请勿作他用。
关于本文
本文标题:遥控器电池后盖模具设计【19张CAD图纸+WORD毕业论文】【注塑模具类】
链接地址:https://www.renrendoc.com/p-438601.html

官方联系方式

2:不支持迅雷下载,请使用浏览器下载   
3:不支持QQ浏览器下载,请用其他浏览器   
4:下载后的文档和图纸-无水印   
5:文档经过压缩,下载后原文更清晰   
关于我们 - 网站声明 - 网站地图 - 资源地图 - 友情链接 - 网站客服 - 联系我们

网站客服QQ:2881952447     

copyright@ 2020-2025  renrendoc.com 人人文库版权所有   联系电话:400-852-1180

备案号:蜀ICP备2022000484号-2       经营许可证: 川B2-20220663       公网安备川公网安备: 51019002004831号

本站为文档C2C交易模式,即用户上传的文档直接被用户下载,本站只是中间服务平台,本站所有文档下载所得的收益归上传人(含作者)所有。人人文库网仅提供信息存储空间,仅对用户上传内容的表现方式做保护处理,对上载内容本身不做任何修改或编辑。若文档所含内容侵犯了您的版权或隐私,请立即通知人人文库网,我们立即给予删除!