无柄塑料水杯注塑塑料模具设计(含CAD图纸、说明书)
收藏
资源目录

压缩包内文档预览:
编号:49673744
类型:共享资源
大小:1.64MB
格式:ZIP
上传时间:2020-02-15
上传人:机****料
认证信息
个人认证
高**(实名认证)
河南
IP属地:河南
50
积分
- 关 键 词:
-
塑料
水杯
注塑
模具设计
CAD
图纸
说明书
- 资源描述:
-

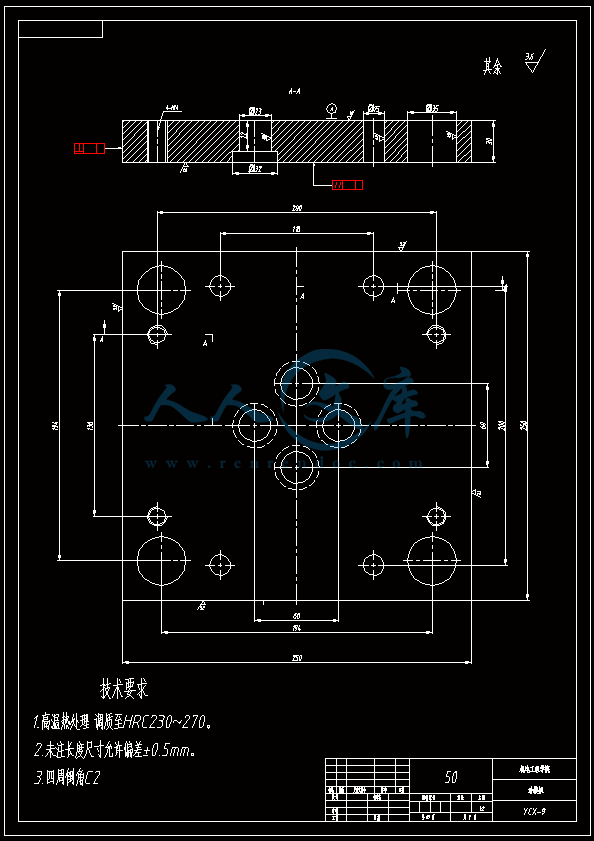
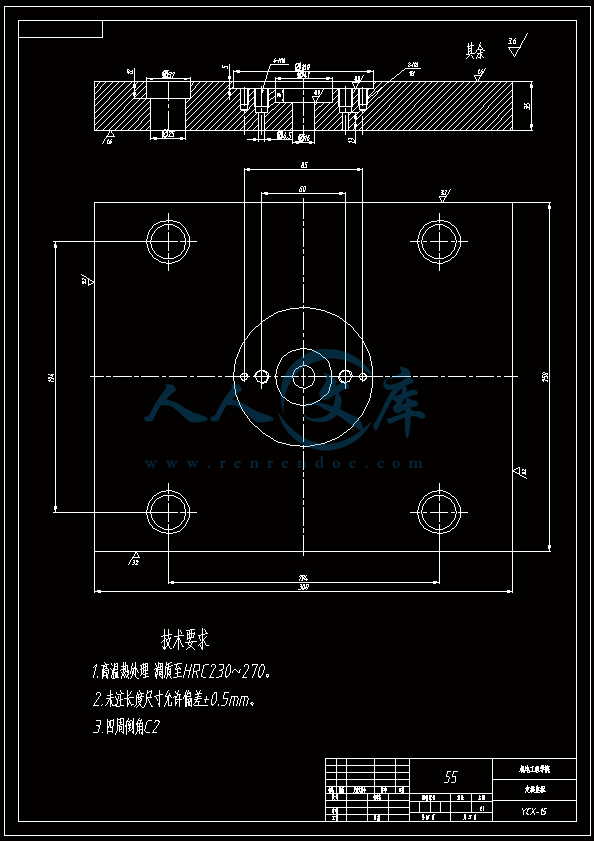
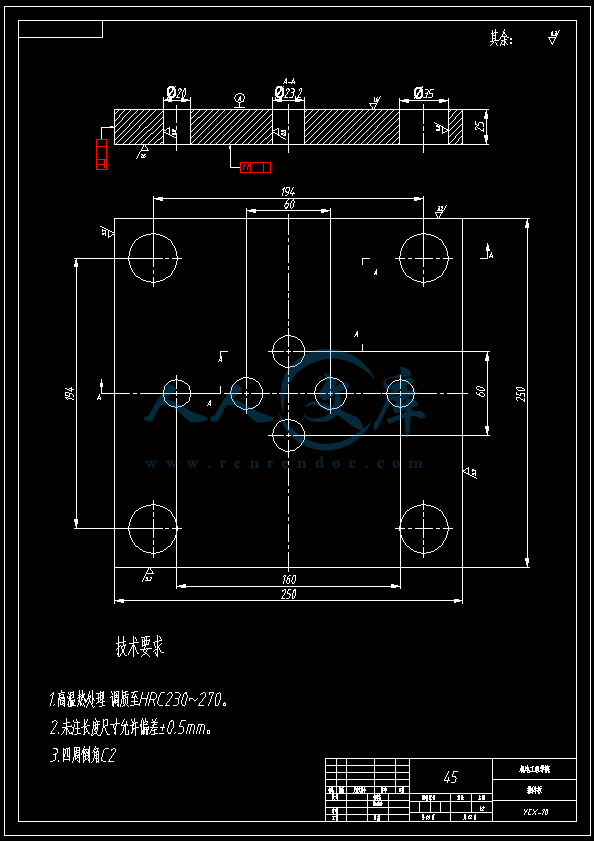
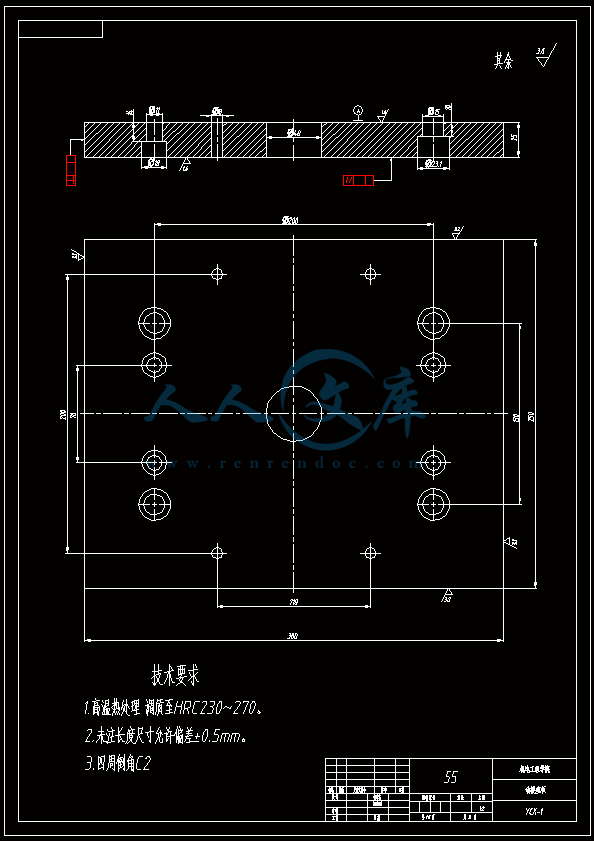
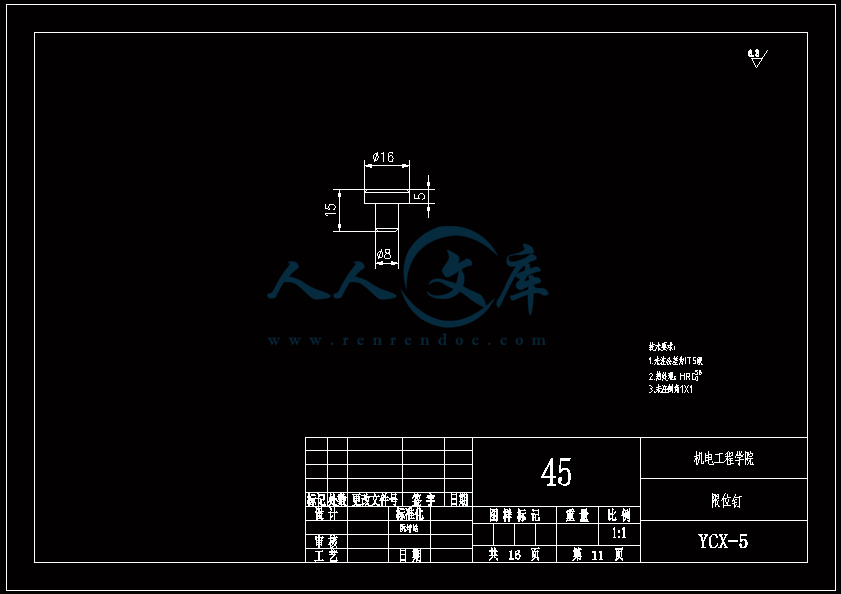
- 内容简介:
-
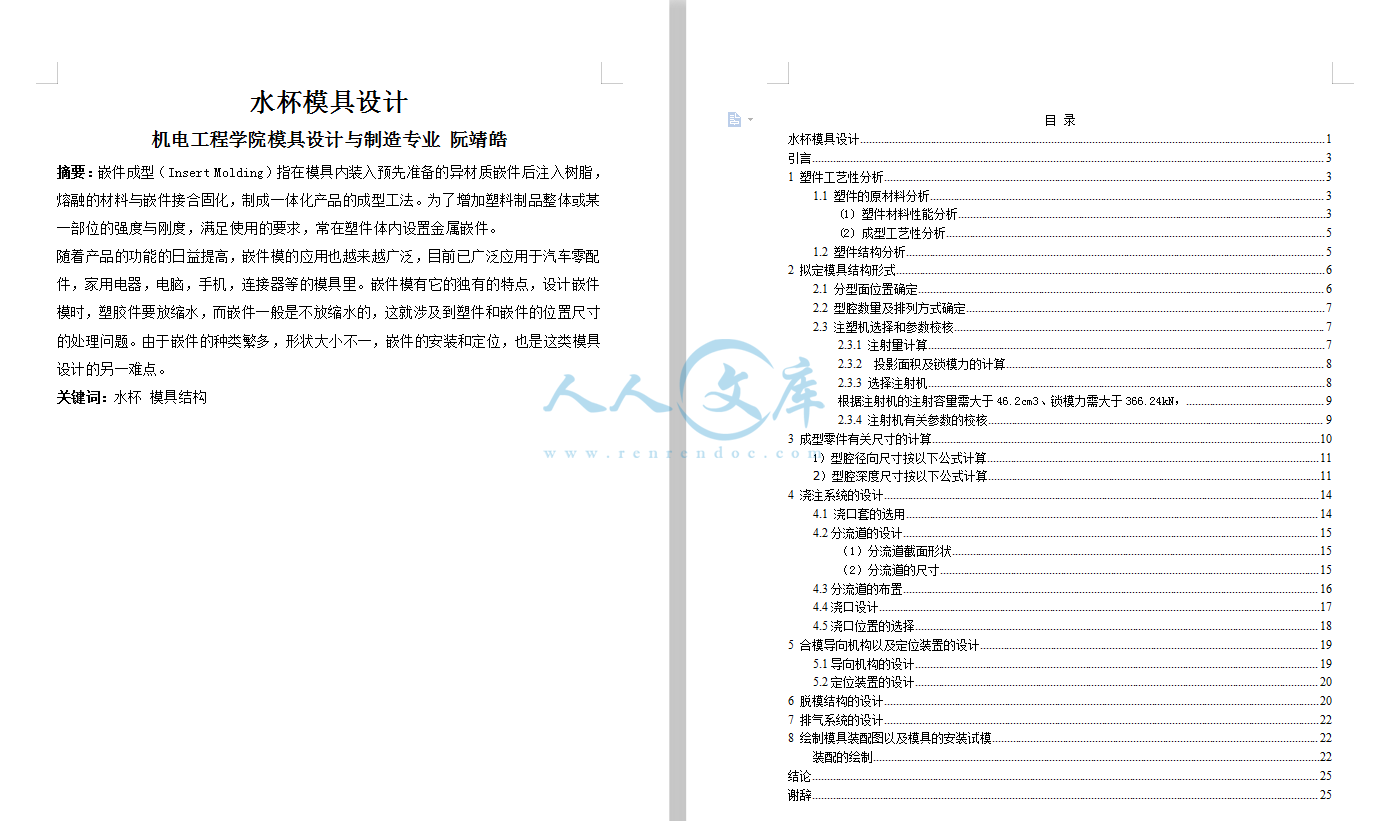
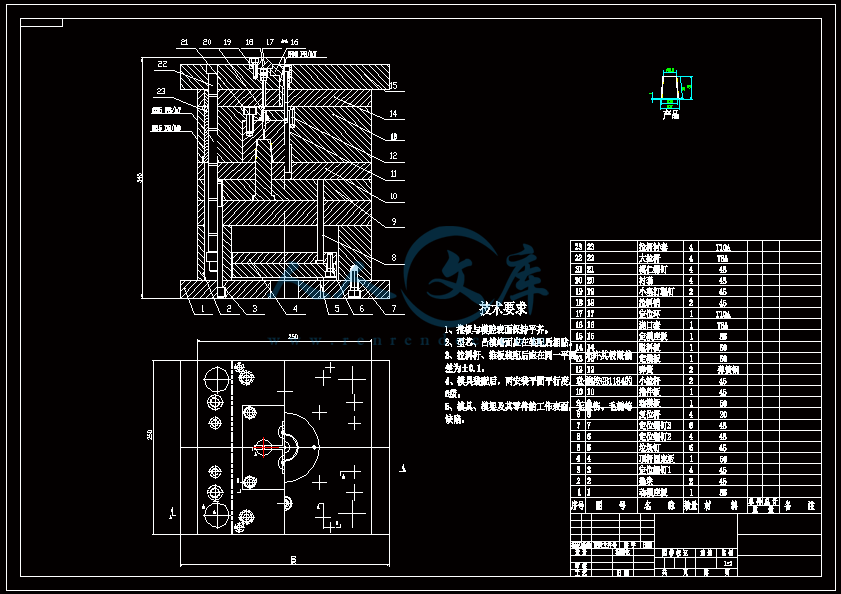
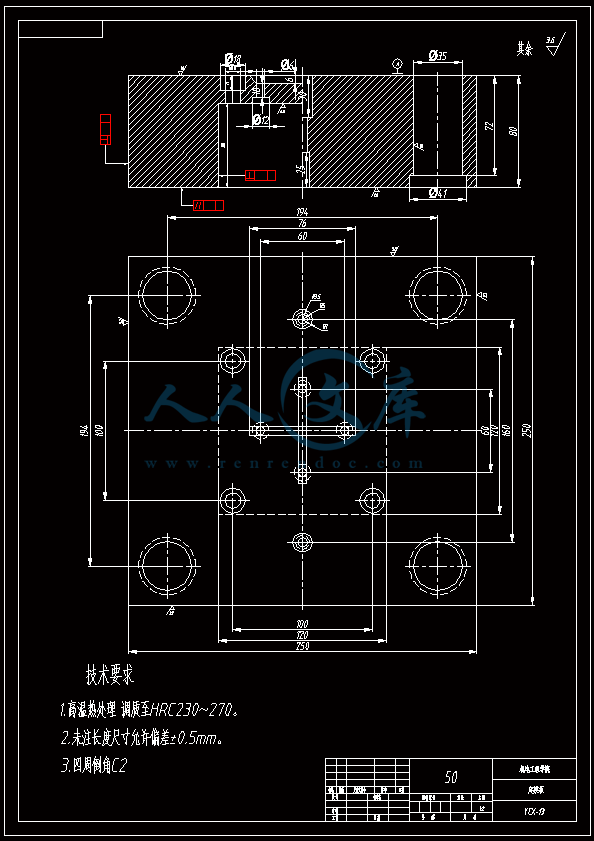
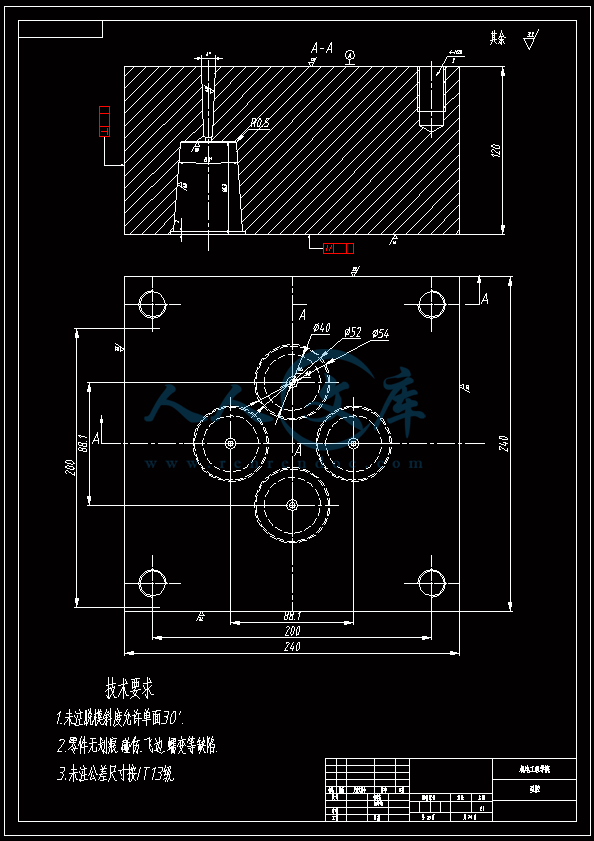
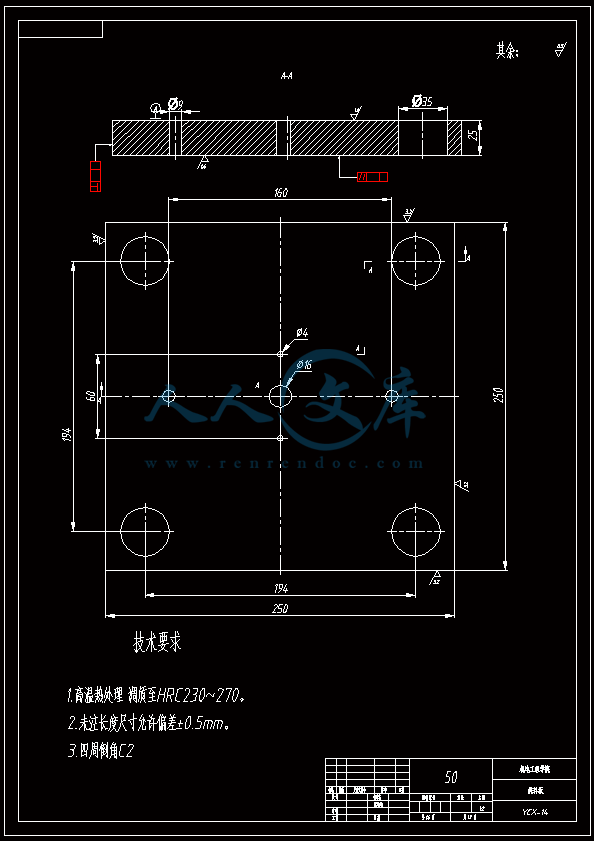
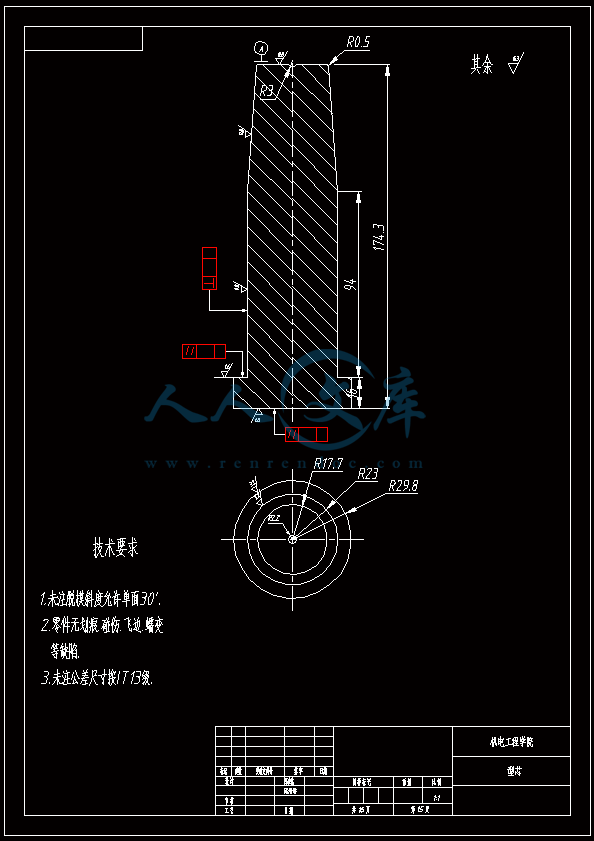
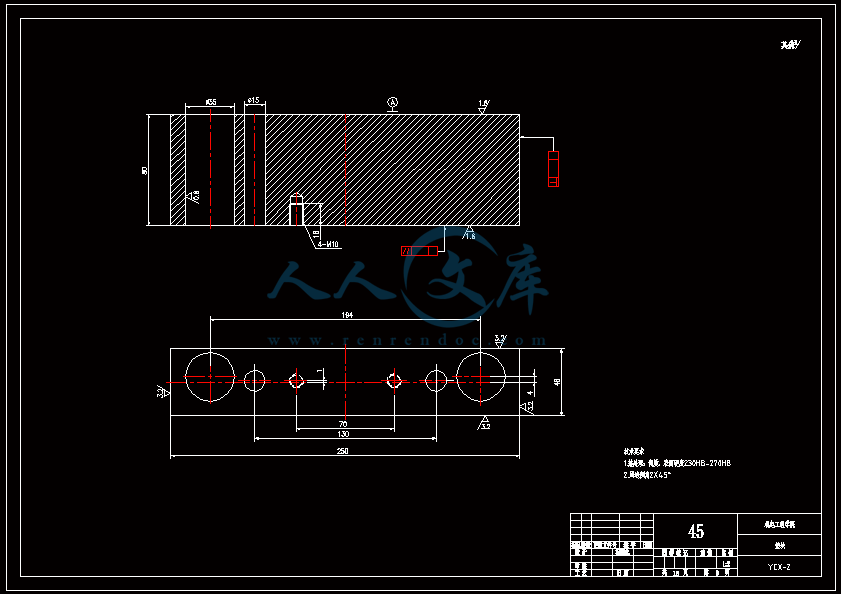
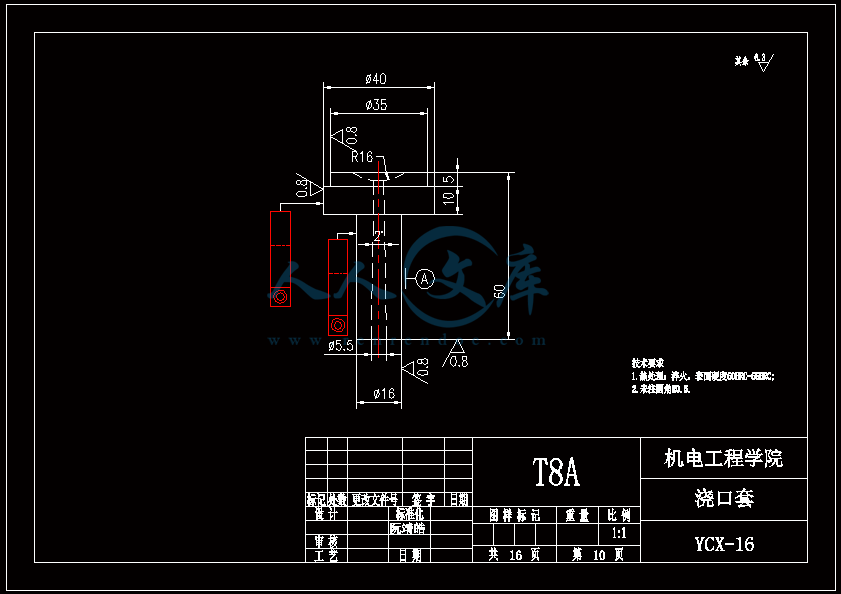
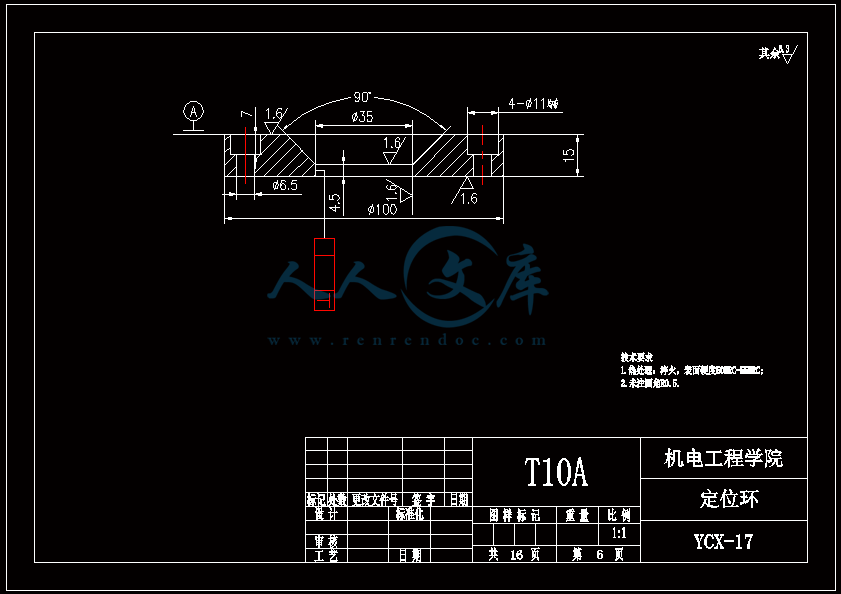
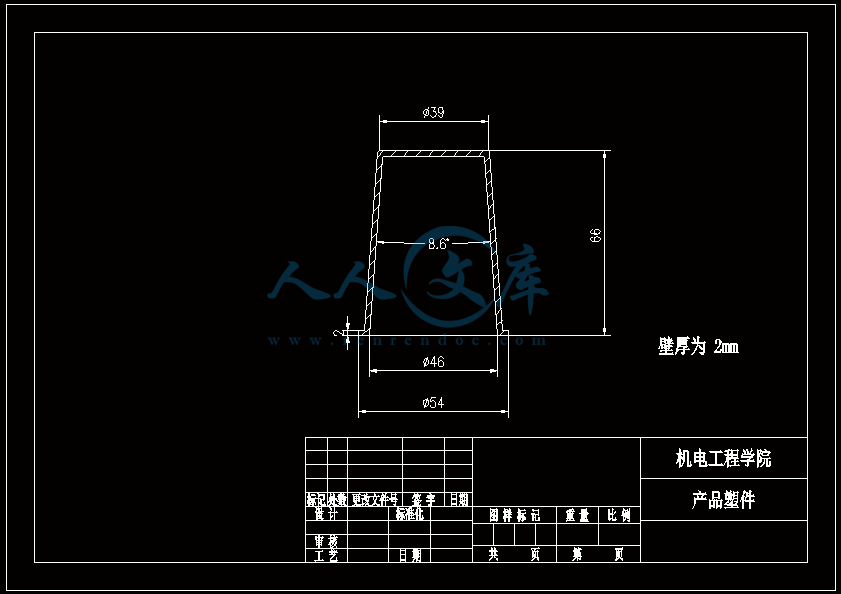
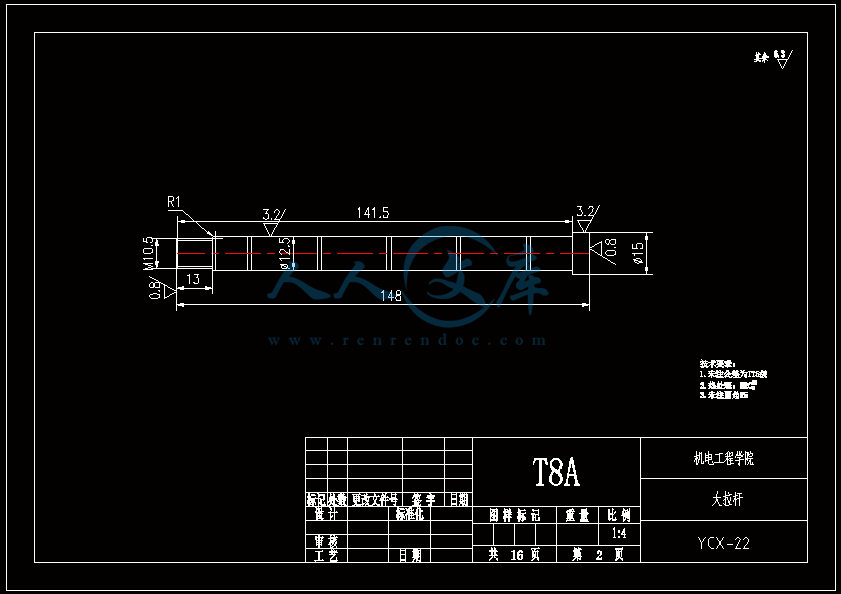
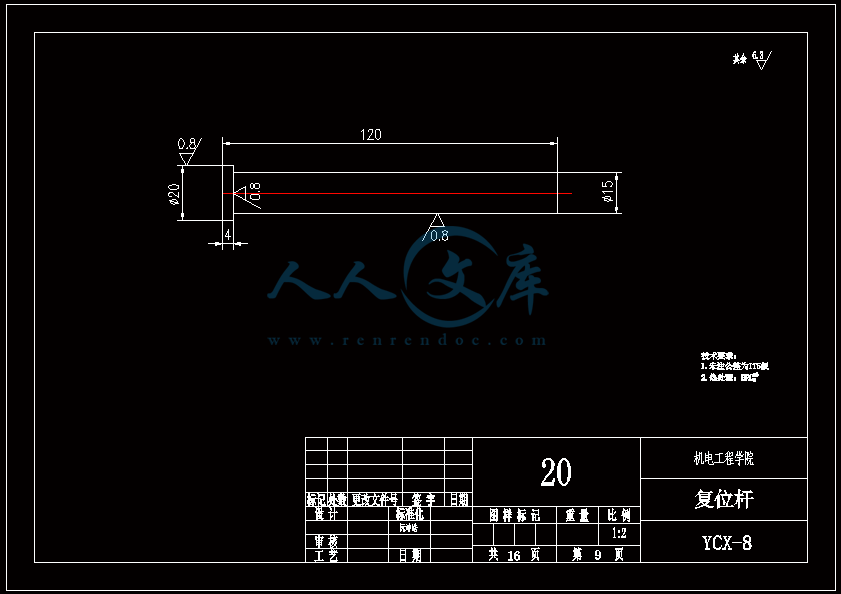
水杯模具设计机电工程学院模具设计与制造专业 阮靖皓摘要:嵌件成型(Insert Molding)指在模具内装入预先准备的异材质嵌件后注入树脂,熔融的材料与嵌件接合固化,制成一体化产品的成型工法。为了增加塑料制品整体或某一部位的强度与刚度,满足使用的要求,常在塑件体内设置金属嵌件。随着产品的功能的日益提高,嵌件模的应用也越来越广泛,目前已广泛应用于汽车零配件,家用电器,电脑,手机,连接器等的模具里。嵌件模有它的独有的特点,设计嵌件模时,塑胶件要放缩水,而嵌件一般是不放缩水的,这就涉及到塑件和嵌件的位置尺寸的处理问题。由于嵌件的种类繁多,形状大小不一,嵌件的安装和定位,也是这类模具设计的另一难点。关键词:水杯 模具结构目录水杯模具设计1引言31 塑件工艺性分析31.1 塑件的原材料分析3(1) 塑件材料性能分析3(2) 成型工艺性分析51.2 塑件结构分析52 拟定模具结构形式62.1 分型面位置确定62.2 型腔数量及排列方式确定72.3 注塑机选择和参数校核72.3.1 注射量计算72.3.2 投影面积及锁模力的计算82.3.3 选择注射机8根据注射机的注射容量需大于46.2cm3、锁模力需大于366.24kN,92.3.4 注射机有关参数的校核93 成型零件有关尺寸的计算101)型腔径向尺寸按以下公式计算112)型腔深度尺寸按以下公式计算114 浇注系统的设计144.1 浇口套的选用144.2分流道的设计15(1)分流道截面形状15(2)分流道的尺寸154.3分流道的布置164.4浇口设计174.5浇口位置的选择185 合模导向机构以及定位装置的设计195.1导向机构的设计195.2定位装置的设计206 脱模结构的设计207 排气系统的设计228 绘制模具装配图以及模具的安装试模22装配的绘制22结论25谢辞25引言 近年来,中国塑料模具制造水平已有较大提高。目前,塑料模具在整个模具行业中所占比重约为30%,在模具进出口中的比重高达5070%。目前,带嵌件模具发展也是相当的快。现在最常见带嵌件模具是带金属嵌件的模具以及带树脂嵌件的模具。结合Pro/E、Moldex3D等CAE分析软件一起对带嵌件模具进行模拟分析,从而来指导带嵌件模具设计及其工艺方案的优化,已经成为了当今社会的一个的重要研究手段。但是总体说来,对带嵌件的模具设计仍然还不成熟。塑料产品从设计到成型生产是一个十分复杂的过程,它包括塑料制品设计、模具结构设计、模具加工制造和模塑生产等几个主要方面,它需要产品设计师、模具设计师、模具加工工艺师及熟练操作工人协同努力来完成,它是一个设计、修改、再设计的反复迭代,不断优化的过程。传统的手工设计已越来越难以满足市场激烈竞争的需要。计算机技术的运用,正在各方面取代传统的手工设计方式,并取得了显著的经济效益。1 塑件工艺性分析 1.1 塑件的原材料分析 产品名称: 水杯 型腔数:一模四腔 生产类型:大批量材料: PP图 1-1(1) 塑件材料性能分析 PP塑料,化学名称:聚丙烯 英文名称:Polypropylene(简称PP) 比重:0.9-0.91克/立方厘米 成型收缩率:1.0-2.5% 成型温度:160-220 。 成分结构PP为结晶型高聚物,常用塑料中PP最轻,密度仅为0.91g/cm3(比水小)。通用塑料中,PP的耐热性最好,其热变形温度为80-100,能在沸水中煮。PP有良好的耐应力开裂性,有很高的弯曲疲劳寿命,俗称“百折胶”。PP的综合性能优于PE料。PP产品质轻、韧性好、耐化学性好。PP的缺点:尺寸精度低、刚性不足、耐候性差,它具有后收缩现象,脱模后,易老化、变脆、易变形。 成型特性1)结晶料,吸湿性小,易发生融体破裂,长期与热金属接触易分解。 2)流动性好,但收缩范围及收缩值大,易发生缩孔.凹痕,变形。 3)冷却速度快,浇注系统及冷却系统应缓慢散热,并注意控制成型温度。料温低温高压时容易取向,模具温度低于50度时,塑件不光滑,易产生熔接不良,流痕,90度以上易发生翘曲变形 4)塑料壁厚须均匀,避免缺胶,尖角,以防应力集中。 PP与其它几种主要的通用塑料的性能比较 表1-1 材料性能表材料性能、种类PPPEPVCPSABS密度最小小于水较大略高于水略高于水刚性较好差好好好收缩率差一般好好好韧性低温下差好差差好强度较高低较高高高耐热性好一般差较差较差化学稳定性好好好好好耐候性差差一般一般较差毒性无毒无毒可以无毒无毒无毒粘合剂粘合差差好一般一般热合性一般好一般一般一般成型加工性好好不易好好(2) 成型工艺性分析PP在熔融温度下有较好的流动性,成型性能好,PP在加工上有两个特点:其一:PP熔体的粘度随剪切速度的提高而有明显的下降(受温度影响较小);其二:分子取向程度高而呈现较大的收缩率。 PP的加工温度在200-300左右较好,它有良好的热稳定性(分解温度为310),但高温下(270-300),长时间停留在炮筒中会有降解的可能。因PP的粘度随着剪切速度的提高有明显的降低,所以提高注射压力和注射速度会提高其流动性,改善收缩变形和凹陷。模温宜控制在30-50范围内。PP熔体能穿越很窄的模具缝隙而出现披锋。PP在熔化过程中,要吸收大量的熔解热(比热较大),产品出模后比较烫。PP料加工时不需干燥,PP的收缩率和结晶度比PE低。 1.2 塑件结构分析塑件的具体结构如图所示。其中塑件外形结构大致圆柱形,带有拔模角度,注塑重点在于,注塑时不能出现浇不足,收缩均匀。同时外观要求不能有熔接痕、脱模痕, 不能有划伤、变形、飞边,必须符合GB/T 2828.1、QC/T 32-2006和GB/T 3730.1-2001。制品尺寸精度分析。该塑件尺寸无特殊要求,尺寸精度按MT5查取公差。该塑件内外尺寸均受到模具活动的影响,故为B类尺寸。据国家标准塑件尺寸公差(GB/T144486-1993)查得,该零件主要尺寸如下所示:表1-2塑件标注尺寸尺寸公差(MT5)塑件标注尺寸尺寸公差(MT5)尺寸18180.3尺寸110.320200.332320.323230.333330.325250.327270.3图1-2 水杯三维图2 拟定模具结构形式2.1 分型面位置确定 在模具设计初期阶段,应首先确定分型面的位置,然后才选择模具的结构。分型面设计是否合理,对塑件质量、工艺操作难易程度和模具的设计制造都有很大影响。因此,分型面的选择是在注射模设计中的一个关键因素。 分型面的选择主要应遵循以下原则: (1) 分型面应选在塑件外形最大截面处。 (2) 便于塑件顺利脱模,尽可能使塑件留在动模一侧。 (3) 有利于保证塑件的精度要求。 (4) 满足塑件的外观质量要求。 (5) 有利于简化模具结构。 (6) 尽量减少塑件在合模方向上的投影面积。 (7) 有利于排气。 综合上述的各原则,分型面可取在制件的最大投影面积处。 图 2-1 分型面2.2 型腔数量及排列方式确定 该塑件三维是54上40下66高mm,为中小型尺寸工件,采用一模四腔,大批量生产。排列如图所示。图 2-2 型腔排列2.3 注塑机选择和参数校核2.3.1 注射量计算 模具所需塑料熔体注射量m = nm1 + m2 (3-1) 式中: m 一副模具所需塑料的质量或体积(g或cm3); n 初步选定的型腔数量; m1 单个塑件的质量或体积(g或cm3) m2 浇注系统的质量或体积(g或cm3)其中m2是个未知值(注塑厂的统计资料),在做设计时以0.6nm1来估算,即 m = 1.6n m1 (3-2)经proe分析,塑件质量m1= 5.9480.91=5.412g,所以注射量m=1.6nm1=1.645.4=34.56g2.3.2 投影面积及锁模力的计算塑件和流道凝料(包括浇口)在分型面上的投影面积及所需锁模力为: A = nA1+A2 (3-3) Fm=(nA1+A2)P型 (3-4)式中: A 塑件及流道凝料在分型面上的投影面积(mm2);A1单个塑件在分型面上的投影面积(mm2);A2流道凝料(包括浇口)在分型面上的投影面积(mm2);Fm 模具所需的锁模力(N);P型塑料熔体对型腔的平均压力(MPa)。表5-1 常用塑料注射成型时型腔平均压力 单位:MPa塑件特点P型举例容易成型塑件25PE、PP、PS等壁厚均匀的日用品,一般塑件30容器类中等黏度塑件及有精度要求塑件35在模温较高的情况下,成型薄壁容器类高黏度塑料及高精度、难充模塑料40ABS、POM等有精度要求的零件,如壳类等高精度的机械零件,如齿轮、凸轮等流道凝料(包括浇口)在分型面上的投影面积A2,在模具设计前是个未知值,根据多型腔模的统计分析,A2是每个塑件在分型面上的投影面积的0.2倍到0.5倍,因此可用0.45nA1来估算,另外部分塑料注射压力P可查相关数据。经过moldex 3D 的计算,总投影面积为:9156mm2。所以:A=4(3.14*27*27)=9156mm2 Fm =AP型=915640=366.24kN2.3.3 选择注射机根据上面计算得到的m和Fm值来选择一种注射机,注射机的最大注射量(额定注射量G)和额定锁模力F满足 G m/ (3-5)式中注射系数,无定型塑料取0.85,结晶型塑料取0.75。 FFm (3-6)则:Gm/G34.56g/0.85=40.66g 生产原料密度为1.76g/cm3 注射容量为23.1 cm3一般注塑机浇注塑料原料时, 其每次注射量仅达标准注射量的75 %。为了提高制件质量及尺寸稳定, 表面光泽、色调的均匀, 要求注射量为标定注射量的50 %为宜,即46.2cm3。根据注射机的注射容量需大于46.2cm3、锁模力需大于366.24kN,又由于模具设计与制造简明手册表2-40选择注射机XS-ZY-1000螺杆式注射机,其参数如下:额定注射量:1000 螺杆直径:85mm 注射压力:178Mpa 锁模力:4500KN 模板行程:700-mm 模具最大厚度:700mm 模具最小厚度:300mm 模板尺寸:700850mm 拉杆空间:650550mm 定位孔直径:150mm合模方式:液压机械 2.3.4 注射机有关参数的校核 (1) 最大注塑量校核模具成型塑料制品和流道凝料总质量应小于注塑机的额定注塑量的80%,所以额定注塑量138.24g80%=172.8g,选定的注塑机额定注塑量为1000cm31.76g/cm3=1760g,注塑量校核合格。(2) 锁模力校核FkAp型=1.2*366.24KN =439.482KN,所选注塑机的锁模力为4500KN,锁模力校核合格。(3) 注射压力的校核注射机的最大压力应大于塑件成型所需的压力,即 (3-7)式中:注射机最大注射压力(Mpa);塑件成型所需的注射压力(Mpa);采用柱塞式注塑机PPA注射压力为140180MPa,螺杆式注塑机则取120140MPa为宜,因此选定的注塑机的注射压力:178 Mpa,满足要求。3 成型零件有关尺寸的计算(1)型芯设计图3-1 型芯 型芯的尺寸计算 型芯的尺寸按以下公式计算D=1+d+x式中D型芯外径尺寸d塑件内形尺寸塑件公差塑料平均收缩率成形零件制造公差,取/2。 (2) 型腔设计图3-2 型腔 1)型腔径向尺寸按以下公式计算D=1+dx式中D型腔的内形尺寸d塑件外形基本尺寸 塑件公差塑料平均收缩率成形零件制造公差,取/2。 2)型腔深度尺寸按以下公式计算=式中型腔深度 塑件外形高度尺寸 塑件公差塑料平均收缩率成形零件制造公差,取 (3) 由于该产品不是透明的,所以型芯的表面粗糙度要求不需那么高。一般取Ra1.6,在机床上加工就可以直接投入使用,不需要经过其它的特殊加工。考虑模具的修模以及型芯的磨损,在精度范围内,型芯尺寸尽量取大值。而型腔则取大值,型腔的表面粗糟将决定产品的外观,因此型腔的表面粗糙度则要求较高,一般取Ra0.80.4。在本次设计中,型腔取Ra0.8。 (4) X综合修正系数(考虑塑料收缩率的偏差和波动,成型零件的磨损等因素),塑件精度低、批量较小时,X取1/2;塑件精度高、批量比较大,X取3/4,根据设计要求取X为0.5。要计算型芯、型腔的工作尺寸,必先确定塑件的公差及模具的制造公差。根据要求塑件精度取五级精度。根据塑料制件公差数值表(SJ137278)塑件在五级精度下,基本尺寸对应的尺寸公差如下:表3-4 基本尺寸公差基本尺寸公差基本尺寸公差30.16360.186100.2010140.2214180.2418240.2824300.3230400.3640500.4050650.4665800.52801000.601001200.68 (1)型腔:宽度方向d=240;取=0.25%(以下收缩率都取0.25%) D=(1+0.0025)2400.50.60=240.3 长度方向 d2=240; D2=(1+0.0025)2400.50.68=240.26 (2)型腔深度:H=66.4 ; X=0.4 H=(1+0.0025) 66.4+0.40.18=66.638(3)型芯: 宽度方向d=46 D=(1+0.0025)46+0.50.60=46.415 高度方向d=64.4 D=(1+0.0025)64.4+0.50.68=64.9 (5)型腔的强度及刚度要求塑料模具型腔的侧壁和底壁厚度计算是模具设计中经常遇到的问题,尤其对大型模具更为突出。目前常用的计算方法有按强度条件计算和按刚度条件计算两类,但塑料模具要求既不许因强度不足而发生明显变形,甚至破坏,也不许刚度不足而变形过大的情况,因此要求对强度和刚度加以考虑。对于型腔主要受到的力是塑料熔体的压力,在塑料熔体的压力作用下,型腔将产生内应力及变形。如果型腔侧壁和底壁厚度不够。当型腔中产生的内应力超过材料的许用应力时,型腔发生强度破坏,与此同时,刚度不足则发生弹性变形,从而产生溢料现象,将影响塑件成型质量,所以模具对强度和刚度都有要求。但是,实践证明,模具对强度和刚度的要求并非同时兼顾,对大型腔,按刚度条件,对小型腔则按强度条件计算即可。(在本设计中按强度条件来计算)对长方形型腔壁厚和底板厚度的计算1)型腔底板厚度: 式中型腔内塑料熔体的压力(MPa),一般取2545MPaL型腔侧壁边长(mm) b型腔宽度(mm) B凹模宽度(mm)材料的许用应力,一般取100Mpa型腔侧壁长边尺寸(mm)=36.65mm由于根据标准模架查得定模板的厚度为40mm,综合各方面考虑,现确定定模板厚为40mm,可以满足型腔的强度要求。 2)确定型腔的壁厚表3-5 型腔壁厚关系表型腔宽度镶拼式腔壁厚 40 94050910506010116070111270801213809013149010014151001201517120140171914016019214 浇注系统的设计浇注系统它是获得优良性能和理想外观的塑件以及最佳的成型效率有直接影响。 此塑件采用普通流道系统,它是主由流道、分流道、浇口、冷料穴组成的。浇注系统是一副模具的重要的内容之一。从总体来说,它的作用可以作如下归纳:它是将来自注塑机喷嘴的塑料熔体均匀而平稳地输教送到型腔,同时使型腔的气体能及时顺利排出,在塑件熔体填充凝固的过程中,将注塑压力有效地传递到型的各个部位,以获得形完整、内外在质量优良的塑件制件。浇注系统的设计的一般原则:了解塑件的成型性能和塑件熔料的流动特性。采用尽量短的流程,以降低热量与压力损失。浇注系统的设计应该有利于良好的排气,浇注系统应能顺利填充型腔。便于修整浇口以保证塑件外观质量。确保均匀进料。4.1 浇口套的选用主流道通常位于模具中心塑料熔体的入口处,它将注射机喷嘴注射出的熔体导入分流道或型腔中。主流道的形状为圆锥形,以便熔体的流动和开模时主流道凝料的顺利拔出。主流道的尺寸直接影响到熔体的流动速度和充模时间。另外,由于其与高温熔体及注射机喷嘴反复接触,因此设计中常设计成可拆卸更换的浇口套。主流道衬套为标准件可选购。主流道小端入口处与注射机喷嘴反复接触,易磨损,对材料要求较严格,因而尽管小型注射模可以将主流道浇口与定位圈设计成一个整体,但考虑上述因素通常仍然将其分开来设计,以便于拆卸更换。同时,也便于选用优质钢材进行单独加工和热处理。设计中常采用碳素工具钢(T8A或T10A),热处理淬火表面硬度为5055HRC,浇口套属于标准件,在选够浇口套时应注意:浇口套进料口直径和球面坑半径。因此,所选浇口套如图所示:图4-1 浇口套4.2分流道的设计(1)分流道截面形状分流道截面形状可以是圆形、半圆形、矩形、梯形和U形等,圆形和正方形截面流道的比表面积最小(流道表面积与体积之比称为比表面积),塑料熔体的温度下降少,阻力亦小,流道的效率最高。但加工较困难,而且正方形截面不易脱模,所以在实际生产中较常用的截面形状为梯形、半圆形及U形。 (2)分流道的尺寸 分流道尺寸由塑料品种、塑件的大小及长度确定。对于重量在200g以下,壁厚在3mm以下的塑件可用下面经验公式计算分流道的直径,如式。 D=0.2654W1/2 L1/4 式中:D-分流道的直径,mm; W-塑件的质量,g; L-分流道的长度,mm. 此式计算的分流道直径限于3.2mm9.5mm.对于HPYC和PMMA。应将计算结果增加25。对于梯形分流道,H=2D/3;对于U形分流道,H=1.25R,R=0.5D。D算出后一般取整数;对于半圆形H=0.45R 对于流动性极好的塑料(如PE,PA等),当分流道很短时,其直径可小到2mm左右;对于流动性差的塑料(如PC,HPVC及PMMA等),分流道直径可以大到13mm;大多数塑料所用分流道的直径为6mm10mm。图4-2 分流道布局 4.3分流道的布置 (1)在保证足够的注塑压力使塑料熔体顺利充满型腔的前提下,分流道截面面积与长度尽量取小值,分流道转折处应圆弧过度。(2)分流道较常时,在分流道的末端应开设冷料井。(3)分流道的位置可单独开设在定模板上或动模板上,也可以同时开设在动、定模板上,合模后形成分流道截面形状。(4)分流道与浇口连接处应加工成斜面,并用圆弧过度。在单腔模中,常不设分流道,而在多腔模中,一般都设置有分流道,塑料沿分流道流动时,要求通过它尽快地充满型腔,流动中温度降低尽可能小,阻力尽可能低。同时,应能将塑料熔体均衡地分配到各个型腔。从前两点出发,分流道应短而粗。但为了减少浇注系统的加回料量,分流道亦不能过粗。过粗的分流道冷却缓慢,还倒增长模塑的周期。而该设计中使用了梯形断面形状的分流道。如图所示;图4-3 分流道横截面 4.4浇口设计 浇口亦称进料口,是连接分流道与型腔的通道。它是整个浇注系统的关键的部位,也是最薄点。其形状、大小及位置应根据塑件大小、形状、壁厚、成型材料及塑件技术要求等进行而确定。浇口分限制性浇口和非限制性浇口,该塑件采用的是限制性浇口,它一方面通过截面积的突然变化,使分流道输送来的塑料熔体的流速产生加速度,提高剪切速率,有利于塑料进入,使其充满型腔。另一方面改善塑料熔体进入型腔的流动特性,调节浇口尺寸,可使多型腔同时充满,可控制填充时间、冷却时间及塑件表面质量,同时还起着封闭型腔防止塑料熔体倒流,并便于浇口凝料与塑件分开的作用。设计中,浇口的位置及尺寸的要求是比较严格的,初步试模,必要时还需要修改。因此浇口的位置的开设,对成型性能及成型质量的影响是很大的。一般在选择浇口位置时,需要根据塑件的结构工艺及特征,成型质量和技术要求,综合分析。一般要满足以下原则:(1) 尽量缩短流动距离。(2) 浇口应开设在塑件的壁厚。(3) 必须尽量减少或避免产生熔接痕。(4) 应有利于型腔中气体的排除。(5) 考虑分子定向的影响。(6) 避免产生喷射和蠕动。(7) 在承受弯曲冲击载荷的部位设置浇口。(8) 浇口位置的选择应注意塑件的外观质量。浇口的形状和尺寸对制品质量影响很大,浇口在多情况下,系整个流道断面尺寸最小的部分(除主流道型的浇口外),一般汇报口的断面积与分流道的断面积之比约为0.030.09。断面形状如图5.4所示,浇口台阶长11.5左右虽然浇口长度比分流道的长度短的多,但因为其断面积甚小,浇口处的阻力与分流道相比,浇口的阻力仍然是主要的,故在加工浇口时,更应注意其尺寸的准确性。然而,根据塑件的样品图、生产的批量等,采用一模四腔结构。浇口采用点浇口 具体尺寸见图。图 4-4 浇点 4.5浇口位置的选择 (1)浇口的位置的应使填充型腔的流程最短这样的结构使压力损失最小,易保证料流充满整个型腔。对于型塑件,要进行流动比的校核。流动比K由流动通道的长度L与厚度t之比来确定。如下式:K=(L/t) 式中:L-各段流程的长度,mm; t-各段流程的厚度或直径,mm; 流动比的允许值随塑料熔体的性质、温度压力等的不同而变化。流动比的计算公式为: K=L1/t 1+L 2+L 3/t 2 K= L1/t 1+L 2/t 2+L 3/t 3+2L 4/t 4+L 5/t 5 (2) 浇口位置的选择要避免塑件变形 (3)浇口位置的设置应减少或避免产生熔接痕 熔接痕是充型时前端较冷的料流在型腔中的对接部位,它的存在会降低塑件的强度,所以设置浇口时应考虑料流的方向。为提高熔接痕处强度,可在熔接处增设溢流槽,使冷料进入逸流槽。筒形塑件采用环行浇口无熔接痕,而轮辐式浇口会有熔接痕产生。浇口的位置塑与件质量有直接影响,位置选择不当会使塑件产生变形、熔接痕等缺陷。浇口位置的选择如总装图所示。5 合模导向机构以及定位装置的设计 5.1导向机构的设计 本次设计采用的是简化型三板模标准模架其中没有导柱导向机构。其导向机构可以用大拉杆代替,大拉杆的具体设计如图所示:图 5-1大拉杆 5.2定位装置的设计 由于本设计为多分型面开模,在定模一侧设置了脱浇道板,即分流道推板,故必须设置限位导柱,以便在浇注系统顺利脱模后,开始进行塑件的开模及顶出,限位导柱的设计结构如图所示:图 5-2限位导柱的装配形式限位导柱的长度由各模板厚度及开模行程决定,限位导柱的长度:L=200mm定距螺钉的直径:D=16mm6 脱模结构的设计 在注塑成型的每一个循环中,塑件必须由模具型腔中脱出,在该设计中,为了使符合脱模机构的要求:使塑件留于动模;塑件不变形损坏这是脱模机构应当达到的基本要求。要做到这一点首先必须分析塑件对模腔的附着力的大小和所在部位,以便选择合适的脱模方式和脱模位置,使脱模力得以均匀合理的分布。良好的塑件外观顶出塑件的位置应尽量设在塑件内部,以免损坏塑件的外观。结构可靠因此,根据装配图,其模具结构的脱模机构主要由脱料板将余料打出模外,然后由司筒推动塑件使工件推出,还有在设计主型芯时也会有一定的拨模作斜度35。本次设计的制件需要用点浇口进行入浇 这样我们就需要设计为三板模,三板模相对普通的模具多了一个脱料板,脱料板的作用是将凝料与产品分开切断以及将凝料打出模外。本次设计的模具的运动过程大致如下:开模的时候,动模板13在如图12弹簧的作用下首先分开,这样分流道的凝料将会被18拉料销拉住留在14脱料板一侧,当动模板13运动一定距离带动11小拉杆的限位杆运动 从而带动脱料板将留在脱料板一侧的凝料以及主流道的余料打出模外,小拉杆运动一些距离被定模座板固定不能运动后 小拉杆拉住定模版使其静止不动 而动模部分继续开模运动 注塑机的顶辊作用顶杆固定板作用在复位杆上 使复位杆作用推件板运动 推件板将产品顶出模外,至此一次完整的注塑过程就完成了。7 排气系统的设计 塑料在熔化时,会产生气体,所以当塑料在充满型腔时及浇注系统内的空气,如果在型腔中不及时排除干净,可以会在塑件上形成气泡、接缝、表面轮廓不清及充填缺料等缺陷。另一方面气体的受压产生反向压力而降低充模速度,还可能造成塑件碳化或烧焦。注射成型时的排气可采用如下四种方式排气:(1) 利用配合间隙排气;(2) 在分型面上开设排气槽排气;(3) 利用排气守排气;(4) 强制性排气;该模具是采用利用配合间隙排气。其间隙值约为0.030.05mm.它常用于中小型的简单模具。 8 绘制模具装配图以及模具的安装试模 装配的绘制模具整体设计也就是模体的设计,随着现代工业的发展,模体设计已接近标准化,可以从市场上购买相应的模体。标准模体一般包括定模板、动模板、垫块、顶出固定板、顶板、导柱、导套、复位杆等。标准模架有12种结构,15876种规格。在本次设计中,浇口套、导柱、导套、顶杆、水嘴都采用标准件,可以外购。总装图主视图如图所示:图 8-1 定模板图 8-2 动模板图 8-3 装配三维图图 8-4 总装配二维图 结论为期一个学期的毕业设计即将结束,也就意味着我的大学生活即将结束,但在这一个学期的时间里我学到了很多知识和技能。 虽然每学期都安排了课程设计或者实习,但是没有一次课程设计能与此次相比,设计限定了时间长,而且是一人一个课题要求更为严格,任务更加繁多、细致、要求更加严格、设计要求的独立性更加高。要我们充分利用在校期间所学的课程的专业知识理解、掌握和实际运用的灵活度。在对设计的态度上的态度上是认真的积极的。 通过近一学期毕业设计的学习,给我最深的感受就是我的设计思维得到了很大的锻炼与提高。作为一名设计人员要设计出有创意而功能齐全的产品,就必须做一个生活的有心人。多留心观察思考我们身边的每一个机械产品,只有这样感性认识丰富了,才能使我们的设计思路具有创造性。谢辞首先感谢吴国洪老师在我完成该论文过程中给予的悉心指导,指出本人设计中的错误与不足,使得本人能按时完成本课题的设计。并与其他同学的共同讨论下,掌握了注塑模设计基本原则以及设计中对软件的应用能力。设计中还引用了不少工厂的经验以及多位专家学者的著作,从中学到了很多设计技巧。使我初步认识到了以后工作中可能出现的问题,如何去解决,这将对我以后的工作有很好的帮助作用,在这里一并表示感谢。最后,通过本设计我巩固了所学专业知识,并得到了不少心得。但由于是第一次系统的做这样规模的设计,会有不少缺点和错误,欢迎审核答辩的老师批评指正,在此再次表示感谢。参考文献1 黄毅宏 模具制造工艺. 北京:机械工业出版社 19992 周四新,和清芳 Pro/ENGINEER野火版基础设计. 北京:机械工业出版社 20043 中国机械工业教育协会组编 塑料模设计与制造. 北京:机械工业出版社 20054 马广、王志明 模具CAD/CAM项目化实训教程. 北京:科学出版社 20095 伍先明等 塑料模具设计指导. 北京:国防工业出版社 2006.56 李学锋等 模具设计与制造实训教程. 北京:化学工业出版社 20047 黄虹 塑料成型加工与模具. 北京:化学工业出版社 2006英文原文 Session VA4 I ntelligent Mold Design Tool For Plastic Injection Molding Jagannath Yammada, Terrence L. Chambers, Suren N. Dwivedi Department of Mechanical Engineering University of Louisiana at Lafayette Abstract Plastic Injection molding is one of the most popular manufacturing processes for making thermoplastic products, and mold design is a key aspect of the process. Design of molds requires knowledge, expertise and most importantly experience in the field. When one of these is lacking, selection of an appropriate mold for manufacturing a plastic component is done on a trial-and-error basis. This increases the cost of production and introduces inconsistencies in the design. This paper describes the development of an intelligent mold design tool. The tool captures knowledge about the mold design process and represents the knowledge in logical fashion. The knowledge acquired will be deterministic and non-deterministic information about the mold design process. Once developed the mold design tool will guide the user in selecting an appropriate mold for his plastic part based on various client specifications. Introduction The plastic injection molding process demands knowledge, expertise and, most important, experience for its successful implementation. Often it is the molding parameters that control the efficiency of the process. Effectively controlling and optimizing these parameters during themanufacturing process can achieve consistency, which takes the form of part quality and part cost. The level of experience of the manufacturer(s) determines how effectively the process parameters are controlled. This sometimes leads to inconsistency introduced by human error. There is also the case where there is inexperience, shortage of time, resources and little scope for innovation. Knowledge-based engineering provides a feasible solution to all these problems by creating what is called an “intelligent model” of the problem. 1 IKEM Intelligent Knowledge based Engineering modules for the plastic injection molding process (IKEM) is a software technology that is a step ahead of the concurrent engineering and CAD/CAM systems. It integrates current knowledge about the design and manufacturing processes and helps to reduce several man-hours by reducing engineering changes in the design phase of product development by giving users instruction about various design aspects. The system will be used for injection molding design, design iterations, and process integration. The current process consists of many manual computations, CAD graphical constructions, and experience attained from previous projects. Once the engineer completes the design, it will be evaluated for performance. The IKEM project has been divided into three major modules. 1. The cost estimation module 2. The mold design module 3. The Manufacturing moduleInput to the IKEM system is of two forms. Input in the form of a CAD model (Pro-E file) and input given at the User Interface form. Figure 1 illustrates the kind of input that goes into each module and the output given to the user. Figure 1. Organization of the IKEM Project 2 Intelligent Mold Design Tool The mold design tool in its basic form is a Visual Basic application taking input from a text file that contains information about the part and a User Input form. The text file contains information about the part geometry parsed from a Pro/E information file. The input is used to estimate the dimensions of mold and variousother features. 2.1 Literature Review Design of molds is another stage of the injection molding process where the experience of an engineer largely helps automate the process and increase its efficiency. The issue that needs attention is the time that goes into designing the molds. Often, design engineers refer to tables and standard handbooks while designing a mold, which consumes lot of time. Also, a great deal of time goes into modeling components of the mold in standard CAD software. Differenresearchers have dealt with the issue of reducing the time it takes to design the mold in different ways. Koelsch and James have employed group technology techniques to reduce the mold design time. A unique coding system that groups a class of injection molded parts, and the tooling required ininjection molding is developed which is general and can be applied to other product lines. A software system to implement the coding system has also been developed. Attempts were also directed towards the automation of the mold design process by capturing experience and knowledge of engineers in the field. The development of a concurrent mold design system is one such approach that attempts to develop a systematic methodology for injection mold design processes in a concurrent engineering environment. The objective of their research was to develop a mold development process that facilitates concurrent engineering-based practice, and to develop a knowledge-based design aid for injection molding mold design that accommodates manufacturability concerns, as well as product requirements.Researchers have been trying to automate the mold design process either by capturing only the deterministic information on the mold design process or the non-deterministic information, in various ways. This research uniquely attempts to develop a mold design application that captures information in both forms; deterministic and non-deterministic.2.2 Approach Adopted In order to develop an intelligent mold design tool, the conventional method of designing molds is studied. The application developer and the design engineer work together in designing a mold for a particular plastic part. During this time, the approach adopted by the engineer to select the mold base is closely observed and aspects of the selection process that require his knowledge/experience are identified. Also, there will be times when the engineer will refer to tables and handbooks in order to standardize his selection process. This time consuming process is also recorded to incorporate it later in the application. Formulating the problem for the application in terms of inputs and outputs is the next stage. This involves defining what information about the mold layout is most required for the user and also the minimum number of inputs that can be taken from him to give those outputs. In injection molding, the polymer melt at high temperature is injected into the mold under high pressure 1. Thus, the mold material needs to have thermal and mechanical properties capable of withstanding the temperatures and pressures of the molding cycle. The focus of many studies has been to create the injection mold directly by a rapid prototyping (RP) process. By eliminating multiple steps, this method of tooling holds the best promise of reducing the time and cost needed to create low-volume quantities of parts in a production material. The potential of integrating injection molding with RP technologies has been demonstrated many times. The properties of RP molds are very different from those of traditional metal molds. The key differences are the properties of thermal conductivity and elastic modulus (rigidity). For example, the polymers used in RP-fabricated stereolithography (SL) molds have a thermal conductivity that is less than one thousandth that of an aluminum tool. In using RP technologies to create molds, the entire mold design and injection-molding process parameters need to be modied and optimized from traditional methodologies due to the completely different tool material. However, there is still not a fundamental understanding of how the modications to the mold tooling method and material impact both the mold design and the injection molding process parameters. One cannot obtain reasonable results by simply changing a few material properties in current models. Also, using traditional approaches when making actual parts may be generating sub-optimal results. So there is a dire need to study the interaction between the rapid tooling (RT) process and material and injection molding, so as to establish the mold design criteria and techniques for an RT-oriented injection molding process. In addition, computer simulation is an effective approach for predicting the quality of molded parts. Commercially available simulation packages of the traditional injection molding process have now become routine tools of the mold designer and process engineer 2. Unfortunately, current simulation programs for conventional injection molding are no longer applicable to RP molds, because of the dramatically dissimilar tool material. For instance, in using the existing simulation software with aluminum and SL molds and comparing with experimental results, though the simulation values of part distortion are reasonable for the aluminum mold, results are unacceptable, with the error exceeding 50%. The distortion during injection molding is due to shrinkage and warpage of the plastic part, as well as the mold. For ordinarily molds, the main factor is the shrinkage and warpage of the plastic part, which is modeled accurately in current simulations. But for RP molds, the distortion of the mold has potentially more inuence, which have been neglected in current models. For instance, 3 used a simple three-step simulation process to consider the mold distortion, which had too much deviation. In this paper, based on the above analysis, a new simulation system for RP molds is developed. The proposed system focuses on predicting part distortion, which is dominating defect in RP-molded parts. The developed simulation can be applied as an evaluation tool for RP mold design and process optimization. Our simulation system is veried by an experimental example.Although many materials are available for use in RP technologies, we concentrate on using stereolithography (SL), the original RP technology, to create polymer molds. The SL process uses photopolymer and laser energy to build a part layer by layer. Using SL takes advantage of both the commercial dominance of SL in the RP industry and the subsequent expertise base that has been developed for creating accurate, high-quality parts. Until recently, SL was primarily used to create physical models for visual inspection and form-t studies with very limited functional applications. However, the newer generation stereolithographic photopolymers have improved dimensional, mechanical and thermal properties making it possible to use them for actual functional molds. Based on the information gathered in the mold design exercise, the conventions followed by the engineer are transformed into if-then rules. Decision tables are used to account for all possible cases that arise when dealing with a particular aspect of the mold design process. The rules so framed are then organized into modules interacting with each other, using an application development environment. Finally the application is tested for its validity when it comes to designing molds for plastic parts manufactured in the industry.2.3 Selection of Appropriate Mold Base Typically, selection of appropriate mold base for manufacturing a plastic part involves Estimating the number of cavities The number of cavities is decided depending on the number of parts required within a given time. There are also other issues like the plasticizing capacity of the machine, reject rate etc that affect the number of cavities to be present in the mold base. Deciding on the presence of inserts and their dimensions Inserts facilitate the reusability of the mold base and therefore help in reducing cost of manufacturing. When it comes to selecting the dimensions and the number, a decision is made depending on the reusability of existing old inserts and cost of ordering new ones. Determining the size and location of runners The runner size depends on the material being molded. Although there are other considerations material properties determines the channel size required for its flow. Location of runners mainly depends on the topology of runners being used. Though a circular runner system is always preferable, the branched runner system that avoids runner balancing is the one most widely used. Determining the diameter of sprue The diameter of the sprue is decided based on the size of the mold, number of cavities, or the amount of plastic that is to be filled within a given time.Locating gates Plastic enters the cavity at a point where it can uniformly fill the cavity. A gate can be located at any point on the perimeter of a circular cavity but has to enter at the midsection when it comes to filling rectangular cavities. Determining the size and location of water linesWater lines are located at standard distances form each other and from any wall in the mold. The convention is not to locate a waterline within one diameter range on the mold wall. Deciding mold dimensions based on above conclusions Based on all the above decisions the approximate mold dimensions can be estimated and rounded off to the nearest catalog number. Considering all the above aspects before even modeling the mold base reduces the cost and time that go into redesigning. The emergence of mold can be traced back thousands of years ago, pottery and bronze foundry, but the large-scale use is with the rise of modern industry and developed.The 19th century, with the arms industry (guns shell), watch industry, radio industry, dies are widely used. After World War II, with the rapid development of world economy, it became a mass production of household appliances, automobiles, electronic equipment, cameras, watches and other parts the best way. From a global perspective, when the United States in the forefront of stamping technology - many die of advanced technologies, such as simple mold, high efficiency, mold, die and stamping the high life automation, mostly originated in the United States; and Switzerland, fine blanking, cold in Germany extrusion technology, plastic processing of the Soviet Union are at the world advanced. 0s, mold industry focus is based on subscriber demand, production can meet the product requirements of the mold. Multi-die design rule of thumb, reference has been drawing and perceptual knowledge, on the design of mold parts of a lack of real understanding of function. From 1955 to 1965, is the pressure processing of exploration and development of the times - the main components of the mold and the stress state of the function of a mathematical sub-bridge, and to continue to apply to on-site practical knowledge to make stamping technology in all aspects of a leap in development. The result is summarized mold design principles, and makes the pressure machine, stamping materials, processing methods, plum with a structure, mold materials, mold manufacturing method, the field of automation devices, a new look to the practical direction of advance, so that pressing processing apparatus capable of producing quality products from the first stage. Into the 70s to high speed, launch technology, precision, security, development of the second stage. Continue to emerge in this process a variety of high efficiency, business life, high-precision multi-functional automatic school to help with. Represented by the number of working places as much as other progressive die and dozens of multi-station transfer station module. On this basis, has developed both a continuous pressing station there are more slide forming station of the press - bending machine. In the meantime, the Japanese stand to the worlds largest - the mold into the micron-level precision, die life, alloy tool steel mold has reached tens of millions of times, carbide steel mold to each of hundreds of millions of times p minutes for stamping the number of small presses usually 200 to 300, up to 1200 times to 1500 times. In the meantime, in order to meet product updates quickly, with the short duration (such as cars modified, refurbished toys, etc.) need a variety of economic-type mold, such as zinc alloy die down, polyurethane rubber mold, die steel skin, also has been very great development. From the mid-70s so far can be said that computer-aided design, supporting the continuous development of manufacturing technology of the times. With the precision and complexity of mold rising, accelerating the production cycle, the mold industry, the quality of equipment and personnel are required to improve. Rely on common processing equipment, their experience and skills can not meet the needs of mold. Since the 90s, mechanical and electronic technologies in close connection with the development of NC machine tools, such as CNC wire cutting machine, CNC EDM, CNC milling, CNC coordinate grinding machine and so on. The use of computer automatic programming, control CNC machine tools to improve the efficiency in the use and scope. In recent years, has developed a computer to time-sharing by the way a group of direct management and control of CNC machine tools NNC system. With the development of computer technology, computers have gradually into the mold in all areas, including design, manufacturing and management. International Association for the Study of production forecasts to 2000, as a means of links between design and manufacturing drawings will lose its primary role. Automatic Design of die most fundamental point is to establish the mold standard and design standards. To get rid of the people of the past, and practical experience to judge the composition of the design center, we must take past experiences and ways of thinking, for series, numerical value, the number of type-based, as the design criteria to the computer store. Components are dry because of mold constitutes a million other differences, to come up with a can adapt to various parts of the design software almost impossible. But some products do not change the shape of parts, mold structure has certain rules, can be summed up for the automatic design of software. If a Japanese companys CDM system for progressive die design and manufacturing, including the importation of parts of the figure, rough start, strip layout, determine the size and standard templates, assembly drawing and parts, the output NC program (for CNC machining Center and line cutting program), etc., used in 20% of the time by hand, reduce their working hours to 35 hours; from Japan in the early 80s will be three-dimensional cad / cam system for automotive panel die. Currently, the physical parts scanning input, map lines and data input, geometric form, display, graphics, annotations and the data is automatically programmed, resulting in effective control machine tool control system of post-processing documents have reached a high level; computer Simulation (CAE) technology has made some achievements.At high levels, CAD / CAM / CAE integration, that data is integrated, can transmit information directly with each other. Achieve network. Present.Only a few foreign manufacturers can do it.2.4 Formulation of the Problem Based on issues that require human knowledge/experience, and aspects of mold design that consume time referring to tables, data sheets etc., the problem for developing the application is defined as shown in Figure 2. While most of the input, like the number of cavities, cavity image dimensions, cycle time are based on the client specifications, other input like the plasticizing capacity, shots per minute etc., can be obtained from the machine specifications. The output of the application contains mold dimensions and other information, which clearly helps in selecting the standard mold base from catalogs. Apart from the input and output, the Figure 2 also shows the various modules that produce the final output. With mold components, with high efficiency, good quality, low cost, saving energy and raw materials and a series of advantages, with the mold workpieces possess high accuracy, high complexity, high consistency, high productivity and low consumption , other manufacturing methods can not match. Have already become an important means of industrial production and technological development. The development of modern industrial and technological level depends largely on the level of industrial development die, so die industry to national economic and social development will play an increasing role.March 1989 the State Council promulgated on the current industrial policy decision points in the mold as the machinery industry transformation sequence of the first, production and capital construction of the second sequence (after the large-scale power generation equipment and the corresponding power transmission equipment), establish tooling industry in an important position in the national economy.Since 1997, they have to mold and its processing technology and equipment included in the current national focus on encouraging the development of industries, products and technologies catalog and to encourage foreign investment industry directory.Approved by the State Council, from 1997 to 2000, more than 80 professional mold factory owned 70% VAT refund of preferential policies to support mold industry. All these have fully demonstrated the development of the State Council and state departments tooling industry attention and support.Mold around the world about the current annual output of 60 billion U.S. dollars, Japan, the United States and other industrialized countries die of industrial output value of more than machine tool industry, beginning in 1997, Chinas industrial output value has exceeded the mold machine tool industry output. According to statistics, home appliances, toys and other light industries, nearly 90% of the parts are integrated with production of chopsticks; in aircraft, automobiles, agricultural machinery and radio industries, the proportion exceeded 60%.Such as aircraft manufacturing, the use of a certain type of fighter dies more than 30,000 units, of which the host 8000 sets, 2000 sets of engines, auxiliary 20 000 sets. From the output of view, since the 80s, the United States, Japan and other industrialized countries die industry output value has exceeded the machine tool industry, and there are still rising.Production technology, according to the International Association predicts that in 2000, the product best pieces of rough 75%, 50% will be finished mold completed; metals, plastics, ceramics, rubber, building materials and other industrial products, most of the mold will be completed in more than 50% metal plates, more than 80% of all plastic products, especially through the mold into.2.5 Framing rules At this stage, the experts knowledge is represented in the form of multiple If-Then statements. The rules may be representations of both qualitative and quantitative knowledge. By qualitative knowledge, we mean deterministic information about a problem that can be solved computationally. By qualitative we mean information that is not deterministic, but merely followed as a rule based on previous cases where the rule has worked. A typical rule is illustrated below: If Material = “Acetal” And Runner Length 0 Then Runner Diameter =0.062 End If When framing the rules it is important that we represent the information in a compact way while avoiding redundancy, incompleteness and inconsistency. Decision tables help take care of all the above concerns by checking for redundancy and comprehensive expression of the problem statement. As an example, in the process of selecting an appropriate mold base, the size of mold base depends on the number of cavities and inserts. To ensure that all possible combinations of cavities and inserts have been considered we use a decision table and subsequently use the decision table to frame rules. Table1 shows more than one case where the mold dimensions are the same. The case where the number of cavities is one and the number of inserts is one has the same mold dimensions as the case where the number of cavities is two and four. The three cases can be reduced to one single rule: If Number Of Inserts=1 Then Mold Width = (Insert Width + 2) Mold Length = (Insert Length + 2) Mold Thickness = Insert Thickness End If The rules are arranged in modular fashion using a standard programming language for the sake of convenience and clarity. Each module generates a set of outputs, which would be inputs for other modules. 2.6 Testing the applicatio The intelligent mold design application is validated using various test cases. For each case the part information, mold information and the machine information are varied and a human expert validates the results of feeding this info into the application. Table 2 shows one such test case where the part requires two cavities and there are no inserts present.The application gives the approximate mold dimensions, runner dimension, sprue dimension and runner length based on the cavity image dimensions and other information. Table 2. Typical test case showing program input and output. The mold dimensions obtained are very close to a typical human expert design for the test case but do not suggest explicitly the use of a standard mold base, like a specific mold from the D-M-E mold base catalog. The mold dimensions are however useful in selecting appropriate mold base from the mold catalogs. The runner dimensions are based on the material being used and therefore are limited to a specific range of shot size. 3 Summary This paper presents the approach adopted towards developing an intelligent mold design application that performs mold base selection based on user input. The knowledge acquisition process is done by first designing a mold base in close consultation with an industry expert and also by collecting deterministic information from hand books and data sheets. The collected information, which can be both qualitative and quantitative knowledge about the mold selection process, is represented in the form of rules arranged in different modules. Decision tables are used to reduce the size of rule base and make the rule base comprehensive in the problem domain. The application developed using the rules in different modules is then tested for its validity when it comes to selecting appropriate mold bases for plastic parts manufactured in the industry译文、 中文翻译 原文题目 Intelligent Mold Design Tool For Plastic Injection Molding 作者 Jagannath Yammada, Terrence L. Chambers, Suren N. Dwived 译名 加甘纳斯亚玛达,特伦斯 L 钱伯斯和苏伦N德维韦迪 国籍 美国 原文出处 Submitted to ASME/JDSMC Special Issue on Sensor 摘要注塑成型是一个生产热塑性塑料制品最流行的制造工艺,而模具设计是这个过程的一个重要方面。模具设计需要专业的知识、技能,最重要的是拥有该领域的经验。三者缺一不可。生产塑料组件需要选择恰当的模具,如果缺乏其中之一,这种选择就得在反复试验的基础上进行。这会增加生产成本,并造成设计上的不一致。本文介绍了智能模具设计工具的发展。该工具捕获模具设计过程的知识,并且以符合逻辑的方式将这些知识反映出来。所获得的知识将是确定性的,但模具设计过程中的信息是非确定的。一旦开发了模具设计工具,它将指导使用者根据不同客户的要求,为其塑料零件选择合适的模具。 导言 注塑成型工艺过程需要专业的知识、技能,最重要的是需要它成功的实践经验。通常是工艺参数控制过程的效率。在制造过程中,有效地控制和优化这些参数能实现一致性,这种一致性会在零件质量和零件成本上表现出来的问题。 1 智能化工程模块注塑成型工艺(IKEM) 基于知识的智能化工程模块的注塑成型工艺(IKEM)是一种软件技术,它领先于并行工程和CAD / CAM系统。它集成工程的设计和制造工艺的最新知识,给用户各种设计方面的指示,通过减少在产品开发设计阶段的工程变更,有助于减少一些工时。该系统将用于注塑设计,设计迭代和流程整合。目前的过程由许多手工计算、CAD图形结构和从以前项目取得的经验三部分组成。一旦工程师完成设计,这将是性能评估。 该IKEM项目已分为三大模块。 (1) 费用估算模块 (2) 模具设计模块 (3) 生产模块 IKEM系统有两种形式输入。在一个CAD模型的形式(Pro/E文件)下输入,和在给出的用户界面形式下输入。图1-1说明了那种进入每个模块的输入形式和用户输出形式。 制造商的经验水平将决定如何有效地控制工艺参数。有时这就导致人为错误引起的不一致性。还有经验不足,时间、资源短缺和创新的空间不大的情况。通过创造所谓的“智能模型”的问题,工程学知识提供了一个可行的方案去解决所有1在它的基本形式中模具设计工具是一个从文本文件中提取输入的Visual Basic应用程序,这种文本文件包含关于零件和用户输入程序。该文本文件包含来自Pro/E的一个信息文件的零件的几何解析。输入是用来估测模具得尺寸和其它各种特性。 2.1 文献回顾 模具设计的是另一种注塑成型过程的阶段,有经验的工程师在很大程度上有助于自动化进程,提高其效率。这个问题需要注意的是深入研究设计模具的时间。通常情况下,当设计工程师设计模具时,他们会参阅表格和标准手册,这会消耗大量的时间。另外,在标准的CAD软件中需要大量的时间去考虑模具的建模组件。不同的研究人员已经解决了缩短用不同的方式来设计模具所花费的时间的问题。凯尔奇和詹姆斯采用成组技术来减少模具设计时间。聚合一类注塑成型件的独特的编码系统和在注射模具中所需的工具已开发,它可以适用于其它产品生产线。实施编码系统的软件系统也已经被开发。通过获取在这方面领域的工程师的经验和知识,尝试直接使模具设计过程的自动化。并行模具设计系统的研究开发就是这样的一个过程,在并行工程环境中试图制定一个系统的注塑模具设计流程。他们的研究目标是研制一个有利于并行工程实践的模具开发的进程,和研制开发一个以知识为基础的为注塑模具设计提供工艺问题和产品要求的辅助设计。通过各种方式获取关于模具设计过程的确定信息和不确定信息,研究人员一直试图使模具设计流程自动化。这个研究试图研制开发一个独特的模具设计应用程序,它一确定性和不确定性两种形式获取信息。2.2 采用的方法为了发展智能模具设计工具,传统的模具设计方法在被研究。应用程序开发人员和设计工程师合作设计一种特定塑料零件的模具。在此期间,被工程师采纳用来选择模底座的方法正在被地密切关注和筛选过程的各个方面,需要他的知识经验来确定。此外,有时候工程师将参考图表和手册以规范其甄选过程。这耗费时间的过程,稍后也被记录在应用程序中。系统的阐述依据输入和输出的应用程序是下一阶段。这涉及到如何定义什么养的模具布局信息是用户最需要的,也是他输入最少却得到相同的输出。在注塑,聚合物熔体在高温注入模具在高压力1。因此,模具材料需要有热、力学性能能够受的温度和压力成型周期。许多研究的焦点已经创 建注塑模具直接由一个快速原型(RP)过程。通过消除多个步骤,这种方法的工具拥有最好的承诺,减少时间和成本需要创建少量数量的零件在生产材料。潜在的整合注塑与RP技术已经证明很多次。属性的RP模具非常不同传统的金属模具。关键的不同之处在于导热性能和弹性模量(刚性)。例如,聚合物用于rp装配式解决(SL)模具有一个热导,小于一千的铝工具。在利用RP技术来创建模具,整个模具设计和注塑成型工艺参数需要修改和优化从传统方法由于完全不同的工具材料。然而,目前还没有一个基本的了解修改的模具加工方法和材料都影响模具设计和注塑工艺参数。一个人不能获得合理的结果,只要改变一些材料属性在当前的模型。同时,使用传统方法进行实际零件可能产生次优的结果。所以有一个可怕的需要研究之间的交互(RT)快速模具和注塑工艺及材料,从而建立模具设计标准和技术对于一个RT导向的注射成型工艺。此外,计算机仿真是一种有效的方法来预测注塑件的质量。商用仿真软件包的传统注塑工艺现在已经成为常规工具的模具设计师和工艺工程师2。不幸的是,当前的仿真程序对常规注塑不再适用于RP模具,由于显著不同的工具材料。例如,在使用现有的仿真软件与铝和SL模具和比较实验结果,尽管模拟值的部分失真是合理的铝模,结果是不可接受的,误差超过50%。在注射成型的变形是由于收缩和翘曲的塑料部分,以及模具。对于一般模具,主要因素是收缩和翘曲的塑料部分,这是在当前模拟精确模拟。但对RP模具,模具的变形可能更多的影响力,而忽视了在当前的模型。例如,3使用一个简单的三步模拟过程考虑模具变形,它有太多的偏差。本文基于上述分析,一个新的仿真系统开发模具RP。拟议的系统着重于预测部分失真,这是控制缺陷在rp成型零件。发达的模拟可以应用作为评价工具,模具设计和过程优化卢比。我们的仿真系统是一个实验例子验证了。尽管很多材料都可以使用在RP技术,我们专注于使用解决(SL),原来的RP技术,创建聚合物模具。SL流程使用光敏聚合物和激光能量,一层一层地建造一个部分。使用SL利用两个商业的主导地位在RP SL工业和随后的专业知识基础,已经开发,建立准确、高质量的零件。直到最近,SL主要是用于创建物理模型进行目视检查和壳式研究非常有限的功能的应用程序。然而,新一代stereolithographic photopolymers有改善空间,机械和热性能使它可以使用他们的实际功能的模具。根据在模具设计工作中收集到的信息,由工程师遵循的公约被转化为if - then规则。决策表是用来解释各种可能出现的情况,它们是当处理模具设计工程中某一特定的方面所提出的。这样被制定规则,然后被组织在相互交融的模块中,使用应用程序开发环境。最后,应用程序是检验其正确性,当涉及到为塑料零件设计模具在工业生产中。模具的出现可以追溯到几千年前的陶器和青铜器铸造,但其大规模使用却是随着现代工业的掘起而发展起来的。19世纪,随着
- 温馨提示:
1: 本站所有资源如无特殊说明,都需要本地电脑安装OFFICE2007和PDF阅读器。图纸软件为CAD,CAXA,PROE,UG,SolidWorks等.压缩文件请下载最新的WinRAR软件解压。
2: 本站的文档不包含任何第三方提供的附件图纸等,如果需要附件,请联系上传者。文件的所有权益归上传用户所有。
3.本站RAR压缩包中若带图纸,网页内容里面会有图纸预览,若没有图纸预览就没有图纸。
4. 未经权益所有人同意不得将文件中的内容挪作商业或盈利用途。
5. 人人文库网仅提供信息存储空间,仅对用户上传内容的表现方式做保护处理,对用户上传分享的文档内容本身不做任何修改或编辑,并不能对任何下载内容负责。
6. 下载文件中如有侵权或不适当内容,请与我们联系,我们立即纠正。
7. 本站不保证下载资源的准确性、安全性和完整性, 同时也不承担用户因使用这些下载资源对自己和他人造成任何形式的伤害或损失。

人人文库网所有资源均是用户自行上传分享,仅供网友学习交流,未经上传用户书面授权,请勿作他用。
 川公网安备: 51019002004831号