十字头的机械加工工艺规程及夹具设计【工装夹具类优秀机械毕业设计@word+5套夹具CAD全套图纸】
收藏
资源目录

压缩包内文档预览:(预览前20页/共28页)
编号:286968
类型:共享资源
大小:2.03MB
格式:RAR
上传时间:2014-06-01
上传人:QQ14****9609
认证信息
个人认证
郭**(实名认证)
陕西
IP属地:陕西
50
积分
- 关 键 词:
-
十字头
零件
机械
加工
工艺
规程
工装
夹具
设计
- 资源描述:
-
任务书
一. 设计题目:
设计如下十字头的机械加工工艺规程及工艺装备设计

二、原始数据和技术要求:
生产类型:成批生产
三、设计内容与要求:
1、毛坯图1张(A4幅面);
2、制定零件的机械加工工艺规程,填写机械加工工艺过程卡片及所有工序的机械加工工序卡片1套;
3、设计说明书1份。
四、进度安排:
序号 | 内容 | 时间(天) |
1 | 领取设计任务书,熟悉资料,搜集设计资料 | 1 |
2 | 分析零件图及加工要求 | 0.5 |
3 | 选择毛坯的种类及制造方法,确定毛坯尺寸,绘制毛坯图 | 1 |
4 | 选择加工方法,拟订工艺路线 | 2 |
5 | 进行工序设计和工艺计算 | 4 |
6 | 编写课程 设计说明书 | 1.5
|
第一部分 工艺设计说明书
1.零件图工艺性分析
1.1零件结构功用分析:
十字头零件是机械中常见的一种零件,它的应用范围很广。由于它们功用的不同,该类零件的结构和尺寸有着很大的差异,但结构上仍有共同特点:零件的主要表面为精度要求较高的孔、零件由内孔、外圆、端平等表面构成。
1.2零件图纸分析:
由零件图可知,该零件形状较为复杂、外形尺寸不大,可以采用铸造毛坯。由于该零件的两个φ20孔要求较高,它的表面质量直接影响工作状态,通常对其尺寸要求较高。一般为IT5-IT7。加工时两φ20孔的同轴度应该控制在0.01mm。φ85外圆的尺寸它直接影响孔在空间的位置,加工时可以将其加工精度降低,通过装配来提高精度。
1.3主要技术条件:
1.孔径精度:两φ20孔的孔径的尺寸误差和形状误差会造的配合不良,因此对孔的要求较高,其孔的尺寸公差为IT7
2.主要平面的精度:由于φ85外圆接影响联接时的接触刚度,并且加工过程中常作为定位基面,则会影响孔的加工精度,因此须规定其加工要求。
2.毛坯选择
2.1毛坯类型
考虑到十字头工作时的作用,要求材料要有很高的强度,并且该零件结构较为复杂,故选用铸造毛坯材料为HT200。
2.2毛坯余量确定
由书机械加工工艺设计资料表1.2-10查得毛坯加工余量为2,毛坯尺寸偏差由表1.2-2查得为1.4.
2.3毛坯-零件合图草图
3.机械工艺路线确定
3.1定位基准的选择:
3.1.1精基准的选择:选择十字头底面与两φ85外圆作定位基准,因为φ85外圆柱面 ,及底面是装配结合面,且十字头底面又是空间位置的设计基准,故选择十字头底面与外圆作定位基准,符合基准重合原则且装夹误差小。
3.1.2粗基准的选择:以十字头上端面和十字头支撑外圆定位加工出精基准。
3.2加工顺序的安排:
十字头零件主要由孔和平面构成与箱体类零件大体相同,加工顺序为先面后孔,这样可以用加工好的平面定位再来加工孔,因为轴承座孔的精度要求较高,加工难度大,先加工好平面,再以平面为精基准加工孔,这样即能为孔的加工提供稳定可靠的精基准,同时可以使孔的加工余量较为均匀
3.3加工阶段的划分说明
加工阶段分为:粗加工阶段、半精加工阶段、精加工阶段。
3.4加工工序简图
1、铸 铸造、清理
2、热处理 时效
3、粗车φ85外圆
4、粗铣上顶面
5、粗,精铣底平面
6、钻、攻4×M6螺纹孔
7、扩φ20孔
9、铣十字头
10、粗镗φ65内孔
11、粗镗、半精镗、精镗2-φ20内孔
12、挖2-φ24环槽
13、精车φ85外圆
14、去毛刺:
15、终检:
4.主要工序尺寸及其公差确定
φ85
工艺路线基本尺寸工序余量经济精度工序尺寸
铸φ90.55.5φ90.51.4
粗车φ873.512.5(IT11)φ87
半精车φ85.51.56.3(IT9)φ85.5
精车φ850.51.6(IT7)φ85
φ20
工艺路线基本尺寸工序余量经济精度工序尺寸
铸φ146φ141.4
粗镗φ1736.3(IT11)φ17
半精镗φ19.52.53.2(IT9)φ19.5
精镗床φ200.51.6(IT7)φ200.01

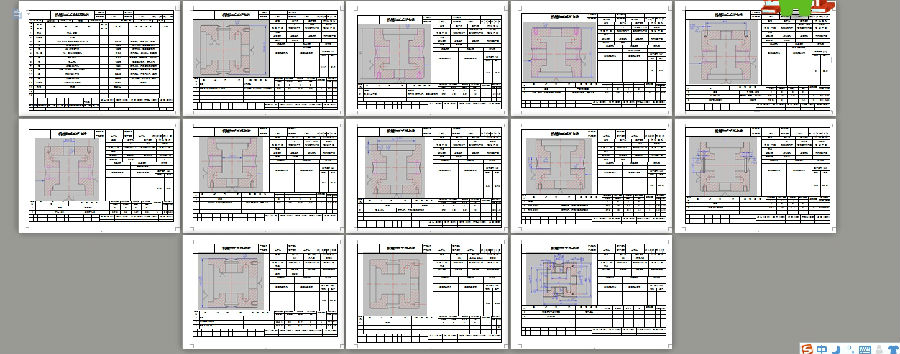


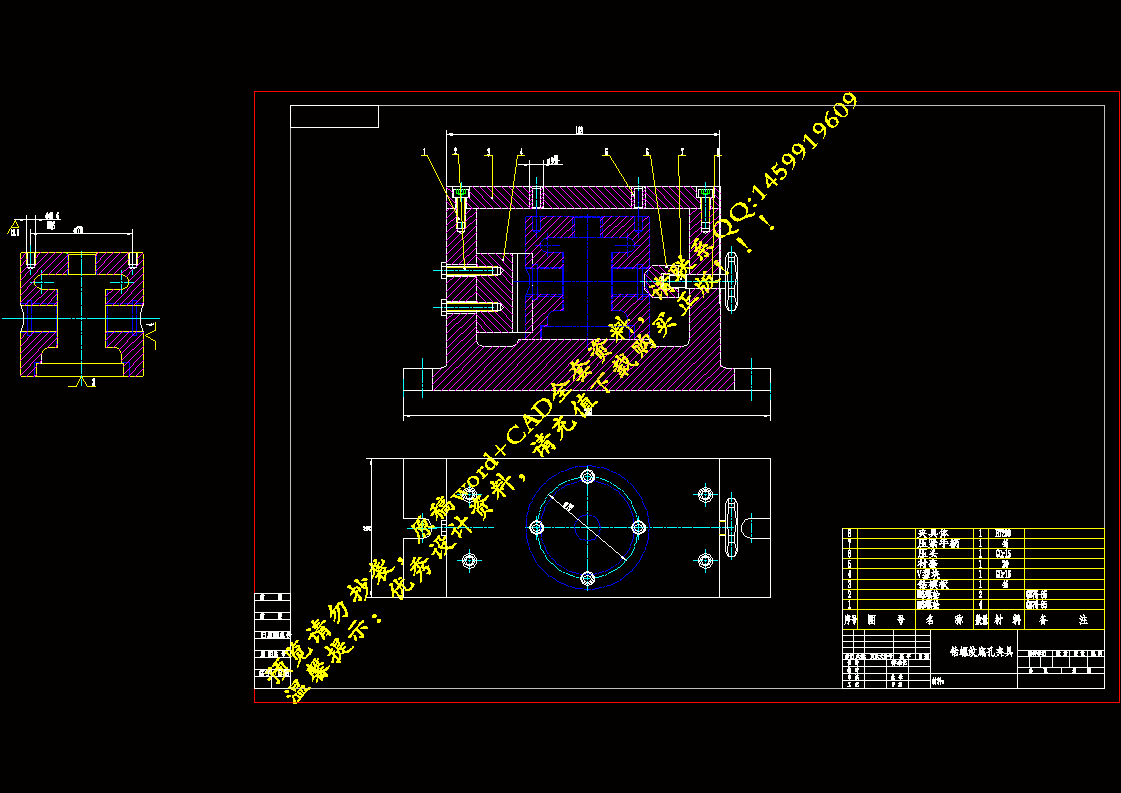


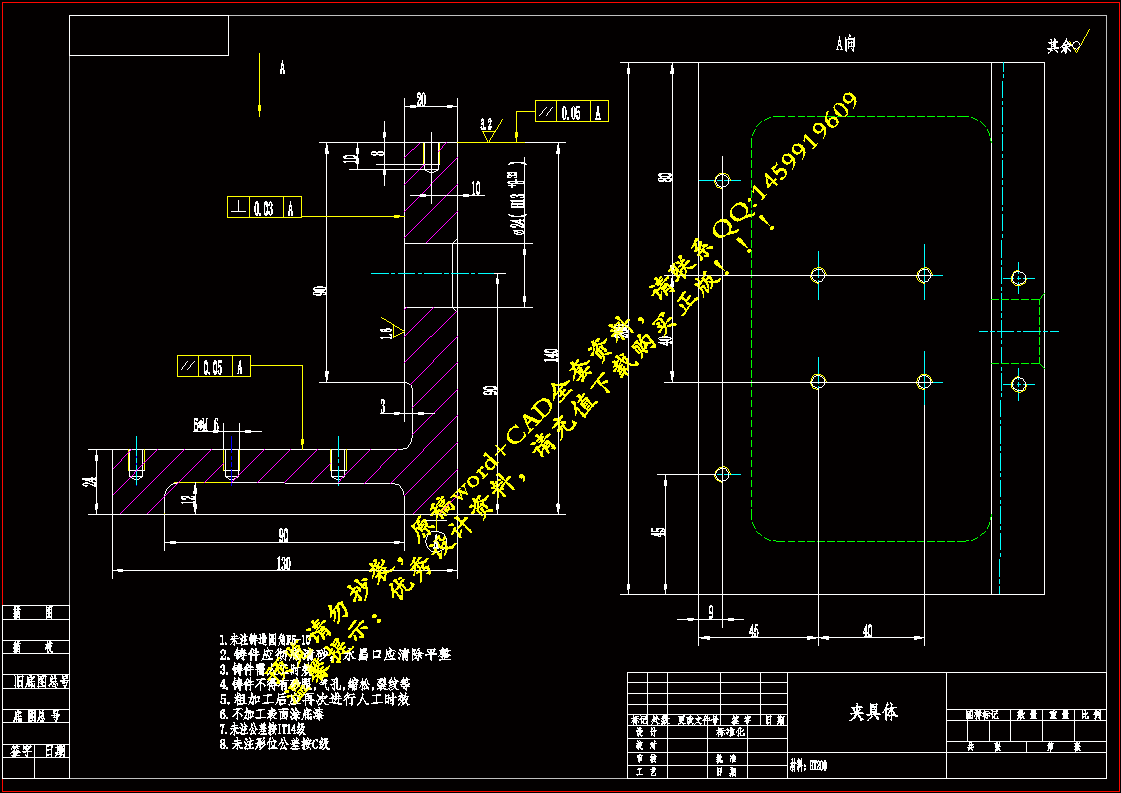
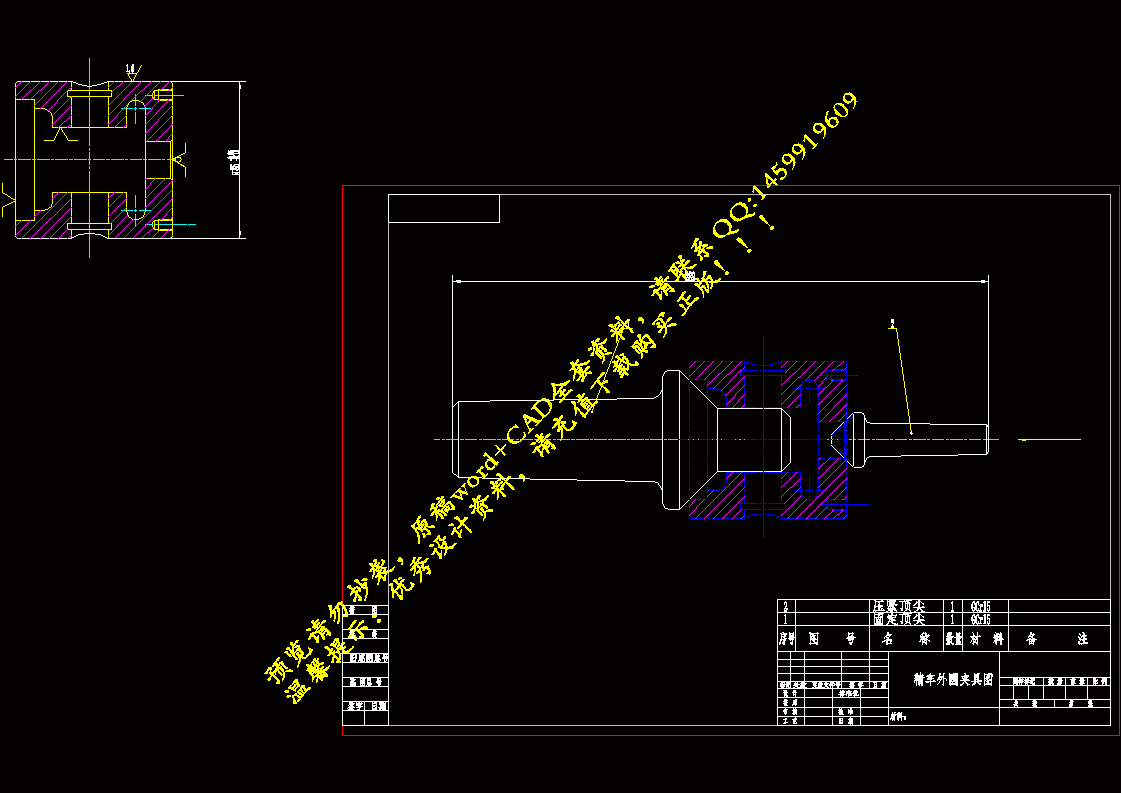
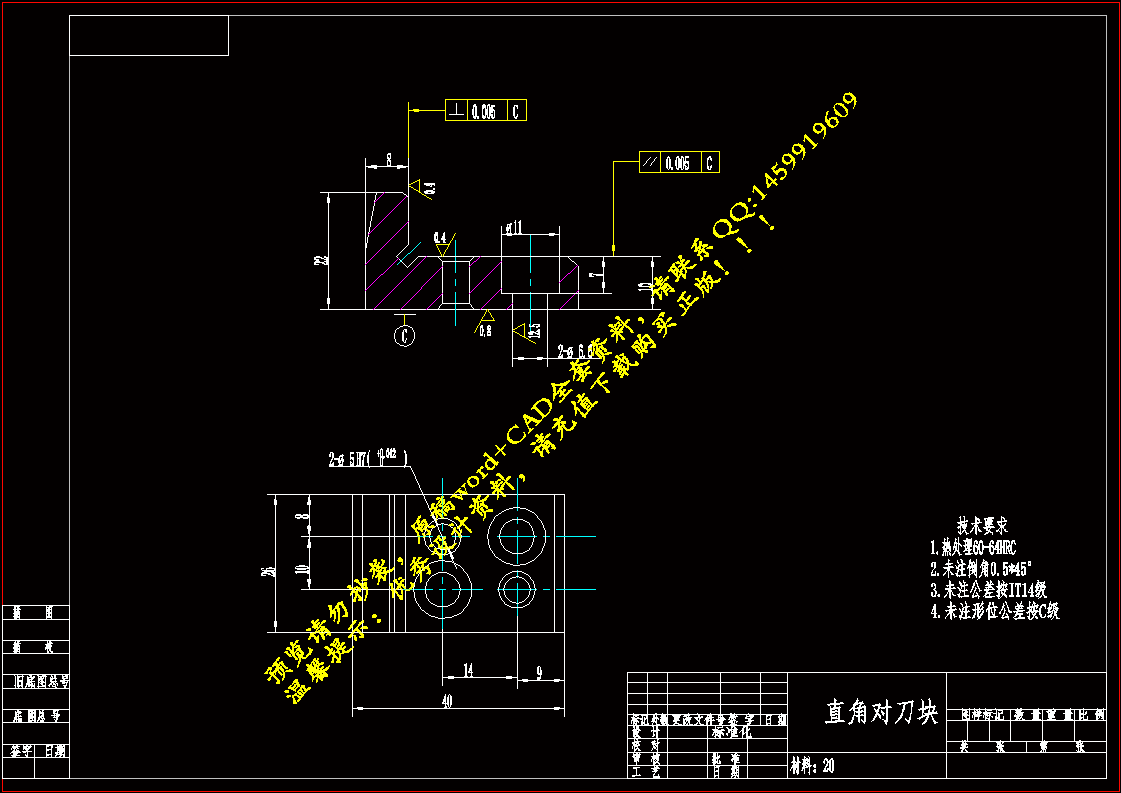
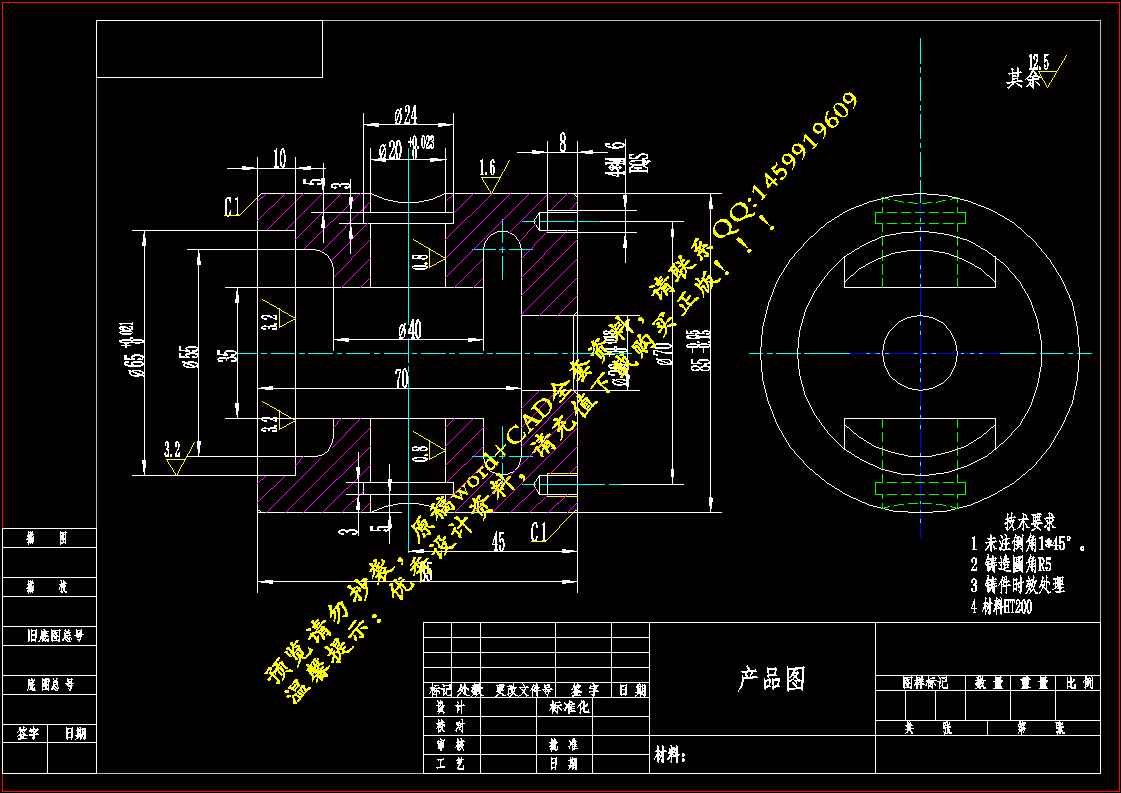
- 内容简介:
-
任务书一 设计题目:设计如下十字头的机械加工工艺规程及工艺装备设计十字头二、原始数据和技术要求: 生产类型:成批生产三、设计内容与要求:1、毛坯图1张(A4幅面);2、制定零件的机械加工工艺规程,填写机械加工工艺过程卡片及所有工序的机械加工工序卡片1套;3、设计说明书1份。四、进度安排:序号内容时间(天)1领取设计任务书,熟悉资料,搜集设计资料12分析零件图及加工要求0.53选择毛坯的种类及制造方法,确定毛坯尺寸,绘制毛坯图14选择加工方法,拟订工艺路线25进行工序设计和工艺计算46编写课程 设计说明书1.5机械加工工艺过程卡片产品型号零件图号产品名称十字头零件名称十字头共1页第1页材 料 牌 号HT200毛 坯 种 类铸铁毛坯外形尺寸每毛坯件数每 台 件 数备 注 工 序 号工 名序 称 工 序 内 容 车 间 工 段设 备工 艺 装 备备注1铸造铸造,清理2热处理时效3车粗车85外圆保证尺寸880.10CA6140专用夹具、游标卡尺、车刀、4铣粗铣85顶面X62W游标卡尺、硬质合金铣刀5铣粗,精铣底平面X62W游标卡尺、硬质合金铣刀6钻、攻钻、攻4M6螺纹孔Z4012专用夹具、5钻头、M6丝锥7扩扩20孔Z4012专用夹具、游标卡尺、20钻头8铣铣十字头X62W硬质合金铣刀、游标卡尺9镗粗镗65内孔T618游标卡尺、开式自锁夹紧镗刀10镗粗镗、半精镗、精镗20内孔T618专用夹具、内径千分尺、车刀11车挖2-24环槽CA6140专用夹具、内径千分尺、车刀12车精车85外圆CA6140专用夹具、游标卡尺、车刀13去毛刺去各部分锐边毛刺钳工台平板锉14终检终检检验台上1516 设 计(日 期) 校 对(日期) 审 核(日期) 标准化(日期) 会 签(日期)韩永锋标记处数更改文件号签 字 日 期标记处数更改文件号签 字 日 期机械加工工序卡片产品型号零件图号产品名称十字头零件名称十字头共12页第1页车间工序号工序名称材 料 牌 号1粗车HT200毛 坯 种 类毛坯外形尺寸每毛坯可制件数每 台 件 数铸造设备名称设备型号设备编号同时加工件数车床CA6140夹具编号夹具名称切削液专用夹具工位器具编号工位器具名称工序工时 (分)准终单件4.51782.07工步号工 步 内 容工 艺 装 备主轴转速切削速度进给量切削深度进给次数工步工时r/minm/minmm/rmm机动辅助1安装专用夹具00002粗车85外圆,保证尺寸如图专用夹具、游标卡尺、90度车刀268591.02.510.521.26 设 计(日 期) 校 对(日期) 审 核(日期) 标准化(日期) 会 签(日期)机械加工工序卡片产品型号零件图号产品名称十字头零件名称十字头共12页第2页车间工序号工序名称材 料 牌 号2铣85上平面HT-200毛 坯 种 类毛坯外形尺寸每毛坯可制件数每 台 件 数铸造设备名称设备型号设备编号同时加工件数铣床X62W夹具编号夹具名称切削液工位器具编号工位器具名称工序工时 (分)准终单件1.4568.7工步号工 步 内 容工 艺 装 备主轴转速切削速度进给量切削深度进给次数工步工时r/minm/minmm/rmm机动辅助1安装大平面00002铣85上平面大平面、游标卡尺、硬质合金铣刀12721200.23.511.452.27 设 计(日 期) 校 对(日期) 审 核(日期) 标准化(日期) 会 签(日期)机械加工工序卡片产品型号零件图号产品名称十字头零件名称十字头共12页第3页车间工序号工序名称材 料 牌 号3铣85下平面HT200毛 坯 种 类毛坯外形尺寸每毛坯可制件数每 台 件 数铸造设备名称设备型号设备编号同时加工件数铣床床X62W夹具编号夹具名称切削液粗铣下面夹具工位器具编号工位器具名称工序工时 (分)准终单件0.862.9工步号工 步 内 容工 艺 装 备主轴转速切削速度进给量切削深度进给次数工步工时r/minm/minmm/rmm机动辅助1安装一面两孔定位、00002粗铣、精铣80下平面保证如图硬质合金铣刀、游标卡尺9541500.123.523.52.27 设 计(日 期) 校 对(日期) 审 核(日期) 标准化(日期) 会 签(日期)机械加工工序卡片产品型号零件图号产品名称十字头零件名称十字头共12页第4页车间工序号工序名称材 料 牌 号4钻孔,攻丝HT200毛 坯 种 类毛坯外形尺寸每毛坯可制件数每 台 件 数铸造设备名称设备型号设备编号同时加工件数立式钻床Z4120夹具编号夹具名称切削液粗铣N面夹具工位器具编号工位器具名称工序工时 (分)准终单件880.53工步号工 步 内 容工 艺 装 备主轴转速切削速度进给量切削深度进给次数工步工时r/minm/minmm/rmm机动辅助1安装V形块、压板00002钻2-5孔V形块、压板、5钻头681.4150.273.510.41.343攻2-M6螺纹孔M6丝锥90.8520.210.41.34 设 计(日 期) 校 对(日期) 审 核(日期) 标准化(日期) 会 签(日期)机械加工工序卡片产品型号零件图号产品名称十字头零件名称十字头共12页第5页车间工序号工序名称材 料 牌 号5扩孔HT-200毛 坯 种 类毛坯外形尺寸每毛坯可制件数每 台 件 数铸造设备名称设备型号设备编号同时加工件数立式钻床Z41201夹具编号夹具名称切削液一面两孔夹具工位器具编号工位器具名称工序工时 (分)准终单件2.5672.62工步号工 步 内 容工 艺 装 备主轴转速切削速度进给量切削深度进给次数工步工时r/minm/minmm/rmm机动辅助1安装专用夹具、00002扩孔2020扩孔钻397.5150.272.510.21.34 设 计(日 期) 校 对(日期) 审 核(日期) 标准化(日期) 会 签(日期)机械加工工序卡片产品型号零件图号产品名称十字头零件名称十字头共12页第6页车间工序号工序名称材 料 牌 号6钻孔、攻丝HT200毛 坯 种 类毛坯外形尺寸每毛坯可制件数每 台 件 数铸造设备名称设备型号设备编号同时加工件数铣床X62W夹具编号夹具名称切削液工位器具编号工位器具名称工序工时 (分)准终单件2.5162.73工步号工 步 内 容工 艺 装 备主轴转速切削速度进给量切削深度进给次数工步工时r/minm/minmm/rmm机动辅助1安装00002粗铣35x35的平面保证如图硬质合金铣刀、游标卡尺9541500.123.523.52.27 设 计(日 期) 校 对(日期) 审 核(日期) 标准化(日期) 会 签(日期)机械加工工序卡片产品型号零件图号产品名称十字头零件名称十字头共12页第7页车间工序号工序名称材 料 牌 号7镗孔HT200毛 坯 种 类毛坯外形尺寸每毛坯可制件数每 台 件 数铸造设备名称设备型号设备编号同时加工件数镗床T618夹具编号夹具名称切削液工位器具编号工位器具名称工序工时 (分)准终单件3.163.93工步号工 步 内 容工 艺 装 备主轴转速切削速度进给量切削深度进给次数工步工时r/minm/minmm/rmm机动辅助1安装V形块00002镗65孔游标卡尺、开式自锁夹紧镗刀12721000.22.510.081.34 设 计(日 期) 校 对(日期) 审 核(日期) 标准化(日期) 会 签(日期)机械加工工序卡片产品型号零件图号产品名称十字头零件名称十字头共12页第8页车间工序号工序名称材 料 牌 号8镗孔HT200毛 坯 种 类毛坯外形尺寸每毛坯可制件数每 台 件 数铸造设备名称设备型号设备编号同时加工件数镗床T618夹具编号夹具名称切削液工位器具编号工位器具名称工序工时 (分)准终单件4.863.23工步号工 步 内 容工 艺 装 备主轴转速切削速度进给量切削深度进给次数工步工时r/minm/minmm/rmm机动辅助1安装00002粗镗20孔游标卡尺、开式自锁夹紧镗刀1017.6800.5310.061.343精樘20孔游标卡尺、开式自锁夹紧镗刀1017.6800.150.510.141.34 设 计(日 期) 校 对(日期) 审 核(日期) 标准化(日期) 会 签(日期)机械加工工序卡片产品型号零件图号产品名称十字头零件名称十字头共12页第9页车间工序号工序名称材 料 牌 号9挖环槽HT200毛 坯 种 类毛坯外形尺寸每毛坯可制件数每 台 件 数铸造设备名称设备型号设备编号同时加工件数普通车床C6140夹具编号夹具名称切削液工位器具编号工位器具名称工序工时 (分)准终单件1.662.63工步号工 步 内 容工 艺 装 备主轴转速切削速度进给量切削深度进给次数工步工时r/minm/minmm/rmm机动辅助1安装00002粗车24环形槽1043820.5210.160.8 设 计(日 期) 校 对(日期) 审 核(日期) 标准化(日期) 会 签(日期)机械加工工序卡片产品型号零件图号产品名称十字头零件名称十字头共12页第10页车间工序号工序名称材 料 牌 号10车外圆HT200毛 坯 种 类毛坯外形尺寸每毛坯可制件数每 台 件 数铸造设备名称设备型号设备编号同时加工件数车床C6140夹具编号夹具名称切削液工位器具编号工位器具名称工序工时 (分)准终单件1.662.63工步号工 步 内 容工 艺 装 备主轴转速切削速度进给量切削深度进给次数工步工时r/minm/minmm/rmm机动辅助1装夹2半精车85外圆363.4800.7112.260.723精车85外圆715.5900.4210.20.8 设 计(日 期) 校 对(日期) 审 核(日期) 标准化(日期) 会 签(日期)机械加工工序卡片产品型号零件图号产品名称十字头零件名称十字头共12页第11页车间工序号工序名称材 料 牌 号11去除锐边毛剌HT200毛 坯 种 类毛坯外形尺寸每毛坯可制件数每 台 件 数铸造设备名称设备型号设备编号同时加工件数夹具编号夹具名称切削液工位器具编号工位器具名称工序工时 (分)准终单件1.662.63工步号工 步 内 容工 艺 装 备主轴转速切削速度进给量切削深度进给次数工步工时r/minm/minmm/rmm机动辅助1安装00002 设 计(日 期) 校 对(日期) 审 核(日期) 标准化(日期) 会 签(日期)机械加工工序卡片产品型号零件图号产品名称十字头零件名称十字头共12页第12页车间工序号工序名称材 料 牌 号13终检入库毛 坯 种 类毛坯外形尺寸每毛坯可制件数每 台 件 数铸造设备名称设备型号设备编号同时加工件数夹具编号夹具名称切削液工位器具编号工位器具名称工序工时 (分)准终单件工步号工 步 内 容工 艺 装 备主轴转速切削速度进给量切削深度进给次数工步工时r/minm/minmm/rmm机动辅助1按图示尺寸进行检查各种量具2防锈入库 设 计(日 期) 校 对(日期) 审 核(日期) 标准化(日期) 会 签(日期)13参考文献:1 蓝恭谦.精密型材校直液压机国内外现状及其发展趋势.锻压机械.1991(4):48-52.2 王汉功,赵文转.修复工程学M.北京:机械工业出版社2000.1.1.2023 谭伟.校直工艺的现状调查.渝州: 渝州大学学报(自然科学版).1997.14(1):1821.4 钦明浩,柯尊忠,张向军等.精密矫直机中轴类零件矫直工艺理论研究.北京:机械工程学报.1997.33(2):4853.5 崔甫.矫直原理与矫直机械.北京:冶金工业出版社.2002.6 机械加工工艺辞典编委会,丁年雄主编.机械加工工艺辞典北京:学苑出版社.1990.7. 1-637 崔甫 施东成.矫直机压弯量汁算法的探讨J.冶金设备19998 刘鸿文 主编 材料力学M 北京:高等教育出版社.2004.65-859 徐芝纶 编弹性力学M.北京;高等教育出版社.1981. 12-12610 成大先 编.机械设计手册M.北京:化学工业出版社,200211 崔甫.矫直理论与参数计算.北京:机械工业出版社,1994.12-1912 丁曙光.精校机自动检测系统中数据处理方法的研究J.机械科学与技13 张利平.液压气动系统设计手册.北京:机械工业出版社,1997.6.14 张君安.机电一体化系统设计M 北京:兵器工业出版社.199715 Makhnenko V I,Shekera V M,hortunatova N N,Shkatov A SErshov yayuko. The efficiency of pulsed loading in the straightening of thin-walled welded structuresby the electrohvdrauiic pulsed method. Automatic Welding vo1.33, no.5:7一II .May 198016 蔡春源 主编.机电液设计手册(中).北京:机械工业出版社. 199717 冯奇斌,吕国强.精密校直机微机检测系统的研究.北京:机械工艺师.2000.(9):3637.英文原文:SHAFT AND GEAR DESIGNAbstract: The important position of the wheel gear and shaft can t falter in traditional machine and modern machines. The wheel gear and shafts mainly install the direction that delivers the dint at the principal axis box. The passing to process to make them can is divided into many model numbers, useding for many situations respectively. So we must be the multilayers to the understanding of the wheel gear and shaft in many waysKey words : Wheel gear ; ShaftIn the force analysis of spur gears, the forces are assumed to act in a single plane .We shall study gears in which the forces have three dimensions.The reason for this, in the case of helical gears, is that the teeth are not parallel to the axis of rotation. And in the case of bevel gears, the rotational axes are not parallel to each other. There are also other reasons, as we shall learn.Helical gears are used to transmit motion between parallel shafts. The helix angle is the same on each gear, but one gear must have a right-hand helix and the other a left-hand helix. The shape of the tooth is an involute helicoid. If a piece of paper cut in the shape of a parallelogram is wrapped around a cylinder, the angular edge of the paper becomes a helix. If we unwind this paper, each point on the angular edge generates an involute curve. The surface obtained when every point on the edge generates an involute is called an involute helicoid. The initial contact of spur-gear teeth is a line extending all the way across the face of the tooth. The initial contact of helical gear teeth is a point, which changes into a line as the teeth come into more engagement. In spur gears the line of contact is parallel to the axis of the rotation; in helical gears, the line is diagonal across the face of the tooth. It is this gradual of the teeth and the smooth transfer of load from one tooth to another, which give helical gears the ability to transmit heavy loads at high speeds. Helical gears subject the shaft bearings to both radial and thrust loads. When the thrust loads become high or are objectionable for other reasons, it may be desirable to use double helical gears. A double helical gear (herringbone) is equivalent to two helical gears of opposite hand, mounted side byside on the same shaft. They develop opposite thrust reactions and thus cancel out the thrust load. When two or more single helical gears are mounted on the same shaft,the hand of the gears should be selected so as to produce the minimum thrust load Crossed-helical, or spiral, gears are those in which the shaft centerlines are neither parallel nor intersecting. The teeth of crossed-helical fears have point contact with each other, which changes to line contact as the gears wear in. For this reason they will carry out very small loads and are mainly for instrumental applications, and are definitely not recommended for use in the transmission of power There is on difference between a crossed heli cal gear and a helical gear until they are mounted in mesh with each other. They are manufactured in the same way. A pair of meshed crossed helical gears usually have the same hand; that is , a right-hand driver goes with a right-hand driven. In the design of crossed-helical gears, the minimum sliding velocity is obtained when the helix angle are equal. However, when the helix angle are not equal, the gear with the larger helix angle should be used as the driver if both gears have the same handWorm gears are similar to crossed helical gears. The pinion or worm has a small number of teeth, usually one to four, and since they completely wrap around the pitch cylinder they are called threads. Its mating gear is called a worm gear, which is not a true helical gear. A worm and worm gear are used to provide a high angular-velocity reduction between nonintersecting shafts which are usually at right angle. The worm gear is not a helical gear because its face is made concave to fit the curvature of the worm in order to provide line contact instead of point contact. However, a disadvantage of worm gearing is the high sliding velocities across the teeth, the same as with crossed helical gearsWorm gearing are either single or double enveloping. A single-enveloping gearing is one in which the gear wraps around or partially encloses the worm. . A gearing in which each element partially encloses the other is, of course, a double-enveloping worm gearing. The important difference between the two is that area contact exists between the teeth of doubleenveloping gears while only line contact between those of single-enveloping gears. The worm and worm gear of a set have the same hand ofhelix as for crossed helical gears, but the helix angles are usually quite different The helix angle on the worm is generally quite large, and that on the gear very small Because of this, it is usual to specify the lead angle on the worm, which is the complement of the worm helix angle, and the helix angle on the gear; the two angles are equal for a 90-deg. Shaft angleWhen gears are to be used to transmit motion between intersecting shaft, some of bevel gear is required. Although bevel gear are usually made for a shaft angle of 90 deg. They may be produced for almost any shaft angle. The teeth may be cast, milled, or generated. Only the generated teeth may be classed as accurate. In a typical bevel gear mounting, one of the gear is often mounted outboard of the bearing. This means that shaft deflection can be more pronounced and have a greater effect on the contact of teeth. Another difficulty, which occurs in predicting the stress in bevel-gear teeth, is the fact the teeth are tapered.Straight bevel gears are easy to design and simple to manufacture and give very good results in service if they are mounted accurately and positively. As in the case of squr gears, however, they become noisy at higher values of the pitch-line velocity In these cases it is often go od design practice to go to the spiral bevel gear, which is the bevel counterpart of the helical gear. As in the case of helical gears, spiral bevel gears give a much smoother tooth action than straight bevel gears, and hence are useful where high speed are encountered. It is frequently desirable, as in the case of automotive differential applications, to have gearing similar to bevel gears but with the shaft offset. Such gears are called hypoid gears because their pitch surfaces are hyperboloids of revolution The tooth action between such gears is a combination of rolling and sliding alonga straight line and has much in common with that of worm gears A shaft is a rotating or stationary member, usually of circular cross section, having mounted upon it such elementsas gears, pulleys, flywheels, cranks, sprockets, and other power-transmission elements. Shaft may be subjected to bending, tension, compression, or torsional loads, acting singly or in combination with one another. When they are combined, one may expect to find both static and fatigue strength tobe important design considerations, since a single shaft may be subjected to static stresses, completely reversed, and repeated stresses, all acting at the same time The word shaft covers numerous variations, such as axles and spindles. Anaxle is a shaft, wither stationary or rotating, nor subjected to torsion load. A shirt rotating shaft is often called a spindle. When either the lateral or the torsional deflection of a shaft must be held to close limits, the shaft must be sized on the basis of deflection before analyzing the stresses. The reason for this is that, if the shaft is made stiff enough so that the deflection is not too large, it is probable that the resulting stresses will be safe. But by no means should the designer assume that they are safe; it is almost always necessary to calculate them so that he knows they are within acceptable limits Whenever possible, the power-transruission elements, such as gears or pullets, should be located close to the supporting bearings, This reduces the bending moment, and hence the deflection and bending stress.Although the von Mises-Hencky-Goodman method is difficult to use in design of shaft, it probably comes closest to predicting actual failure. Thus it is a good way of checking a shaft that has already been designed or of discovering why a particular shaft has failed in service. Furthermore, there are a considerable number of shaft-design problems in which the dimension are pretty well limited by other considerations, such as rigidity, and it is only necessary for the designer to discover something about the fillet sizes, heat-treatment, and surface finish and whether or not shot peening is necessary in order to achieve the required life and reliabilityBecause of the similarity of their functions, clutches and brakes are treated together. In a simplified dynamic representation of a friction clutch, or brake two in ertias 11 and 12 traveling at the respective angular velocities Wl and W2, one of which may be zero in the case of brake, are to be brought to the same speed by engaging the clutch or brake. Slippage occurs because the two elements are running at different speeds and energy is dissipated during actuation, resulting in a temperature rise. In analyzing the performance of these devices we shall beinterested in the actuating force, the torque transmitted, the energy loss and the temperature rise. The torque transmitted is related to the actuating force, the coefficient of friction, and the geometry of the clutch or brake. This is problem in static, which will have to be studied separately for eath geometric configuration. However, temperature rise is related to energy loss and can be studied without regard to the type of brake or clutch because the geometry of interest is the heat-dissipating surfaces. The various types of clutches and brakes may be classified as fllows1. Rim type with internally expanding shoes2. Rim type with externally contracting shoes3。 Band type4. Disk or axial type5 Cone type6. Miscellaneous typeThe analysis of all type of friction clutches and brakes use the same general procedure. The following step are necessary1. Assume or determine the distribution of pressure on the frictional surfaces2. Find a relation between the maximum pressure and the pressure at any point3. Apply the condition of statical equilibrium to find (a) the actuating force, (b) the torque, and (c) the support reactionsMiscellaneous clutches include several types, such as the positive-contact clutches, overload-release clutches, overrunning clutches, magnetic fluid clutches, and others.A positive-contact clutch consists of a shift lever and two jaws. The greatest differences between the various types of positive clutches are concerned with the design of the jaws. To provide a longer period of time for shift action during engagement, the jaws may be ratchet-shaped, or gear-tooth-shaped. Sometimes a greatmany teeth or jaws are used, and they may be cut either circumferentially, so that they engage by cylindrical mating, or on the faces of the mating elements Although positive clutches are not used to the extent of the frictional-contact type, they do have important applications where synchronous operation is required Devices such as linear drives or motor-operated screw drivers must run to definite limit and then come to a stop. An overload-release type of clutch is required for these applications. These clutches are usually spring-loaded so as to release at a predetermined toque. The clicking sound which is heard when the overload point is reached is considered to be a desirable signal An overrunning clutch or coupling permits the driven member of a machine to freewheel or overrun because the driver is stopped or because another source of power increase the speed of the driven. This type of clutch usually uses rollers or balls mounted between an outer sleeve and an inner member having flats machined around the periphery. Driving action is obtained by wedging the rollers between the sleeve and the flats. The clutch is therefore equivalent to a pawl and ratchet with an infinite number of teeth Magnetic fluid clutch or brake is a relatively new development which has two parallel magnetic plates. Between these plates is a lubricated magnetic powder mixture. An electromagnetic coil is inserted somewhere in the magnetic circuit. By varying the excitation to this coil, the shearing strength of the magnetic fluid mixture may be accurately controlled. Thus any condition from a full slip to a frozen lockup may be obtainedIntroduciton of MachiningHave a shape as a processing method, all machining process for the production of the most commonly used and most important method. Machining process is a process generated shape, in this process, Drivers device on the workpiece material to be in the form of chip removal. Although in some occasions, the workpiece under no circumstances, the use of mobile equipment to the processing, However, the majorityof the machining is not only supporting the workpiece also supporting tools and equipment to complete. Machining know the process has two aspects. Small group of low-cost production. For casting, forging and machining pressure, every production of a specific shape of the workpiece, even a spare parts, almost have to spend the high cost of processing. Welding to rely on the shape of the structure, to a large extent, depend on effective in the form of raw materials. In general, through the use of expensive equipment and without special processing conditions, can be almost any type of raw materials, mechanical processing to convert the raw materials processed into the arbitrary shape of the structure, as long as the external dimensions large enough, it is possible. Because of a production of spare parts, even when the parts and structure of the production batch sizes are suitable for the original casting, Forging or pressure processing to produce, but usually prefer machining Strict precision and good surface finish, Machining the second purpose is the establishment of the high precision and surface finish possible on the basis of Many parts, if any other means of production belonging to the largescale production, Well Machining is a low-tolerance and can meet the requirements of small batch production. Besides, many parts on the production and processing of coarse process to improve its general shape of the surface. It is only necessary precision and choose only the surface machining. For instance, thread, in addition to mechanical processing, almost no other processing method for processing. Another example is the blacksmith pieces keyhole processing, as well as training to be conducted immediately after the mechanical completion of the processing.Primary Cutting ParametersCutting the work piece and tool based on the basic relationship between the following four elements to fully describe : the tool geometry, cutting speed, feed rate, depth and penetration of a cutting tool. Cutting Tools must be of a suitable material to manufacture, it must be strong, tough hard and wear-resistant. Tool geometry - to the tip plane and cutter angle characteristics - for each cutting process must be correct. Cutting speed is the cutting edge of work piece surface rate, it is inches per minute to show. In order to effectively processing, and cutting speed must adapt to the level of specific parts - with knives. Generally, the more hard work piece materialthe lower the rate. Progressive Tool to speed is cut into the work piece speed. If the work piece or tool for rotating movement, feed rate per round over the number of inches to the measurement. When the work piece or tool for reciprocating movement and feed rate on each trip through the measurement of inches. Generally, in other conditions, feed rate and cutting speed is inversely proportional to。 Depth of penetration of a cutting tool - to inches dollars - is the tool to the work piece distance. Rotary cutting it to the chip or equal to the width of the linear cutting chip thickness. Rough than finishing, deeper penetration of a cutting tool depth.Wears of Cutting To01We already have been processed and the rattle of the countless cracks edge tool we learn that tool wear are basically three forms : flank wear, the former flank wear and V-Notch wear. Flank wear occurred in both the main blade occurred vice blade On the main blade, shoulder removed because most metal chip mandate, which resulted in an increase cutting force and cutting temperature increase, If not allowed to check, That could lead to the work piece and the tool vibration and provide for efficient cutting conditions may no longer exist. Vicebladed on, it is determined work piece dimensions and surface finish. Flank wear size of the possible failure of the product and surface finish are also inferior. In most actual cutting conditions, as the principal in the former first deputy flank before flank wear, wear arrival enough, Tool will be effective, the results are made unqualified partsAs Tool stress on the surface uneven, chip and flank before sliding contact zone between stress, in sliding contact the start of the largest, and in contact with the tail of zero, so abrasive wear in the region occurred. This is because the card cutting edge than the nearby settlements near the more serious wear, and bladed chip due to the vicinity of the former flank and lost contact wear lighter. This resultsfrom a certain distance from the cutting edge of the surface formed before the knife point Ma pit, which is usually considered before wear. Under normal circumstances, this is wear cross-sectional shape of an arc. In many instances and for the actual cutting conditions, the former flank wear compared to flank wear light, Therefore flank wear more generally as a tool failure of scale signs. But because many authors have said in the cutting speed of the increase, Maeto surface temperature than the knife surface temperatures have risen faster. but because any form of wear rate is essentially temperature changes by the significant impact. Therefore, the former usually wear in high-speed cutting happen The main tool flank wear the tail is not processed with the work piece surface in contact, Therefore flank wear than wear along with the ends more visible, which is the most common. This is because the local effect, which is as rough on the surface has hardened layer, This effect is by cutting in front of the hardening of t he work piece. Not just cutting, and as oxidation skin, the blade local high temperature will also cause this effect. This partial wear normally referred to as pit sexual wear, but occasionally it is very serious. Despite the emergence of the pits on the Cutting Tool nature is not meaningful impact, but often pits gradually become darker If cutting continued the case, then there cutter fracture crisis If any form of sexual allowed to wear, eventually wear rate increase obviously will be a tool to destroy failure destruction, that will no longer tool for cutting, cause the work piece scrapped, it is good, can cause serious damage machine. For various carbide cutting tools and for the various types of wear, in the event of a serious lapse, on the tool that has reached the end of the life cycle. But for various high-speed steel cutting tools and wear belonging to the non-uniformity of wear, has been found : When the wear and even to allow for a serious lapse, the most meaningful is that the tool can re-mill use, of course, In practice, cutting the time to use than the short time lapse. Several phenomena are one tool serious lapse began features : the most common is the sudden increase cutting force, appeared on the work piece burning ring patterns and an increase in noise.The Effect of Changes in Cutting Parameters on Cutting TemperaturesIn metal cutting operations heat is generated in the primary and secondary deformation zones and this results in a complex temperature distribution throughoutthe tool, workpiece and chip. A typical set of isotherms is shown in figure where it can be seen that, as could be expected, there is a very large temperature gradient throughout the width of the chip as the workpiece material is sheared in primary deformation and there is a further large temperature in the chip adjacent to theface as the chip is sheared in secondary deformation. This leads to a maximum cutting temperature a short distance up the face from the cutting edge and a small distance nto the chip ince virtually all the work done in metal cutting is converted into heat, it could e expected that factors which increase the power consumed per unit volume of metal emoved will increase the cutting temperature. Thus an increase in the rake angle, ll other parameters remaining constant, will reduce the power per unit volume of etal removed and cutting temperatures will reduce. When considering increase in ndeformed chip thickness and cutting speed the situation is more comples. An ncrease in undeformed chip thickness and cutting speed the situation is more complex n increase in undeformed chip thickness tends to be a scale effect where the amounts f heat which pass to the workpiece, the tool and chip remain in fixed proportions nd the changes in cutting temperature tend to be small. Increase in cutting speed, owever, reduce the amount of heat which passes into the workpiece and this increase he temperature rise of the chip in primary deformation. Further, the secondary eformation zone tends to be smaller and this has the effect of increasing thetemperatures in this zone. Other changes in cutting parameters have virtually no ffect on the power consumed per unit volume of metal removed and consequently have irtually no effect on the power consumed per unit volume of metal removed and onsequently have virtually no effect on the cutting temperatures. Since it has been hown that even small changes in cutting temperature have a significant effect on ool wear rate, it is appropriate to indicate how cutting temperatures can be ssessed from cutting data he most direct and accurate method for measuring temperatures in high-speed-steel utting tools is that of Wright&Trent which also yields detailed information ontemperature distributions in high-speed-steel tools which relates microstructural hanges to thermal history .Trent has described measurements of cutting temperatures and temperature istributions for high-speed-steel tools when machining a wide range of workpiecematerials. This technique has been further developed by using scanning electronmicroscopy to study fine-scale microstructural changes srising from over temperingof the tempered martensitic matrix of various high-speed-steels. This technique hasalso been used to study temperature distributions in both high-speed-steel singlepoint turning tools and twist drills.Automatic Fixture DesignAssembly equipment used in the traditional synchronous fixture put parts of the ixture mobile center, to ensure that components from transmission from the plane r equipment plate placed after removal has been scheduled for position. However n certain applications, mobile mandatory parts of the center line, it may cause arts or equipment damage. When parts vulnerability and may lead to a small vibration bandoned, or when their location is by machine spindle or specific to die, Tolerance gain or when the request is a sophisticated, it would rather let the fixture toadapt to the location of parts, and not the contrary. For these tasks, Elyria, Ohio, he company has developed Zaytran a general non-functional data synchronization West ategory FLEXIBILITY fixture. Fixture because of the interaction and ynchronization devices is independent, The synchronous device can use ophisticated equipment to replace the slip without affecting the fixture force ixture specification range from 0. 2 inches itinerary, 5 pounds clamping force of he six-inch trip, 400-inch clamping force. he characteristics of modern production is becoming smaller and smaller quantities nd product specifications biggest changes. Therefore, in the final stages of roduction, assembly of production, quantity and product design changes appear to e particularly vulnerable. This situation is forcing many companies to make greater fforts to rationalize the extensive reform and the previously mentioned case of ssembly automati flexible fixture behind the rapid development of flexible transport and andling devices, such as backward in the development of industrial robots, it is till expected to increase the flexibility fixture. In fact the important fixture evices - the production of the devices to strengthen investment on the fixtureso that more flexibility in economic support holders. According to their flexibility and fixture can be divided into : special fixture, he fixture combinations, the standard fixture, high flexible fixture. Forms can transform the structure of the flexible fixture can be installed with the change of structure components (such as needle cheek plate, Multi-chip components and flake cheek plate) , a non-standard work piece gripper or clamping elements (for example : commencement standard with a clamping fixture and mobile components fixture supporting documents) , or with ceramic or hardening of the intermediary substances (such as : Mobile particle bed fixture and heat fixture tight fixture) To production, the parts were secured fixture, the need to generate clamping function, its fixture with a few unrelated to the sexual submissive steps. According to the processing was part of that foundation and working characteristics to determine the work piece fixture in the required position, then need to select some stability flat combination, These constitute a stable plane was fixed in the work piece fixture set position on the clampprofile structure, all balanced and torque, it has also ensured that the work features close to the work piece. Finally, it must be calculated and adjusted, assembly or disassembly be standard fixture components required for the position, so that the work piece firmly by clamping fixture in China. In accordance with this procedure, the outline fixture structure and equipped with the planning and recording process can be automated control Structural modeling task is to produce some stable flat combination, Thus, these plane of the work pieces clamping force and will fixture stability. According to usual practice, this task can be human-machine dialogue that is almost completely automated way to completion. A man-machine dialogue that is automated fixture structure modeling to determine the merits can be conducted in an organized and planning fixture design, reduce the amount of the design, shortening the study period and better distribution of work conditions. In short, can be successfully achieved significantly improve fixture efficiency and effectiveness. Fully prepared to structure programs and the number of material circumstances, thecompletion of the first successful assembly can save up t0 60Yo of the time.译文:轴和齿轮的设计及应用摘要:在传统机械和现代机械中齿轮和轴的重要地位是不可动摇的。齿轮和轴主要安装在主轴箱来传递力的方向。通过加工制造它们可以分为许多的型号,分别用于许多的场合。所以我们对齿轮和轴的了解和认识必须是多层次多方位的。关键词:齿轮;轴在直齿圆柱齿轮的受力分析中,是假定各力作用在单一平面的。我们将研究作用力具有三维坐标的齿轮。因此,在斜齿轮的情况下,其齿向是不平行于回转轴线的。而在锥齿轮的情况中各回转轴线互相不平行。像我们要讨论的那样,尚有其他道理需要学习,掌握。斜齿轮用于传递平行轴之间的运动。倾斜角度每个齿轮都一样,但一个必须右旋斜齿,而另一个必须是左旋斜齿。齿的形状是一溅开线螺旋面。如果一张被剪成平行四边形(矩形)的纸张包围在齿轮圆柱体上,纸上印出齿的角刃边就变成斜线。如果我展开这张纸,在血角刃边上的每一个点就发牛一渐开线曲线。直齿网柱齿轮轮齿的初始接触处是跨过整个齿面而伸展开来的线。斜齿轮轮齿的初始接触是一点,当齿进入更多的啮合时,它就变成线。在直齿网柱齿轮中,接触是平行于回转轴线的。在斜齿轮中,该先是跨过齿面的对角线。它是齿轮逐渐进行啮合并平稳的从一个卤到另一个齿传递运动,那样就使斜齿轮具有高速重载下平稳传递运动的能力。斜齿轮使轴的轴承承受径向和轴向力。当轴向推力变的大了或由于别的原因而产生某些影响时,那就可以使用人字齿轮。双斜齿轮(人字齿轮)是与反向的并排地装在同一轴上的两个斜齿轮等效。他们产生相反的轴向推力作用,这样就消除了轴向推力。当两个或更多个单向齿斜齿轮被在同一轴上时,齿轮的齿向应作选择,以便产生最小的轴向推力。交错轴斜齿轮或螺旋齿轮,他们是轴中心线既不相交也不平行。交错轴斜齿轮的齿彼此之间发生点接触,它随着齿轮的磨合而变成线接触。因此他们只能传递小的载荷和主要用于仪器设备中,而且肯定不能推荐在动力传动中使用。交错轴斜齿轮与斜齿轮之间在被安装后互相捏合之前是没有任何区别的。它们是以同样的方法进行制造。一对相啮合的交错轴斜齿轮通常具有同样的齿向,即左旋主动齿轮跟右旋从动齿轮相啮合。在交错轴斜齿设计中,当该齿的斜角相等时所产生滑移速度最小。然而当该齿的斜角不相等时,如果两个齿轮具有相同齿向的话,大斜角齿轮应用作丰动齿轮。蜗轮与交错轴斜齿轮相似。小齿轮即蜗杆具有较小的齿数,通常是一到四齿,由于它们完全缠绕在节圆柱上,因此它们被称力螺纹齿。与其相配的齿轮叫做蜗轮,蜗轮不是真正的斜齿轮。蜗杆和蜗轮通常是用于向垂直相交轴之间的传动提供大的角速度减速比。蜗轮不是斜齿轮,因为其齿顶面做成巾凹形状以适配蜗杆曲率,目的是要形成线接触而不是点接触。然而蜗杆蜗轮传动机构中存在齿间有较大滑移速度的缺点,正像交错轴斜齿轮那样。蜗杆蜗轮机构有单包围和双包围机构。单包围机构就是蜗轮包裹着蜗杆的一种机构。当然,如果每个构件各自局部地包围着对方的蜗轮机构就是双包围蜗轮蜗杆机构。着两者之间的重要区别是,在双包围蜗轮组的轮齿间有面接触,而在单包围的蜗轮组的轮齿间有线接触。一个装置中的蜗杆和蜗轮正像交错轴斜齿轮那样具有相同的齿向,但是其斜齿齿角的角度是极不相同的。蜗杆上的齿斜角度通常很大,而蜗轮上的则极小,因此习惯常规定蜗杆的导角,那就是蜗杆齿斜角的余角;也规定了蜗轮上的齿斜角,该两角之和就等于90度的轴线交角。当齿轮要用来传递相交轴之间的运动时,就需要某种形式的锥齿轮。虽然锥齿轮通常制造成能构成90度轴交角,但它们也可产牛任何角度的轴交角。轮齿可以铸出,铣制或滚切加工。仅就滚齿而言就可达一级精度。在典型的锥齿轮安装中,其中一个锥齿轮常常装于支承的外侧。这意味着轴的挠曲情况更加明显而使在轮齿接触上具有更大的影响。另外一个难题,发生在难于预示锥齿轮轮齿上的应力,实际上是由于齿轮被加工成锥状造成的。直齿锥齿轮易于设计且制造简单,如果他们安装的精密而确定,在运转中会产生良好效果。然而在直齿网柱齿轮情况下,在节线速度较高时,他们将发出噪音。在这些情况下,螺旋锥齿轮比直齿轮能产生平稳的多的啮合作用,因此碰到高速运转的场合那是很有用的。当在汽车的各种不同用途中,有一个带偏心轴的类似锥齿轮的机构,那是常常所希望的。这样的齿轮机构叫做准双曲面齿轮机构,因为它们的节面是双曲回转面。这种齿轮之间的轮齿作用是沿着一根直线上产生滚动与滑动相结合的运动并和蜗轮蜗杆的轮齿作用有着更多的共同之处。轴是一种转动或静止的杆件。通常有圆形横截面。在轴上安装像齿轮,皮带轮,飞轮,曲柄,链轮和其他动力传递零件。轴能够承受弯曲,拉伸,压缩或扭转载荷,这些力相结合时,人们期望找到静强度和疲劳强度作为设计的重要依据。因为单根轴可以承受静压力,变应力和交变应力,所有的应力作用都是同时发生的。“轴”这个词包含着多种含义,例如心轴和主轴。心轴也是轴,既可以旋转也可以静止的轴,但不承受扭转载荷。短的转动轴常常被称为主轴。当轴的弯曲或扭转变形必需被限制于很小的范围内时,其尺寸应根据变形来确定,然后进行应力分祈。因此,如若轴要做得有足够的刚度以致挠曲不太大,那么合应力符合安全要求那是完全可能的。但决不意味着设计者要保证;它们是安全的,轴几乎总是要进行计算的,知道它们是处在可以接受的允许的极限以内。因之,设计者无论何时,动力传递零件,如齿轮或皮带轮都应该设置在靠近支持轴承附近。这就减低了弯矩,因而减小变形和弯曲应力。虽然来自MHG方法在设计轴中难于应用,但它可能用来准确预示实际失效。这样,它是一个检验已经设计好了的轴的或者发现具体轴在运转中发生损坏原因的好方法。进而有着大量的关于设计的问题,其中由于别的考虑例如刚度考虑,尺寸已得到较好的限制。设计者去查找关于圆角尺寸、热处理、表面光洁度和是否要进行喷丸处理等资料,那真正的唯一的需要是实现所要求的寿命和可靠性。由于他们的功能相似,将离合器和制动器一起处理。简化摩擦离合器或制动器的动力学表达式中,各自以角速度w1和w2运动的两个转动惯量II和12,在制动器情况下其中之一可能是零,由于接上离合器或制动器而最终要导致同样的速度。因为两个构件开始以不同速度运转而使打滑发生了,并且在作用过程中能量散失,结果导致温升。在分析这些装置的性能时,我们应注意到作用力,传递的扭矩,散失的能量和温升。所传递的扭矩关系到作用力,摩擦系教和离合器或制动器的几何状况。这是一个静力学问题。这个问题将必须对每个几何机构形状分别进行研究。然而温升与能量损失有关,研究温升可能与制动器或离合器的类型无关。因为几何形状的重要性是散热表面。各种各样的离合器和制动器可作如下分类:1轮缘式内膨胀制冻块;2轮缘式外接触制动块;3条带式;4盘型或轴向式;5圆锥型;6混合式。分析摩擦离合器和制动器的各种形式都应用一般的同样的程序,下面的步骤是必需的:1假定或确定摩擦表面上压力分布;2找出最大压力和任一点处压力之间的关系3应用静平衡条件去找寻(a)作用力; (b)扭矩;(c)支反力。混合式离合器包括几个类型,例如强制接触离合器、超载释放保护离合器、超越离合器、磁液离合器等等。强制接触离合器由一个变位杆和两个夹爪组成。各种强制接触离合器之间最大的区别与夹爪的设计有关。为了在结合过程中给变换作用予较长时间周期,夹爪可以是棘轮式的,螺旋型或齿型的。有时使用许多齿或夹爪。他们可能在圆周面上加:1。齿,以便他们以圆柱周向配合来结合或者在配合元件的端面上加工齿来结合。虽然强制离合器不像摩擦接触离合器用的那么广泛,但它们确实有很重要的运用。离合器需要同步操作。有些装置例如线性驱动装置或电机操作螺杆驱动器必须运行到一定的限度然后停顿下来。为着这些用途就需要超载释放保护离合器。这些离合器通常用弹簧加载,以使得在达到预定的力矩时释放。当到达超载点时听到的“喀嚓”声就被认定为是所希望的信号声。超越离合器或连轴器允许机器的被动构件“空转”或“超越”,因为主动驱动件停顿了或者因为另一个动力源使被动构件增加了速度。这种离合器通常使用装在外套筒和内轴件之间的滚子或滚珠。该内轴件,在它的周边加工了数个平面。驱动作用是靠在套筒和平面乏间契入的滚子来获得。因此该离合器与具有一定数量齿的棘轮棘爪机构等效。磁液离合器或制动器相对来说是一个新的发展,它们具有两平行的磁极板。这些磁极板之间有磁粉混合物润滑。电磁线圈被装入磁路中的某处。借助激励该线圈,磁液混合物的剪切强度可被精确的控制。这样从充分滑移到完全锁住的任何状态都可以获得。加工基础作为产生形状的一种加工方法,机械加工是所有制造过程中最普遍使用
- 温馨提示:
1: 本站所有资源如无特殊说明,都需要本地电脑安装OFFICE2007和PDF阅读器。图纸软件为CAD,CAXA,PROE,UG,SolidWorks等.压缩文件请下载最新的WinRAR软件解压。
2: 本站的文档不包含任何第三方提供的附件图纸等,如果需要附件,请联系上传者。文件的所有权益归上传用户所有。
3.本站RAR压缩包中若带图纸,网页内容里面会有图纸预览,若没有图纸预览就没有图纸。
4. 未经权益所有人同意不得将文件中的内容挪作商业或盈利用途。
5. 人人文库网仅提供信息存储空间,仅对用户上传内容的表现方式做保护处理,对用户上传分享的文档内容本身不做任何修改或编辑,并不能对任何下载内容负责。
6. 下载文件中如有侵权或不适当内容,请与我们联系,我们立即纠正。
7. 本站不保证下载资源的准确性、安全性和完整性, 同时也不承担用户因使用这些下载资源对自己和他人造成任何形式的伤害或损失。

人人文库网所有资源均是用户自行上传分享,仅供网友学习交流,未经上传用户书面授权,请勿作他用。
 川公网安备: 51019002004831号