资源目录

压缩包内文档预览:
编号:421920
类型:共享资源
大小:3.18MB
格式:RAR
上传时间:2015-03-30
上传人:上***
认证信息
个人认证
高**(实名认证)
江苏
IP属地:江苏
40
积分
- 关 键 词:
-
超声波
深孔钻床
设计
图纸
超声波深孔钻床
- 资源描述:
-
超声波深孔钻床设计
51页 15000字数+说明书+任务书+外文翻译+7张CAD图纸【详情如下】
主轴.dwg
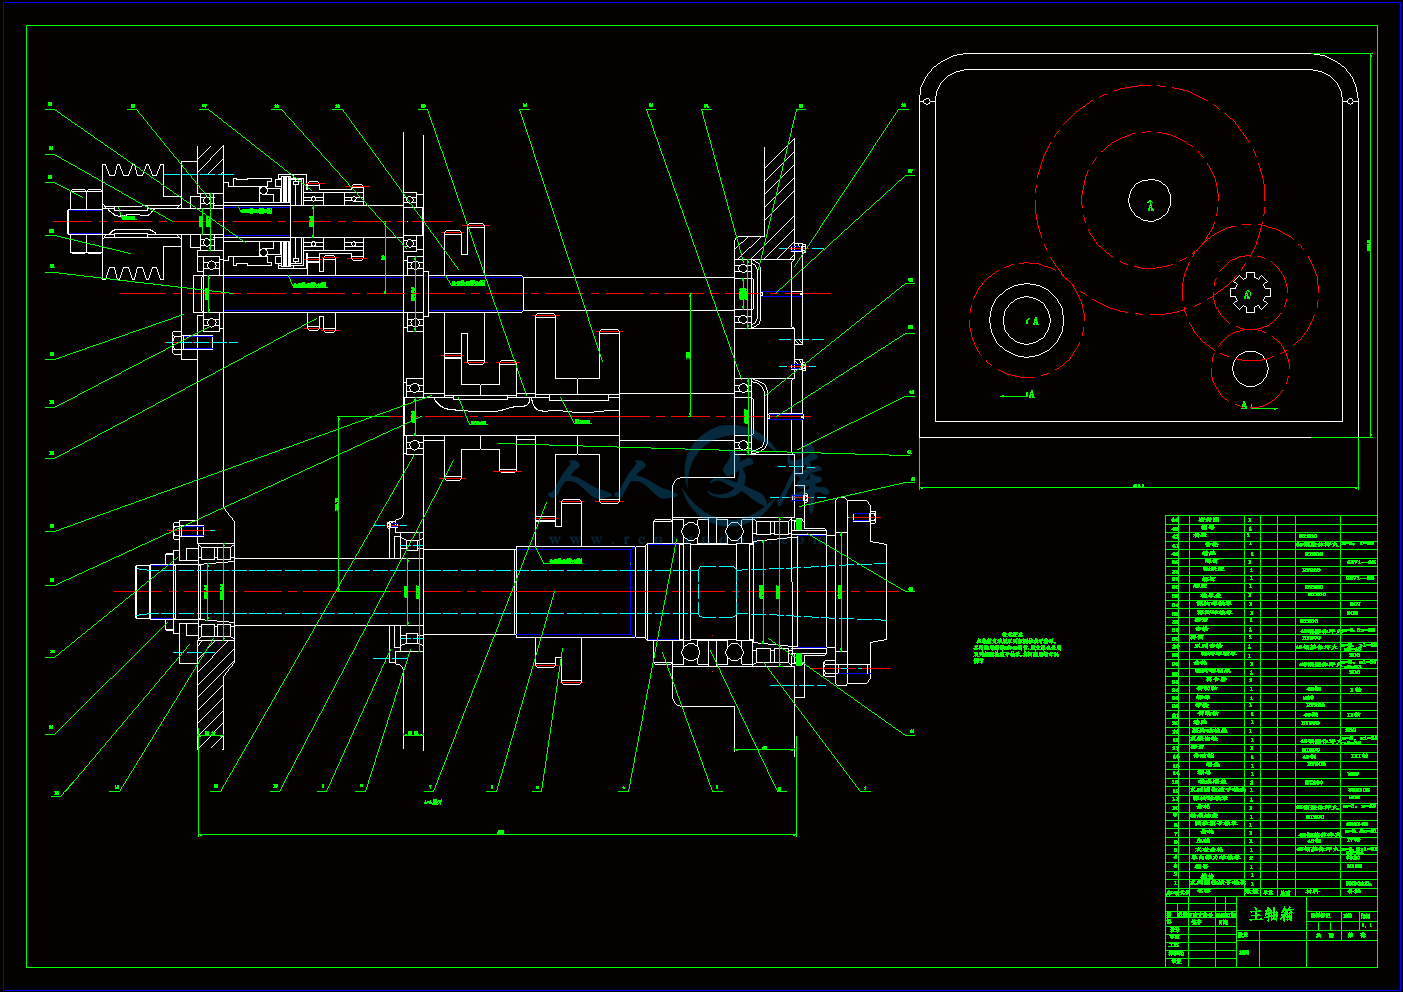
主轴箱.dwg
外文翻译--用表面反应来测量圆柱形钢SCM440的磨削力和表面粗糙度的方法.doc
封面.doc
带轮.dwg
机床装配A0.dwg
机械专业毕业实习报告.doc
超声波深孔钻床设计说明书.doc
轴I.dwg
齿轮.dwg
齿轮2.dwg

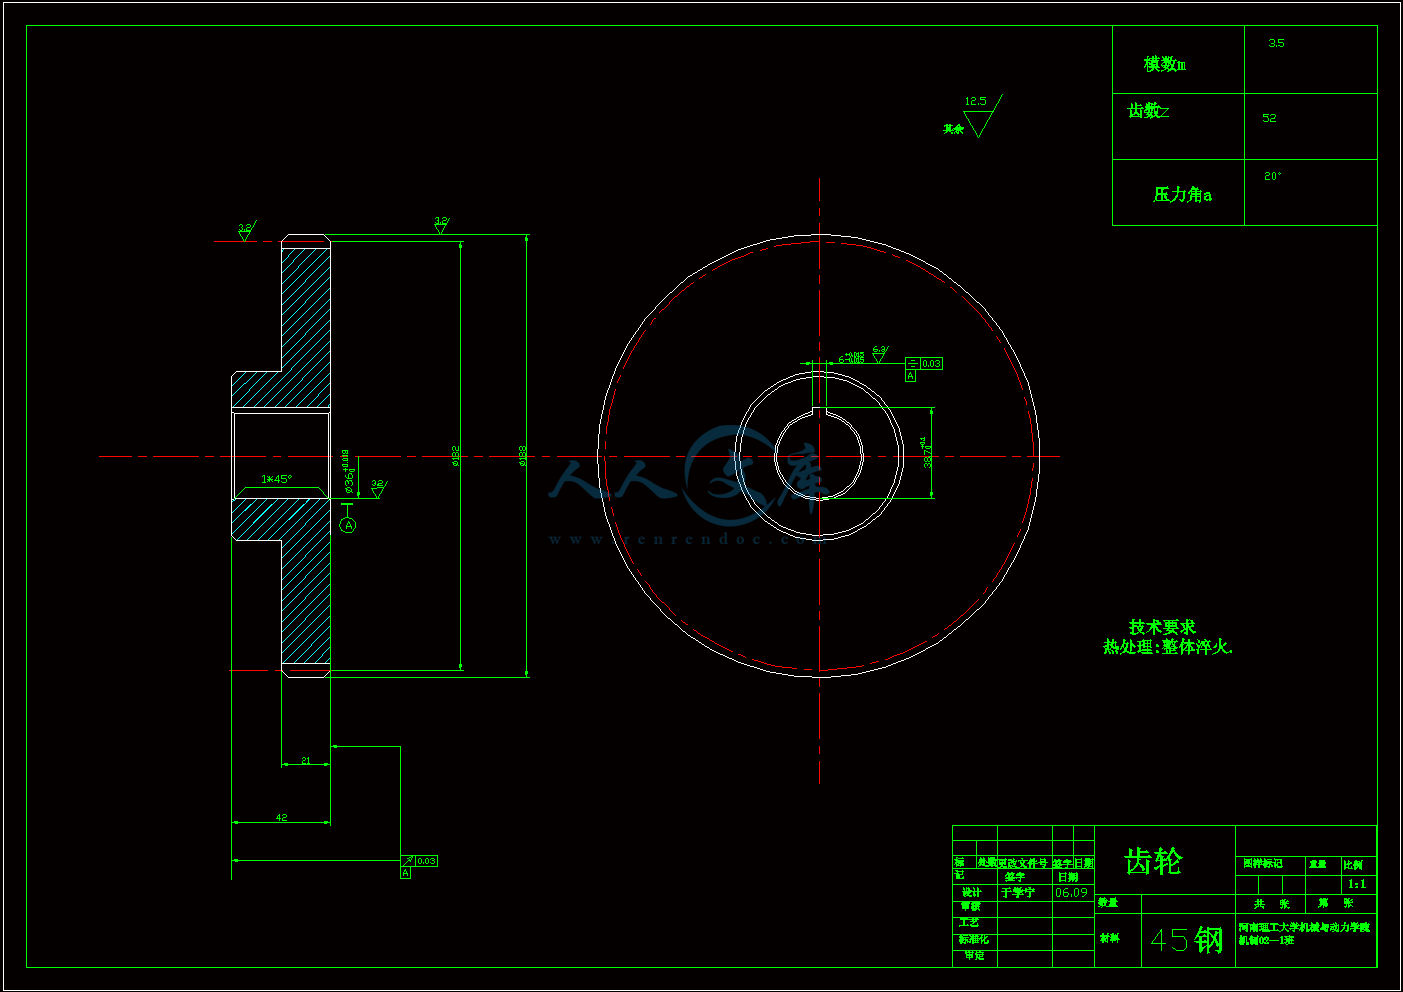
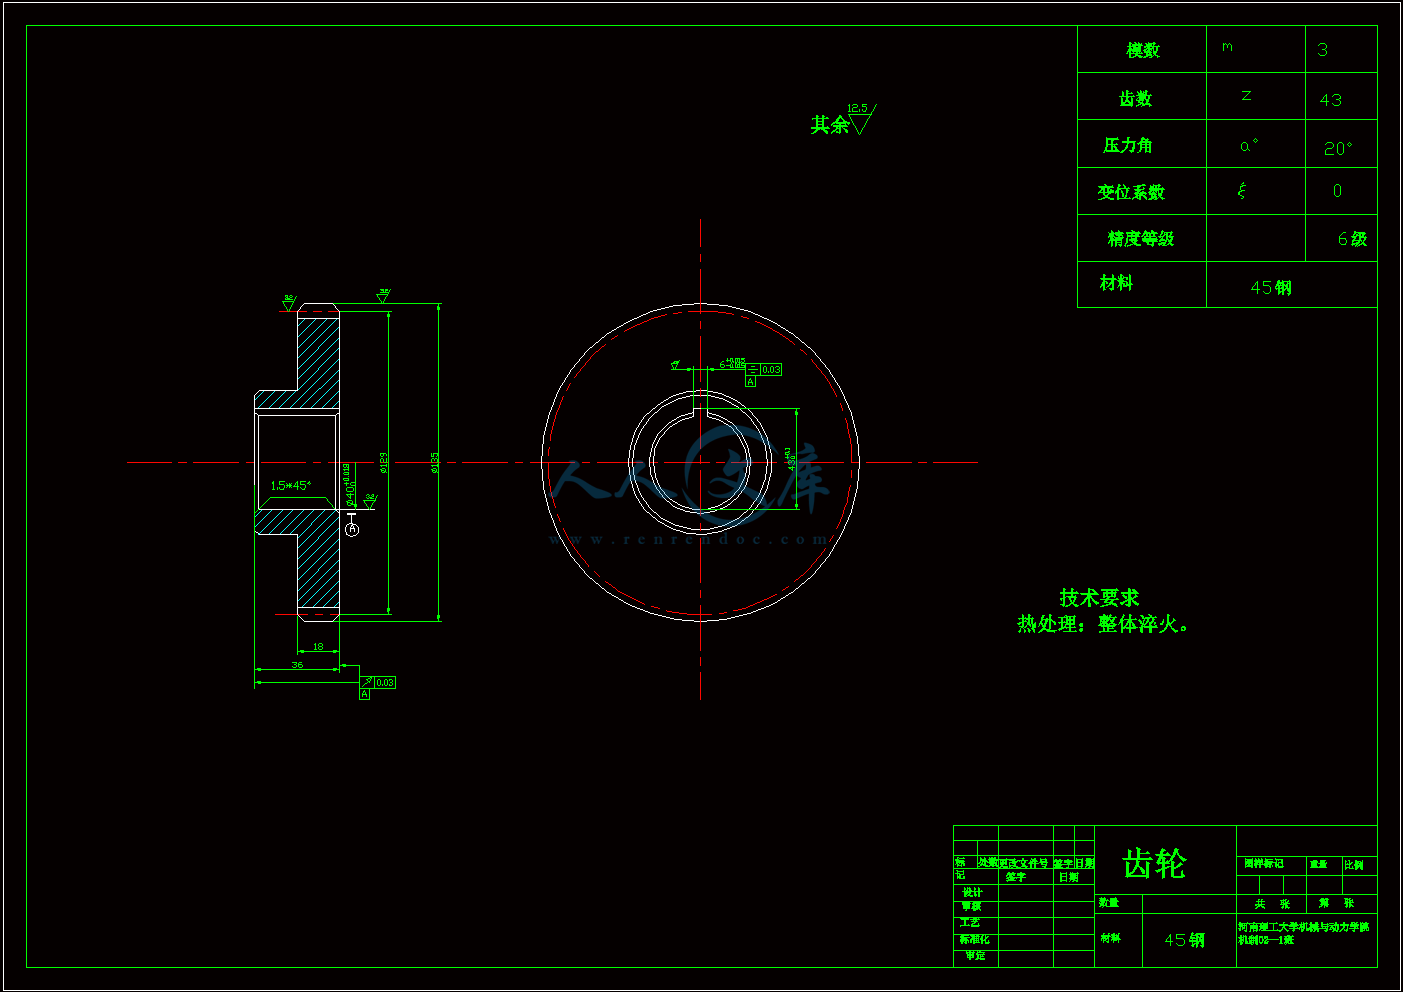
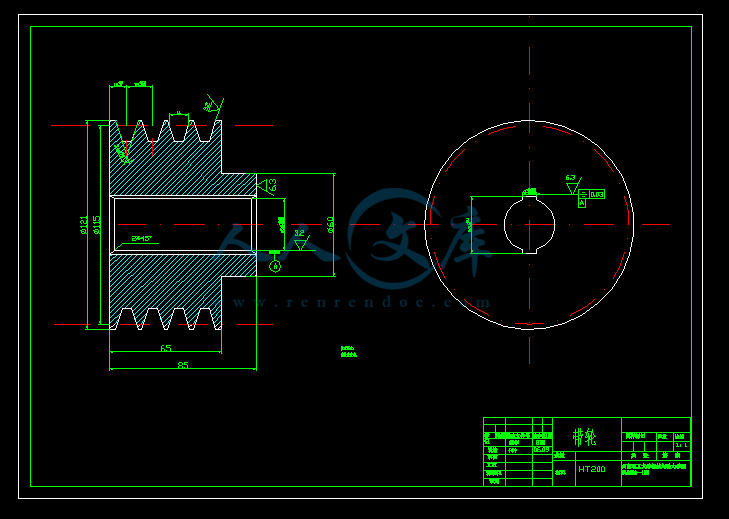



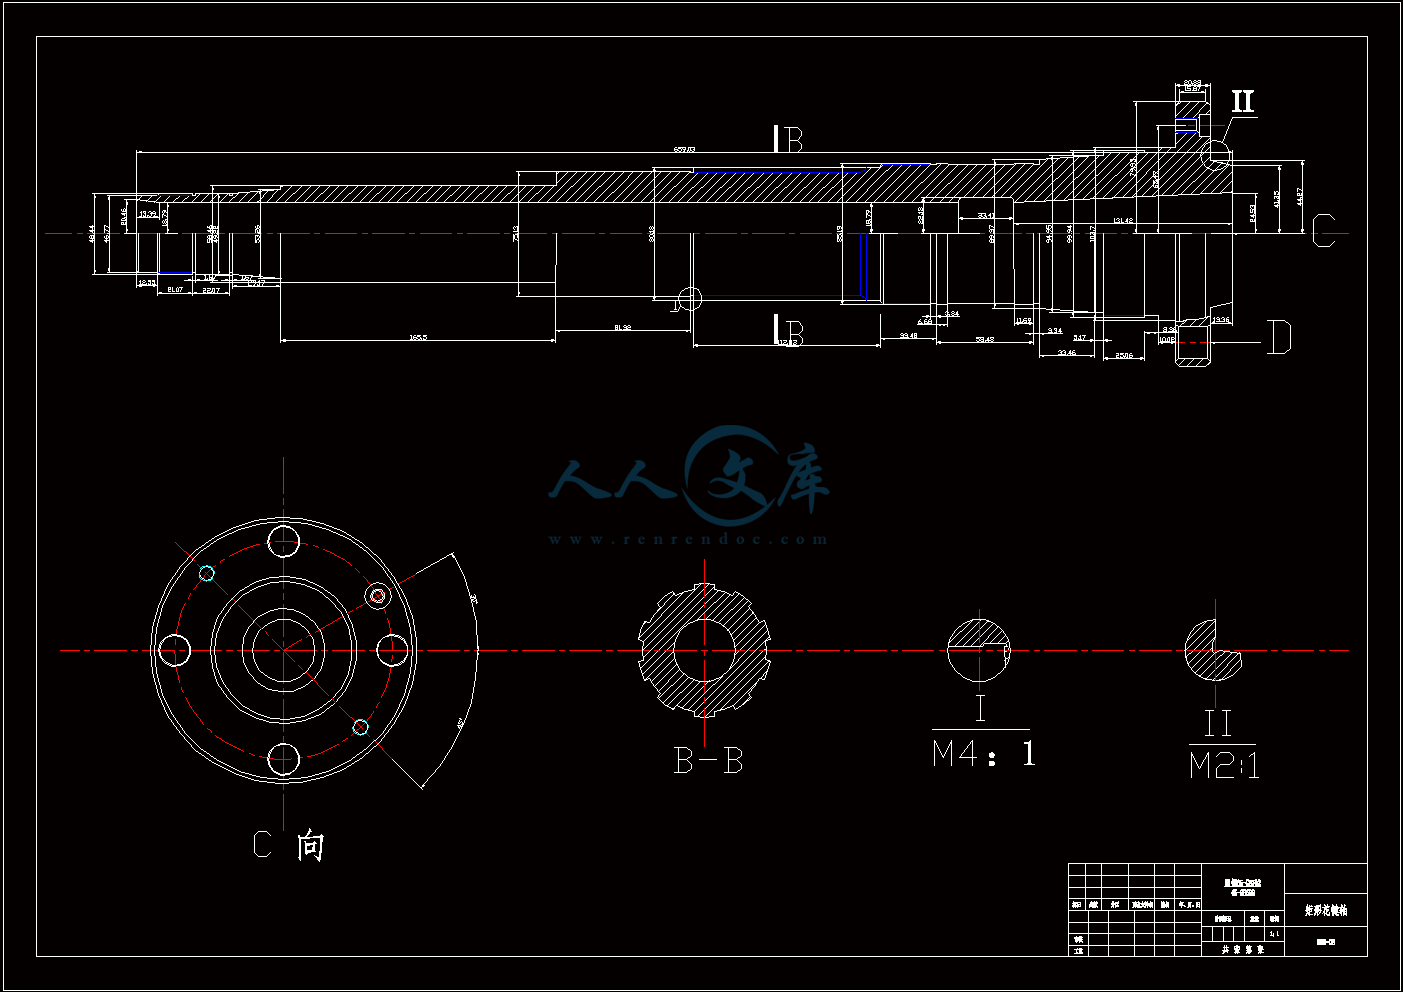
目 录
前言1
1.超声和深孔加工技术的发展趋势3
1.1 超声振动加工技术发展趋势3
1.2 深孔加工发展状况9
2.机床主要参数的确定12
2.1 电机功率的确定12
2.2 主运动参数的确定12
2.3 标准公比值和标准转速数列14
3.确定结构式和绘制转速图18
3.1 求级数z18
3.2 确定结构式18
3.3 绘制转速图19
4.确定各级传动副齿轮的齿数21
4.1 确定齿轮的齿数21
4.2 验算传动比25
4.3 各轴及齿轮的计算转速的确定26
5.传动零件的初步计算29
5.1 传动轴直径初定29
5.2 主轴主要结构参数的确定30
5.3 齿轮模数计算和齿轮中心距的计算30
5.4 皮带的相关计算31
6.主要零件的验算36
6.1 齿轮的强度验算36
6.2 主轴的验算37
6.3 花键的验算43
致 谢46
参考文献:47
摘 要
该设计是设计一超声深孔钻床,利用超声震动加工深孔。振动切削与普通切削相比,在降低切削力和切削热方面有明显的效果,尤其在难加工材料的加工和精密加工中,振动切削具有普通切削无法比拟的工艺效果。因此,作为精密机械加工和难加工材料加工的一种新技术,振动切削已经逐步渗透到多种机械加工领域,振动钻削就是比较成功的应用实例。
振动钻削,即在钻头(或工件)正常工作进给的同时,对钻头(或工件)施加某种有规律的振动,使钻头在振动中切削,形成脉冲式的切削力波形,使切削用量按某种规律变化,以达到改善切削效能的目的。根据实际加工的需要,适当选择振动参数(频率v,振幅A以及频率v与工件转速n的比例关系),可以控制切屑的大小和形状,得到满意的切屑,避免切屑堵塞。可提高生产效率几倍到十几倍,提高加工精度1—2级,且加工表面质量也有较大改善。
超声振动深孔加工钻床是利用超声振动系统对钻头施加振动,使钻头在振动中切削,使切削用两按规律变化,从而达到改善切削效能的目的。
关键词:超声振动,深孔加工,枪钻车床。
前言
毕业设计是学生学完大学教学计划所规定的全部基础课和专业课后,综合运用所学的知识,与实践相结合的重要实践性教学环节。它是大学生活最后一个里程碑,是四年大学学习的一个总结,是我们结束学生时代,踏入社会,走上工作岗位的必由之路,是对我们工作能力的一次综合性检验。
1.毕业设计的目的
通过本次毕业设计,使达到以下几个效果:
巩固、扩大、深化学生以前所学的基础和专业知识;
培养学生综合分析、理论联系实际的能力;
培养学生调查研究、正确熟练运用国家标准、规范、手册等工具书的能力;
锻炼进行设计计算、数据处理、编写技术文件、绘图等独立工作能力。
总之,通过毕业设计使学生建立正确的设计思想,初步掌握解决本专业工程技术问题的方法和手段,从而使学生受到一次工程师的基本训练。
2、毕业设计的主要内容和要求
本次毕业设计的主要内容是设计超声深孔钻床的主轴箱。具体设计内容和要求如下:
调查使用部门对机床的具体要求,现在使用的加工方法;收集并分析国内外同类型机床的先进技术、发展趋势以及有关的科技动向;调查制造长的设备、技术能力和生产经验等。
超声深孔钻床主轴箱的设计主要是设计主轴、传动轴及传动齿轮,确定各部分的相互关系;拟订总体设计方案,根据总体设计方案,选择通用部件,并绘制装配图和各零件的零件图;
进行运动计算和动力计算,绘制转速图;
- 内容简介:
-
河南理工大学本科毕业设计(论文)说明书用表面反应来测量圆柱形钢SCM440的磨削力和表面粗糙度的方法 摘要:这项研究的目的是为了有效的分析在磨削过程中的磨削力和表面粗糙度圆柱形工件,材料是钢SCM440,l利用表面反应的方法。传感器用来测量主轴驱动马达的电力,通过磨削参数的变化来测量和分析粗糙度。用实验数据建立一个模型,预测磨削力和粗糙度。通过单独的改变磨削率绘制数学模型的轮廓线。在工业中测量磨削条件是很容易的。关键词:磨削力,表面粗糙度,圆柱形磨棒,表面反应方法 简介:不少实验更多的说明充分和有效的磨削过程是与车削和铣削很不同。由于砂轮表面的不均匀,每次磨削工件时是不一样的。尽管努力的尝试,但是砂轮和工件间的磨削过程还没搞清楚。所以绘制了许多统计模型和计算机模型。不但这些模型很复杂,很难描述磨削过程,而且增加了优化磨削的难度,很难验证磨削参数之间的相互影响和磨削结果。 在过去的几十年中Malkin调查和研究了磨削监测结果和磨削现象如切削机理、磨削能以及磨削参数之间的相互影响。在他的研究中,那是很明显的:切削机理很复杂,很难重复磨削过程而获得相同的磨削条件。Shaji刊登了Taguchi方法。用石墨作润滑剂估算磨削表面的参数。影响切削表面参数的参数如砂轮速度,工件转速,切削深度,打磨模型还有切削力被统计。Kwak先生用Taguchi方法显示了不同的切削参数引起磨削表面几何误差。同样用表面反映方法也可以估算磨削表面的几何误差。 在本论文中,用圆柱形钢SCM440作磨削棒料,用表面反映方法来预测切削力和表面粗糙度和帮助选择磨削条件。2.文献评论 2.1圆柱形磨料切屑形状由于砂轮磨削表面无规则的分布着不规则的磨料,所以磨削机理很复杂,很难能清楚。为了方便研究,假设圆柱形棒料接触点放大,如图1所示。从切屑的形状看,在磨削过程中,砂轮的磨削面与工件的接触点,开始与C点接触,然后沿着弧CD(接触长度)。所以在从C点到I点的过程中切削厚逐渐增加,并在I点达到最大值。在从I点到D点的过程中切削厚又逐渐减小。切屑层的最大厚(g)等于HI长,用公式表示为:在公式中,d表示工件直径,D表示砂轮直径,Z表示切削深度。切削厚的最大值还与平均断削点之间的距离(a)和速比有关。砂轮和工件间接触的弧长被近似为一条直线,公式为: 进给速度f表示工件每旋转一周而砂轮进给的长度,切向切削力Ft和切削功率P0可以用如下公式表示:从公式3中,可以很明显的看出切向力影响圆柱形棒料的磨削参数。 2.2 霍耳效应和磨削力的测量 通常测量磨削过程的磨削力在工业中是用霍耳效应传感器。霍耳效应传感器的原理是霍耳效应。霍耳效应是Dr Edwin Hall在1879年发现的。 通过磨削驱动马达的的电流会产生一个磁场。如果把这个电流通过霍耳传感器,在洛伦兹力的作用下在传感器内产生电压,这个电压叫霍耳电压,电压的大小与通过传感器的电流成比例。所以,测量霍耳电压就可以知道通过驱动马达的电流。2.3.表面反映方法 表面反映法是最佳获得希望输出结果的方法之一。在这种方法中,期望输出值可以用带磨削参数的函数表示。这个函数包括磨削参数被称为表面反映如图2所示。为了建立表面反映模型,首先函数必须化成待定系数多项式。这些待定系数可以有实验确定。 由于表面反映函数涉及到许多参数和要进行许多实验,所以待定系数多项式很复杂。另外改变待定系数计算函数值很难满足所有的实验结果。为了方便常用图形最小二乘逼近和运算规律进行复合计算。3.磨削实验和实验结果3.1实验装置 在这个实验中,圆柱形磨削工件作为实验装置,如图3所示。工件的材料是SCM440钢热处理后达到Rc60。砂轮的类型是在工业生产中常用的WA120KmV。砂轮的直径是320mm,宽度是38mm。 为了测量不断随磨削条件改变的磨削力,三个霍耳传感器被装在主轴电动机电源线上。12v的电源电压被通到霍耳传感器上通过DC电源。霍耳电压随着电流改变的灵敏度是0.4V/A。传感器的反应时间是0.5。用转换器和示波器可以连续的测量传感器的输出霍耳电压。进给方向的粗糙度可以直接测量。 磨削条件是,工件的转速分别是52,64和76rpm。切削深度分别是20,25,30和35进给速度分别是1.19,1.46和2.14m/min。砂轮的转速(1800rpm)保持不变。在所有的实验中用水混合冷却剂冷却。3.2磨削条件对磨削力的影响 在磨削过程消耗的功率等于通过马达的电流和马达电源电压的乘积。如图4所示磨削过程被分成A,B,C和D四个典型的部分。区域A是不工作阶段,在这一区域砂轮和工件没有接触,但是由于砂轮的旋转而消耗功率。当砂轮和工件有一个接触点时(如图4中B区域所示)磨削消耗的功率是变化的,其改变量与磨削条件有关。为了方便在本论文中,总磨削功率等于驱动功率加净磨削功率。总磨削功率被称为磨削圆柱形工件整个过程所消耗的功率。正向进给之后,开始反向进给时是清磨阶段,即是C阶段。如图所示在C阶段时的磨削功率小于正向进给时的磨削功率,但是大于驱动功率。最后是D阶段,砂轮脱离工件完成切削过程。 图5显示的是在不同的工件旋转速度和进给速度下,切削深度对磨削功率的影响。磨削功率随着磨削深度的增加而增加(如图6所示)。尽管磨削功率的增大在不同地方是倾斜的,磨削功率也随着工件转速和进给速度的增加而增加。工件转速对磨削功率的影响如图7所示。在相同的工件转速下,磨削功率相差1.6倍由于磨削深度的不同。由此可见磨削深度对磨削功率的影响比进给速度对磨削功率的影响大。3.3 磨削条件对表面粗糙度的影响 图7显示的是磨削深度对工件切向的粗糙度影响。图7(a)显示的是在不同的磨削深度和工件转速下的粗糙度。由于磨削深度的改变,粗糙度的最大值()成比例的增加,但是粗糙度的平均高度的中心线改变很小,尤其是在进给速度为1.46m/min时。图7(b)显示的是在不同的磨削深度和进给速度下,粗糙度的平均高度的中心线的不同值。3.4 清磨对磨削功率和表面粗糙度的影响 为了确定清磨对磨削功率和表面粗糙度的影响进行实验。清磨对磨削功率和表面粗糙度的影响用图8表示。 由于清磨刚实现,还受磨削深度的影响,所以磨削功率保持最大值如图8所示。但是由于64th清磨的实现和不在受磨削深度的影响,磨削功率降到不工作阶段时的驱动功率。在这个阶段不在有切屑掉下。所以,在几个清磨之后,认为圆柱形磨削工件的材料不在掉下。粗糙度中心线的平均高度值如图8(b)所示。在6th清磨之后,表面粗糙度由于磨削深度的影响而不收敛成定植,必然原因在几个清磨之后,粗糙度很难达到理想值。这是个二难推论,所以要大量的减少清磨的比率,来改善表面粗糙度。由此,处理实际问题要很小心,尤其是选择磨削条件时。4.应用表面反映方法4.1表面反映模型的开发 象前面描述的那样,它能预测不同磨削条件下的磨削功率和表面粗糙度。首先,磨削结果用函数表示,该函数带有实用的磨削参数。在这个研究中,表面反映方法用来获得想要的结果。其次,表面反映模型用工件的转速v(rpm),进给速度f(m/min)和磨削深度d表示为:在公式中,表示磨削功率,表示表面粗糙度。如图9所示,不同的测量值和修正值用来开发表面反映模型公式(4)和(5)。象图9(a)所示,修正过的磨削功率非常的符合测量值。在图9(b)显示的修正过的粗糙度与测量值一致,尽管有一些偏差。 图10表示的是表面反映的一个例子。磨削功率的等高线随着工件转速和进给速度的改变而改变。在这个图中,磨削深度被定为25。在这个3D图中如图10(a)所示,磨削功率的增加是线形的,当工件转速和进给速度增加时。但是,从图10(b)中的等高线可以看出进给速度的影响比工件转速的影响大。工件转速不变时,进给的一个很小的改变都能影响磨削功率, 在图11所示的3D表面粗糙度图中显示粗糙度受工件转速和进给速度的影响比磨削功率大。粗糙度是占优势的当工件转速改变时。4.2 证实表面反映模型 在过去的几十年中,磨削条件的选择很大程度上需要专家去判断。对初学者和技术不熟练的工人来说是很困难的确定适合的磨削条件满足系统规定参数的要求,如粗糙度,切削率,和磨削功率。表面反映模型的建立使磨削条件的选择变的很容易。圆柱形工件每转的切削率可以用下面的公式表示: 式子6中,代表工件的平均直径。如果三个系统规定的参数用如(7)(9)所示的工业要求表示。选择的磨削参数很容易的满足所有的系统规定的参数。尽管这有点象常规的参数优化问题,用表面反映模型很容易的解除来。 一个例子用图12表示:工件转速定在64rpm。首先通过改变进给速度,磨削深度和系统规定的切削率范围绘制粗糙度的等高线,然后把磨削功率加进该等高线。现在磨削条件满足确定所有的系统规定参数,选择被系统参数线所封入的区域。5.结束语 在本论文中,用表面反映方法测量圆柱形SCM440钢磨削工件的磨削功率和表面粗糙度。霍耳传感器测量磨削过程主轴电动机的功率。 基于实验结果,磨削深度对磨削功率的影响比进给速度的影响大。另外,磨削深度对粗糙度的最大值的影响比对粗糙度平均中心线的高度影响大。进行一段时间清磨之后,磨削功率降低到驱动功率,但是不能获得期望的粗糙度。 用磨削参数和二次表面反映模型表示圆柱形工件的磨削功率和粗糙度。由于,磨削功率和粗糙度,利用工业要求和应用表面反映模型轮廓线很容易的可以选取磨削条件。References1 E.S. Lee, N.H. Kim, A study on the machining characteristics in the experimental plunge grinding using the current signal of the spindlemotor, International Journal of Machine Tools & Manufacture 41 (7)(2001) 937951.2 Z.B. Hou, R. Komanduri, On the mechanics of the grinding process,part 2-thermal analysis of fine grinding, International Journal ofMachine Tools & Manufacture 44 (23) (2004) 247270.3 T. Kuriyagawa, K. Syoji, H. Ahshita, Grinding temperature withincontact arc between wheel and workpiece in high-efficiency grindingof ultrahard cutting tool materials, Journal of Materials Processing Technology 136 (13) (2003) 3947.4 A.V. Gopal, P.V. Rao, Selection of optimum conditions for maximummaterial removal rate with surface finish and damage as constraints in SiC grinding, International Journal of Machine Tools & Manufacture43 (13) (2003) 13271336.5 B. Lin, S.Y. Yu, S.X. Wang, An experimental study on moleculardynamics simulation in nanometer grinding, Journal of MaterialsProcessing Technology 138 (13) (2003) 484488.6 M.N. Dhavlikar, M.S. Kulkarni, V. Mariappan, Combined Taguchiand dual response method for optimization of a centerless grindingoperation, Journal of Materials Processing Technology 132 (13)(2003) 9094.7 X. Xu, Y. Yu, H. Huang, Mechanisms of abrasive wear in the grinding of titanium (TC4) and nickel (K417) alloys, Wear 255 (712) (2003) 14211426.8 S. Malkin, Grinding Technology-theory and Applications ofMachining with Abrasives, Wiley, New York, 1989.9 T.W. Hwang, S. Malkin, Upper bound analysis for specific energy in grinding of ceramics, Wear 231 (2) (1999) 161171.10 S. Shaji, V. Radhakrishnan, Analysis of process parameters in surface grinding with graphite as lubricant based of the Taguchi method, Journal of Materials Processing Technology141 (1) (2003) 5159.11 J-S Kwak, Application of Taguchi and response surface methodologies for geometric error in surface grinding process, International Journal of Machine Tools and Manufacture 45 (3) (2005) 327334.附录2An analysis of grinding power and surface roughnessin external cylindrical grinding of hardened SCM440 steel using the response surface methodAbstract The aim of this study was to analyze effectively the grinding power spentduring the process and the surface roughness of the groundworkpiece in the external cylindrical grinding of hardened SCM440 steel using the response surface method. A Hall effect sensor was usedfor measuring the grinding power of the spindle driving motor. The surface roughness was also measured and evaluated according to thechange of the grinding conditions. Response surface models were developed to predict the grinding power and the surface roughness usingthe experimental results. From adding simply material removal rate to the contour plot of these mathematical models, it was seen that usefulgrinding conditions for industrial application could be easily determined. 2005 Elsevier Ltd. All rights reserved.Keywords: Grinding power; Surface roughness; External cylindrical grinding; Response surface method1. Introduction A lot of attempts have been made to describe moreeffectively and adequately the grinding process. This isdissimilar to other machining processes such as turning andmilling, as the cutting edges of the grinding wheel dont haveuniformity and act differently on the workpiece at eachgrinding. In spite of these attempts, typified by 13,describing the grinding action between the grinding wheeland the workpiece has not been made clear. So statistical models 4 and computer simulations 5 that could deal withthe variety of the cutting edges were introduced. These complexities and difficulties of illustrating the grinding process also raise obstacles to the optimization of the grindingprocess and to the verification of the interrelationship between grinding parameters and outcomes of the process 67. Malkin 89 investigated the process monitoring and studied various grinding phenomena such as cutting mechanisms, the specific energy and the interrelationship of the parameters during past decades. In his research, it was seen that the grinding process had very complex cutting mechanisms and also repeatability was difficult to obtain under the same grinding conditions. Shaji 10 reported a study on the Taguchi method for evaluating process parameters in surface grinding with graphite as lubricant. The effect of the grinding parameters (wheel speed, table speed, depth of cut and the dressing mode) on the surface finish and the grinding force was analyzed. Kwak 11 showed that the various grinding parameters affected the geometric error generated during the surface grinding by using the Taguchi method and also the geometric error could be predicted by means of the response surface method. In this study, the response surface models are developed to predict the grinding power and the surface roughness in the external cylindrical grinding of the hardened SCM440 steel and also to help the selection of grinding conditions.2. Literature review2.1. Chip geometry of external cylindrical grinding The cutting mechanism of the grinding process is very complex and not clear because the grinding wheel has manyirregular abrasives that are randomly distributed in the working area of the wheel circumference. Under several assumptions for convenience, the enlarged contact geometry in the external cylindrical grinding process can be simplyillustrated as shown in Fig. 1. From the chip geometry, it is seen that a cutting edge on the circumference of the grinding wheel contacts firstly a point C on the workpiece and then it moves along the arc CD (contact length) during the grinding. So the chip thickness in a viewpoint of the cutting edge increases gradually from C to I and peaks at point I. And then, the chip thickness decreases from I to D. The maximum chip thickness (g) in the cutting edge is about equal to the lengthHI and can be expressed as below.Where d and D represent the workpiece diameter and the wheel diameter, respectively. Z is the depth of cut. The maximum chip thickness is mostly affected by an average distance (a) between the successive cutting edges at the grinding wheel and the speed ratio ( v V ). The arc of the contact length (lc) between the grinding wheel and the workpiece can also be represented by applying a small angle approximation. Considering traverse speed f that is a traverse length per revolution in the workpiece, a tangential grinding force Ft and an energy Po spent during grinding are as follows. From Eq. (3), it is seen that the tangentialgrinding force(or energy) in the external cylindrical grinding directly concerns a selection of the grinding parameters.2.2. Hall effect and grinding power measurement Usually to measure the spent power of a machine during the process, the Hall effect sensor would be available in many types of industrial applications. The principle of the Hall effect sensor is based on the Hall effect, which was discovered by Dr Edwin Hall in 1879. The current flowing through a cable from the driving motor of a grinding machine produces a magnetic field. If the cable passes into the Hall effect sensor, an induced voltage in the sensor is developed due to the Lorentz force. This voltage is known as the Hall voltage and the amount of the Hall voltage is proportional to the original current flowing into the cable. So from measuring the changes of the Hall voltage, the spent power of the driving motor can beeasily obtained during the grinding process.2.3. Response surface method The response surface analysis is one of various methods for optimizing and evaluating the process parameters to achieve the desired output. In this method, the desired output can be represented as a function of the process parameters. The function that consists of the process parameters is called a response surface as shown in Fig. 2. In order to develop the response surface model, firstly the function must be assumed as a mathematical polynomial form having coefficients that should be determined. And then these coefficients are determined with applying the set of the experimental results. In the case of the situation that the response surface function is related to various process parameters and a lot of experiments are conducted, the calculation for determining coefficients of the polynomial equation is very complex. And also it is difficult to finish the calculation by determining adequate coefficients that have to satisfy all of the experimental results. The scheme of a least square error, therefore, is usually adopted and a commercial code is used for convenience of the multiple calculation.3. Grinding experiment and obtained results3.1. Experimental set-up The experimental set-up for the external cylindrical grinding usedin this study is shown in Fig. 3. The workpiece material was the chromiummolybdenum steel (SCM440) and heat-treated to Rc 60. This material is commonly used for rotating shafts. The grinding wheel wasa type of WA120 Km V that is widely used in various industrial areas. The diameter of the wheel was 320 mm and the width 38 mm. To evaluate the change of the grinding energy according to thevarious grinding conditions, three Hall effect sensors were installed in the electric cables of the grinding spindle motor. The current source of 12 V in the Hall effect sensors was supplied from a DC power supply unit. The sensitivitybetween the current change in the spindle motor andthe output voltage in the Hall effect sensor was 0.4 V/A. The response time of the sensor was about 0.5 ms. The output voltage of the sensor was continuously measured by using an A/D converter and an oscilloscope during the grindingprocess. After the grinding, the surface roughness in the traverse direction in the workpiece was measured. In the grinding conditions, the workpiece revolution speeds were 52, 64 and 76 rpm. The depths of cut in a pass were 20, 25, 30 and 35 mm and the traverse speeds were 1.19, 1.46 and 2.14 m/min. The wheel speed (1800 rpm) was maintained and a water-miscible coolant was supplied in all grinding experiments.3.2. Effect of grinding conditions on power The grinding power that was spent during the grinding process was obtained by multiplying the measured current flowing into the spindle motor cable and the supplied voltage of the motor. Fig. 4 shows a typical signal form of the grinding power during the process cycle that consisted of 4 individual parts illustrated as A, B, C and D. Region A was an idle stage with no contact between the grinding wheel and the workpiece. Although there was no contact,power was used in turning the grinding wheel. On contact between the wheel and the workpiece, the grinding power(see region B shown in Fig. 4) changed. The amount ofchange depended on the grinding conditions. For convenience,in this study, the total grinding power, which added the driving power to the net grinding power, was defined asthe grinding power spent during the external cylindrical grinding process. At the end of a feed forward action in the grinding wheel, the grinding wheel started the feed backward traverse, referred to spark-out motion shown inregion C. As seen in region C, the grinding power was less than that of the feed forward traverse but was more than the driving power. Finally in region D, the grinding wheel disengaged the workpiece and finished the process cycle. Fig. 5 presents the effect of the depth of cut on the grinding power for different workpiece revolution speed and traverse speed. The grinding power spent during the grinding process increased with increasing depth of cut(Fig. 6). Although the slopes of the grinding power increases were somewhat different, grinding power was also increased with increasing workpiece speed and traverse speed. The effect of the workpiece speed on grinding power is shown in Fig. 7. Although the same workpiece speed was applied, the grinding power differed about 1.6 times according to the depth of cut. From the results, it is seen that increasing the depth of cut affected the grinding power more than increasing the traverse speed.3.3. Effect of grinding conditions on surface roughness Fig. 7 shows the effect of depth of cut on surface roughness of the workpiece, which is measured along the traverse direction. Fig. 7 (a) shows surface roughness for different depths of cut and workpiece speeds. According to the change of the depth of cut, the maximum height (Rmax) of the surface roughness increased proportionally but the centerline average height (Ra) changed little especially in the case of the traverse speed of 1.46 m/min.Fig. 7 (b) shows the centerline average height of the surface roughness for different depths of cut and traverse speeds.3.4. Effect of spark-out on grinding power and surface roughness To determine how spark-out motion affected the grinding power and the surface roughness, the experiments were conducted. The effect of the spark-out on the grinding power and the surface roughness are presented in Fig. 8. In the case of the first spark-out implementation, the grinding power maintained a higher magnitude according to the depth of cut as shown in Fig. 8 (a). But in the case of the 6th spark-out implementation, the grinding power went down to near the driving power of the spindle motor at the idle stage and wasnt affected by the depth of cut or the traverse speed. In this stage, there is no more material removal. So, it was seen that material removal in externalcylindrical grinding was completed after several spark-outs. The centerline average height of the surface roughness is shown in Fig. 8 (b). After the 6th spark-out implementation, the surface roughness according to the depth of cut had not converged to a constant magnitude and a desired surface roughness in certain cases was not achieved even by severalspark-outs. This is a dilemma to be solved, because more spark-outs decrease production rate but produce a good surface roughness. Therefore it is necessary to deal with this matter carefully, especially in the selection of the grindingconditions.4. Applying response surface method4.1. Development of response surface models As mentioned in the previous section of this study, it is desirable to be able to forecast grinding power and surface roughness according to the grinding conditions. One means of doing this is to represent grinding outcomes mathematically as a function of the applicable grinding parameters. In this study, the response surface method was used to achieve the aim. Second-order response surface models using the workpiece revolution speed v (rpm), the traverse speed f(m/min) and the depth of cut d (mm) were developed asWhere, the symbol Po (W) was the grinding power and Ra (mm) the surface roughness. Fig. 9 shows the difference between the measured quantity and the predicted quantity by applying the developed response surface models lists inEqs. (4) and (5). As shown in Fig. 9(a), the predicted grinding power well coincides with the measured grinding power and also the predicted surface roughness shown in Fig. 9(b) corresponded with the measured value although ithad some wide deviation in the distribution. Fig. 10 presents an example of the response surface and contour plots of the grinding power according to the change of the workpiece speed and the traverse speed. In these plots, the depth of cut was fixed as 25 mm. The 3D plot of the grinding power shown in Fig. 10 (a) seems to increase linearly in accordance with increasing the workpiece speed and the traverse speed. But from the contour plot shown in Fig. 10 (b), it is seen that the traverse speed has a greater in fluence on the grinding power. A small change of the traverse speed with a fixed workpiece speed, affected the grinding power. The 3D plot of the surface roughness, as represented in Fig. 11, shows a more rapid change than the grinding power according to the workpiece speed and the traverse speed. The surface roughness was dominantly affected by the change of the workpiece speed.4.2. Validation of developed response surface models In past decades, selecting the grinding conditions strongly depended upon an experts judgment. So, it was very difficult for beginners or unskilled workers to determine the proper grinding conditions to satisfy all demanded constraints such as the surface roughness, the material removal rate and the grinding power to be spent. The developed response surface models enable selection of the grinding conditions without much grinding experience. The material removal rate per minute, MRR (mm3/min), during the external cylindrical grinding can be written as follows: In Eq. (6), the symbol Da (mm) represents the average diameter of the used workpiece. If three constraints for industrial application were as Eqs. (7)(9), the selected grinding conditions have to satisfy all constraints. Althoughit looks like a conventional optimization problem, it can be simply solved by using the developed response surface models. An example is presented in Fig. 12. In this case, the workpiece revolution speed was fixed as 64 rpm. Firstly the contour plot of the surface roughness was drawn according to the change of the traverse speed and the depth of cut and then the given constraint ranges at the material removal rate and the grinding power were added into the contour plot. Now, the grinding conditions satisfying all constraints can be determined by selecting an inside region enclosed by the constraints lines.5. Concluding remarks In this study, the response surface method was applied for analyzing the grinding power and the surface roughness in the external cylindrical grinding of the hardened SCM440 material. A Hall effect sensor was used to measure thegrinding power of the spindle driving motor during the grinding. Based on experimental results, increasing the depth of cut affected the grinding power more than increasing the traverse speed. In addition, increasing the depth of cut changed the maximum height of the surface roughness more than the centerline average height. After several spark-outs, the grinding power went down to near the driving power but, in certain cases, the desired surface roughness was not obtained. By using the grinding param
- 温馨提示:
1: 本站所有资源如无特殊说明,都需要本地电脑安装OFFICE2007和PDF阅读器。图纸软件为CAD,CAXA,PROE,UG,SolidWorks等.压缩文件请下载最新的WinRAR软件解压。
2: 本站的文档不包含任何第三方提供的附件图纸等,如果需要附件,请联系上传者。文件的所有权益归上传用户所有。
3.本站RAR压缩包中若带图纸,网页内容里面会有图纸预览,若没有图纸预览就没有图纸。
4. 未经权益所有人同意不得将文件中的内容挪作商业或盈利用途。
5. 人人文库网仅提供信息存储空间,仅对用户上传内容的表现方式做保护处理,对用户上传分享的文档内容本身不做任何修改或编辑,并不能对任何下载内容负责。
6. 下载文件中如有侵权或不适当内容,请与我们联系,我们立即纠正。
7. 本站不保证下载资源的准确性、安全性和完整性, 同时也不承担用户因使用这些下载资源对自己和他人造成任何形式的伤害或损失。

人人文库网所有资源均是用户自行上传分享,仅供网友学习交流,未经上传用户书面授权,请勿作他用。
 川公网安备: 51019002004831号