SSCK20A数控车床主轴和箱体加工编程设计【数控类】【全套5张CAD图纸+毕业论文】
收藏
资源目录

压缩包内文档预览:
编号:432791
类型:共享资源
大小:385.49KB
格式:RAR
上传时间:2015-05-16
上传人:上***
认证信息
个人认证
高**(实名认证)
江苏
IP属地:江苏
30
积分
- 关 键 词:
-
SSCK20A
数控车床
主轴
箱体加工
编程设计
数控
SSCK20A数控车床主轴
cad图纸
毕业论文
- 资源描述:
-
SSCK20A数控车床主轴和箱体加工编程设计
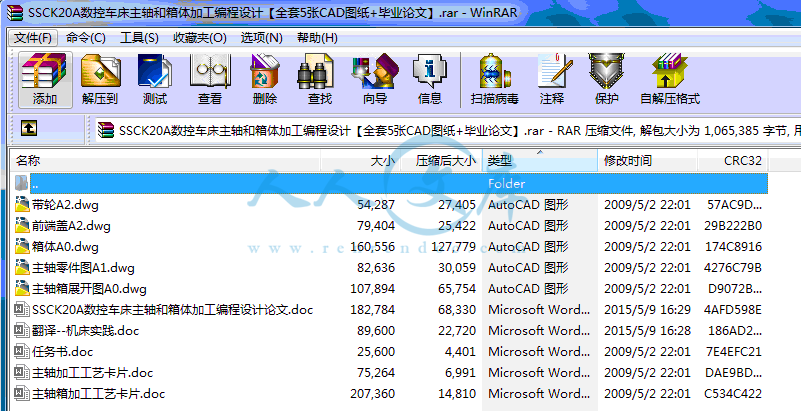
30页 9000字数+说明书+任务书+工艺卡片+外文翻译+4张CAD图纸【详情如下】
SSCK20A数控车床主轴和箱体加工编程设计论文.doc
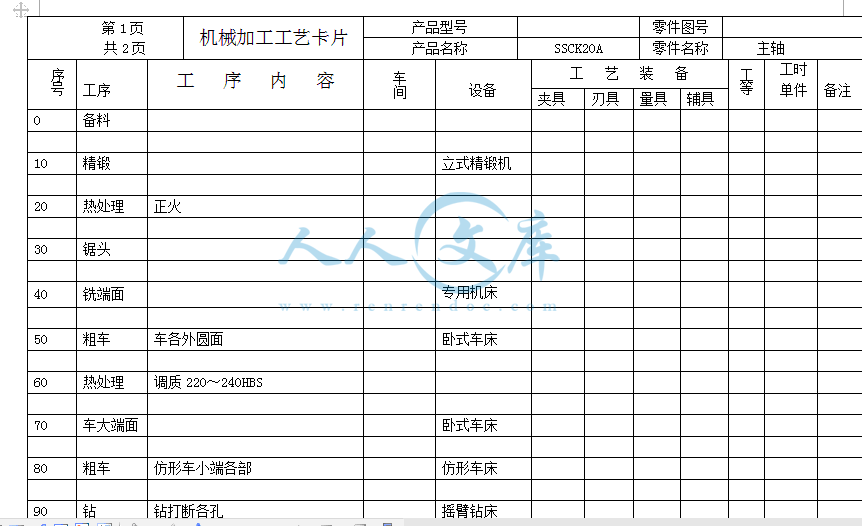
主轴加工工艺卡片.doc
主轴箱加工工艺卡片.doc
主轴箱展开图A0.dwg
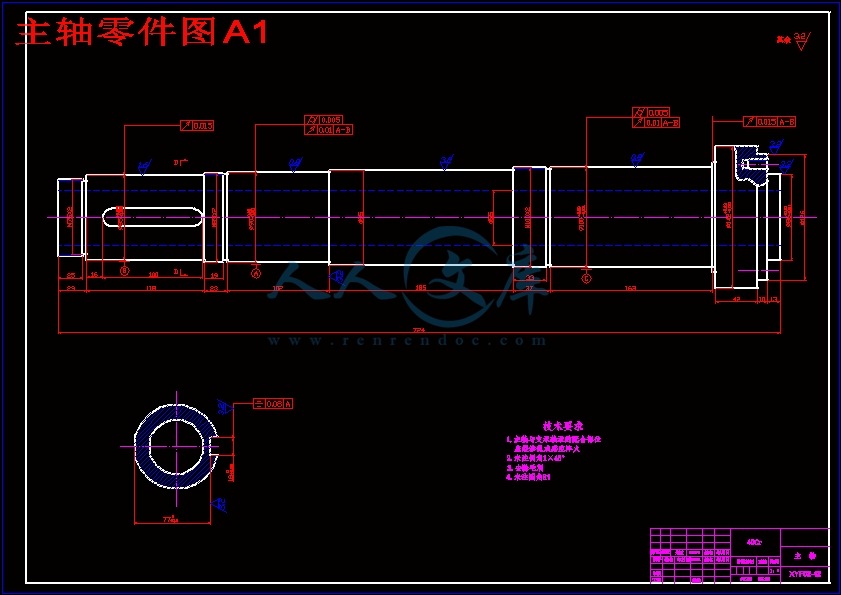
主轴零件图A1.dwg
任务书.doc
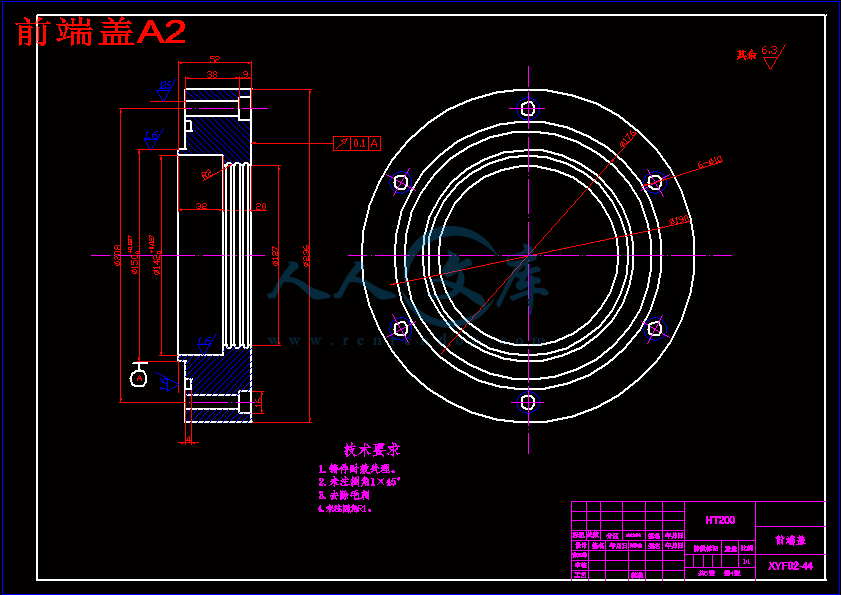
前端盖A2.dwg
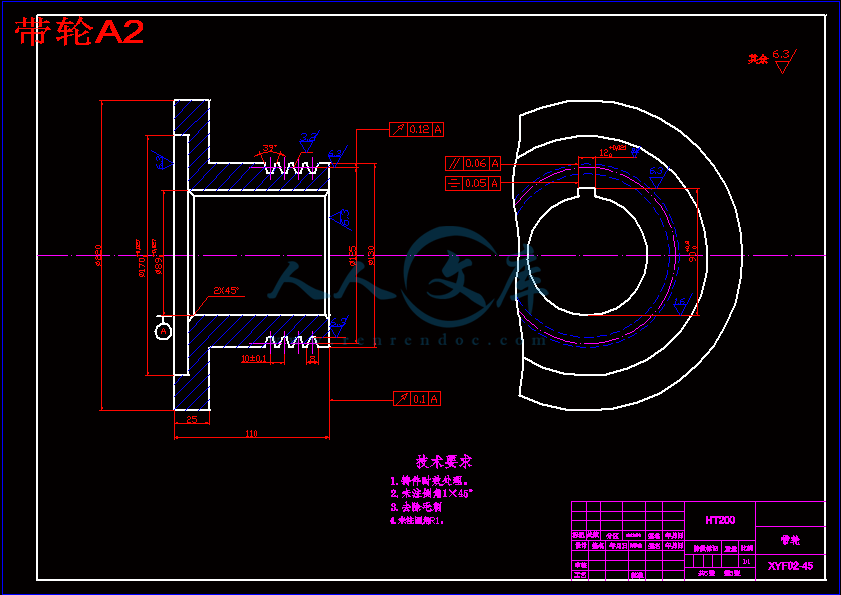
带轮A2.dwg
箱体A0.dwg
翻译--机床实践.doc


摘要
随着社会的进步,制造业的发展越来越迅速,数控技术和数控装备是制造工业现代化的重要基础。这个基础是否牢固直接影响到一个国家的经济发展和综合国力,关系到一个国家的战略地位。因此,世界上各工业发达国家均采取重大措施来发展自己的数控技术及其产业。在我国,数控技术与装备的发展亦得到了高度重视,近年来取得了相当大的进步。数控机床发展很快,作为数控机床的重要部分,主轴箱的设计更新也越来越快。我设计的是SSCK20A数控机床主轴和主轴箱箱体加工工艺以及数控编程,其中涉及了主轴和箱体加工中刀具、量具、毛坯、定位基准等的选择。设计图为两张零号图纸,一张一号图纸,两张二号图纸。
关键词:数控加工工艺 、数控编程、定位基准、主轴箱、工艺编程。
Abstract
Ore and Along with the advance of society, the development of manufacturing industry is mmore quick, the technical equipment of numerical control of numerical control is to make industrial modern important foundation. Whether directly affect a economy of country strongly develop this foundation with the country's comprehensive power, concern a strategic position of country. Therefore on world, each industrial developed countries adopts significant measure to develop the own technical and its estate of numerical control. in recent years, have gotten fairly big advance. The development of numerical control of machine tool is very rapid , is the important part of the machine tool of numerical control, the design of the case of main shaft update also more and more rapid.
What I design is that the case casing processing technology as well as programming of numerical control of machine tool of main shaft have in which been concerned with the option of cutting tool, measuring tool, blank and location standard etc. in casing processing. Design drawing is the two blueprints No. 0 and a blueprint No. 1 and two blueprints No. 2 .
Keyword: Number control to process the craft、count to control to weave the distance、fixed position basis、 principal axis box、craft plait distance。
目 录
摘要:·1
Abstract·2
第一章 绪论·5
第二章 数控加工概念6
2.1高速、高效、高精度、高可靠性8
第三章 数控车床·9
3.1数控车床的组成·9
3.2数控车床的特点 ·11
3.3数控车床的适用范围及工作原理·12
第四章 数控加工工艺分析15
4.1 毛坯的选择18
4.2确定数控加工内容18
4.3数控加工零件的工艺性分析18
4.4定位基准的选择19
4.4.1精基准的选择19
4.4.2粗基准的选择19
4.5加工方法的选择·20
4.6刀具的选择·21
4.6.1数控车刀的类型与刀片选择21
4.7夹具的选择21
4.8量具的选择·22
4.9数控加工工艺路线设计·22
4.9.1外圆表面的加工方法的选择·22
第五章 工序的划分24
5.1加工顺序的安排·25
5.1.1切削加工工序安排25
5.1.2热处理工序安排·25
5.1.3辅助工序安排·26
5.2数控加工工序设计26
5.3走刀路线和工步顺序的确定·26
5.4主轴机械加工工艺规程卡片·27
5.5主轴的工艺分析27
5.6箱体机械加工工艺规程卡片·27
5.7箱体的工艺分析·28
第六章 数控加工程序29
6.1主轴数控加工程序·29
6.2箱体数控加工部分的程序31
6.2.1安装面的数控加工·31
6.2.2主轴孔的数控加工程序·33
第七章 毕业设计总结·37
7.1成本分析37
7.2经济效益分析·37
7.3前景预测·37
结论·38
参考文献·39
致谢·40
4.3数控加工零件的工艺性分析
该箱体零件主要有平面以及孔系组成。在上述中我们只对那些孔系进行数控加工。那些孔系都是重要的装配孔,所以其粗糙度要求都比较高,特别是倒角要求为Ra1.6。但也有比较低的666Ra12.5。各孔系都有同轴度要求,孔系端面都有垂直度要求。该零件的材料为铸铁,切削加工性能较好。
根据上述分析,我们粗、精加工应该分开进行,以保证表面粗糙度的要求。粗糙度要求低的孔宅粗加工阶段就完成。根据零件图上的465±0.2的尺寸分析,我们先加工465±0.2的两面。 这样可以更好的保证各端面的垂直度。从而能保证各孔的同轴度。根据分析我们以A面为定位基准。
4.4定位基准的选择
工件加工的第一道工序或最初几道工序中,只能用毛坯上未经加工的表面作为定位基准,这种定位基准称为粗基准。在以后的工序中,则应使用经过加工的表面作为定位基准,这种基准称为精定位。
我们首先要考虑选择怎样的金基准把各个主要表面加工出来,然后再考虑选择怎样的粗基准把作为精基准的表面加工出来。
4.4.1粗基准的选择
粗基准的选择主要影响不加工表面与加工表面的相互位置精度,以及加工表面的余量分配。选择粗基准时必须注意以下几个问题:
① 如果必须首先保证工件上加工表面与不加工表面之间的位置精度要求,应以不加工表面作为粗基准。如果工件上由很多不需加工的表面,则应以其中与加工表面的位置精度要求较高的表面作为粗基准。
② 必须首先保证工件上的某种要表面的加工余量均匀,则应选择该表面作为粗基准。
③ 选作粗基准的表面应尽量平整光洁,不应有飞边、浇口、冒口等缺陷。
④ 粗基准一般只能使用一次。
根据上述的精基准选择的原则和粗基准选择时注意的问题,我们可以在粗加工阶段选择B面为粗基准,在精加工阶段,我们可以选择燕尾面作为精基准,这样可以做到基准统一和基准重合,可以减少误差,提高位置精度。
4.4.2精基准的选择
精基准的选择应重保证零件的加工精度,特别是加工表面的相互位置精度来考虑,同时也要考虑到装夹方便,夹具结构方便。选择精基准应遵循下列原则:
①“基准重合”原则 即应尽可能选用设计基准作为精基准。这样可以避免由于基准不重合而引起的误差。
②“基准统一”原则 即应尽可能选择加工工件的多个表面时都能使用的一组定位基准作为精基准。这样就便于保证各加工表面的相互位置精度,避免基准变换说产生的误差,并能简化夹具的设计制造。
③“互为基准”原则 当两个表面相互位置精度以及他们自身的尺寸与形状精度都要求很高时,可以采取互为基准的原则,反复多次进行加工。
④“自为基准”原则 有些精加工或光整加工工序要求加工余量小而均匀,再加工时就应尽量选择加工表面本身作为精基准,而该表面与其他表面之间的位置精度则有先行工序保证。
4.5加工方法的选择
主轴的零件进行数控加工的内容就是对主轴进行最后一步要求精加工部分内容进行数控加工。箱体零件进行数控加工的内容就是以上所述的那些加工内容中的一些大的要求精度高的平面和主轴孔,下面我们就以主轴孔的加工为例进行分析。由于毛坯是铸件,所以孔加工前不需要钻孔。内孔表面的加工方案在很大程度上取决于内孔表面本身的尺寸精度和粗糙度。对于精度较高、粗糙度Ra值较小的表面,一般不能一次加工到规定的尺寸,而要划分加工阶段逐步进行。
加工顺序的确定
该机床主轴箱毛坯采用HT200灰铸铁,铸造精度Ⅱ级,铸造后进行退火处理。
拟定机械加工工序,要依照“先粗后精”“先主后次”,“先面后孔”加工箱体零件的原则。必要的热处理、检验等辅助工序安排在各加工阶段之间。
加工阶段的划分
主轴箱的主要表面的加工分粗精两个阶段。粗、精加工分开进行,可以消除由粗加工所造成的内应力、切削力、加紧力和切削热对加工精度的影响,有利于保证主轴箱的加工精度;同时还能根据粗、精加工的不同要求来合理地选择设备,有利于提高生产效率。结论
为期三个月的毕业设计结束了,在本次设计中,我查了大量的资料,在网上也搜索了很多相关数控机床主轴箱的内容,在我设计困难的时候,我得到了我的导师和多位院里老师的指导和帮助,同学们也给了我很大的支持,因此,我的设计与老师同学的帮助是分不开的,在这里,我对帮助过我顺利完成毕业设计的老师和同学表示真挚的感谢。
我的实际题目是:SSCK20A数控机床主轴和主轴箱箱体数控加工工艺分析及数控加工程序编制。在本次设计中,我设计了主轴箱的数控加工工艺,主轴箱的数控加工编程。我的工作是在机械厂工作,因此,本次毕业设计对我而言,非常重要。既是对我大学四年的学习总结,也是为以后在工厂工作打下基础。在本次设计中,在老师的指导下,我完成了主轴和主轴箱加工的数控编程,学习了新的知识,很感谢学校为我创造这个学习设计的机会。
本次设计中,我查阅了大量的书籍,在此,对所有机械书籍的作者表示感谢。没有他们的辛勤劳动,不可能完成我的毕业设计。由于我的知识有限,而且设计中涉及了编程的知识,因此,有很多缺点和错误,希望答辩时专家和老师们能给我指出,对此表示感谢。
参考文献
1许镇宇.机械零件.北京:高等教育出版社,1983;
2孔庆复.计算机辅助设计与制造.哈尔滨:哈尔滨工业大学出版社,1994;
3雷宏.机械工程基础.哈尔滨:黑龙江出版社 2002;
4王中发.实用机械设计.北京:北京理工大学出版社 1998;
5 唐宗军.机械制造基础.大连:机械工业出版社 1997;
6吴祖育,秦鹏飞.数控机床.上海:上海科学技术出版社 2003;
7许翔泰,刘艳芳. 数控加工编程实用技术.北京:机械工业出版社2000;
8吴明友.数控机床加工技术 东南大学出版社.江苏:2000;
9王宝成.现代数控机床.天津:天津科学技术出版社,2000;
10廖效果,朱启俅.数字控制机床.江西:华中科技大学出版社,2002;
11王卫兵.数控编程100例.机械工业出版社,2004;
12张树森.机械工程学.辽宁;东北大学出版社,2001;
13应云天.俄文翻译手册.北京:高等教育出版社,1999;
14金蓓.数控加工的编程技巧.《航空精密制造技术》.成都:2002,2;
15 邓星钟. 机电传动控制(第三版). 武汉: 华中科技大学出版社, 2001;
16董献坤 《数控机床结构与编程》 机械工业出版 1997;
17曹琰 数控机床应用与维修 北京:电子工业出版社,1994;
18李福生等 实用数控机床技术手册 北京:北京出版社,1993;
19王爱玲等 实用数控与编程技术 北京:国防工业出版社,1993;
- 内容简介:
-
附录2 外文翻译(外文部分)ADVANCED MACHINING PROCESSES As the hardware of an advanced technology becomes more complex, new and visionary approaches to the processing of materials into useful products come into common use. This has been the trend in machining processes in recent years. Advanced methods of machine control as well as completely different methods of shaping materials have permitted the mechanical designer to proceed in directions that would have been totally impossible only a few years ago. Parallel development in other technologies such as electronics and computers have made available to the machine tool designer methods and processes that can permit a machine tool to far exceed the capabilities of the most experienced machinist. In this section we will look at CNC machining using chip-making cutting tools. CNC controllers are used to drive and control a great variety of machines and mechanisms, Some examples would be routers in wood working; lasers, plasma-arc, flame cutting, and waterjets for cutting of steel plate; and controlling of robots in manufacturing and assembly. This section is only an overview and cannot take the place of a programming manual for a specific machine tool. Because of the tremendous growth in numbers and capability of computers ,changes in machine controls are rapidly and constantly taking place. The exciting part of this evolution in machine controls is that programming becomeseasier with each new advanced in this technology.Advantages of Numerical Control A manually operated machine tool may have the same physical characteristics as a CNC machine, such as size and horsepower. The principles of metal removal are the same. The big gain comes from the computer controlling the machining axes movements. CNC-controlled machine tools can be as simple as a 2-axis drilling machining center (Figure O-1). With a dual spindle machining center, the low RPM, high horsepower spindle gives high metal removal rates. The high RPM spindle allows the efficient use of high cutting speed tools such as diamonds and small diameter cutters (Figure O-2). The cutting tools that remove materials are standard tools such as milling cutters, drills, boring tools, or lathe tools depending on the type of machine used. Cutting speeds and feeds need to be correct as in any other machining operation. The greatest advantage in CNC machining comes from the unerring and rapid positioning movements possible. A CNC machine does dot stop at the end of a cut to plan its next move; it does not get fatigued; it is capable of uninterrupted machining error free, hour after hour. A machine tool is productive only while it is making chips. Since the chip-making process is controlled by the proper feeds and speeds, time savings can be achieved by faster rapid feed rates. Rapid feeds have increased from 60 to 200 to 400 and are now often approaching 1000 inches per minute (IPM). These high feed rates can pose a safety hazard to anyone within the working envelope of the machine tool. Complex contoured shapes were extremely difficult to product prior to CNC machining .CNC has made the machining of these shapes economically feasible. Design changes on a part are relatively easy to make by changing the program that directs the machine tool. A CNC machine produces parts with high dimensional accuracy and close tolerances without taking extra time or special precautions, CNC machines generally need less complex work-holding fixtures, which saves time by getting the parts machined sooner. Once a program is ready and production parts, each part will take exactly the same amount of time as the previous one. This repeatability allows for a very precise control of production costs. Another advantage of CNC machining is the elimination of large inventories; parts can be machined as needs .In conventional production often a great number of parts must be made at the same time to be cost effective. With CNC even one piece can be machined economically .In many instances, a CNC machine can perform in one setup the same operations that would require several conventional machines. With modern CNC machine tools a trained machinist can program and product even a single part economically .CNC machine tools are used in small and large machining facilities and range in size from tabletop models to huge machining centers. In a facility with many CNC tools, programming is usually done by CNC programmers away from the CNC tools. The machine control unit (MCU) on the machine is then used mostly for small program changes or corrections. Manufacturing with CNC tools usually requires three categories of persons. The first is the programmer, who is responsible for developing machine-ready code. The next person involved is the setup person, who loads the raw stork into the MCU, checks that the correct tools are loaded, and makes the first part. The third person is the machine and unloads the finished parts. In a small company, one person is expected to perform all three of these tasks. CNC controls are generally divided into two basic categories. One uses a ward address format with coded inputs such as G and M codes. The other users a conversational input; conversational input is also called user-friendly or prompted input. Later in this section examples of each of these programming formats in machining applications will be describes.CAM and CNC CAM systems have changed the job of the CNC programmer from one manually producing CNC code to one maximizing the output of CNC machines. Since CNC machine tools are made by a great number of manufacturers, many different CNC control units are in use. Control units from different manufacturers use a variety of program formats and codes. Many CNC code words are identical for different controllers, but a great number vary from one to another. To produce an identical part on CNC machine tools with different controllers such as one by FANCU, OKUMA or DYNAPATH, would require completely different CNC codes. Each manufacturer is constantly improving and updating its CNC controllers. These improvements often include additional code words plus changes in how the existing code works. A CAM systems allows the CNC programmer to concentrate on the creation of an efficient machining process, rather then relearning changed code formats. A CNC programmer looks at the print of a part and then plans the sequence of machining operations necessary to make it (Figure O-3). This plan includes everything, from the selection of possible CNC machine tools, to which tooling to use, to how the part is held while machining takes place. The CNC programmer has to have a thorough understanding of all the capacities and limitations of the CNC machine tools that a program is to be made for. Machine specifications such as horsepower, maximum spindle speeds, workpiece weight and size limitations, and tool changer capacity are just some of the considerations that affect programming. Another area of major importance to the programmer is the knowledge of machining processes. An example would be the selection of the surface finish requirement specified in the part print. The sequence of machining processes is critical to obtain acceptable results. Cutting tool limitations have to be considered and this requires knowledge of cutting tool materials, tool types, and application recommendations. A good programmer will spend a considerable amount of time in researching the rapidly growing volume of new and improved tools and tool materials. Often the tool that was on the cutting edge of technology just two years ago is now obsolete. Information on new tools can come from catalogs or tool manufacturers tooling engineers. Help in tool selection or optimum tool working conditions can also be obtained from tool manufacturer software. Examples would be Kennametals TOOLPRO, software designed to help select the best tool grade, speed, and feed rates for different work materials in turning application. Another very important feature of TOOLPRO is the display of the horsepower requirement for each machining selection. This allow the programmer to select a combination of cutting speed, feed rate, and depth of cut that equals the machines maximum horsepower for roughing cuts. For a finishing cut, the smallest diameter of the part being machined is selected and then the cutting speed varied until the RPM is equal to the maximum RPM of the machine. This helps in maximizing machining efficiency. Knowing the horsepower requirement for a cut is critical if more than one tool is cutting at the same time. Software for a machining center application would be Ingersoll Tool Companys Actual Chip Thickness, a program used to calculate the chip thickness in relation to feed-per-tooth for a milling cutter, especially during a shallow finishing cut. Ingersolls Rigidity Analysis software ealculates tool deflection for end mills as a function of tool stiffness and tool force. To this point we looked at some general qualifications that a programmer should possess. Now we examine how a CAM system works. Point Control Companys SmartCam system uses the following approach. First, the programmer makes a mental model of the part to be machined. This includes the kind of machining to be performed-turning or milling. Then the part print is studied to develop a machining sequence, roughing and finishing cuts, drilling, tapping, and boring operations. What work-holding device is to be used, a vise or fixture or clamps? After these considerations, computer input can be started. First comes the creation of a JOBPLAN. This JOBPLAN consists of entries such as inch or metric units, machine type, part ID, type of workpiece material, setup notes, and a description of the required tools. This line of information describes the tool by number, type, and size and includes the appropriate cutting speed and feed rate. After all the selected tools are entered, the file is saved. The second programming step is the making of the part. This represents a graphic modeling of the projected machining operation. After selecting a tool from the prepared JOBPLAN, parameters for the cutting operation are entered. For a drill, once the coordinate location of the hole and the depth are given, a circle appears on that spot. If the location is incorrect, the UNDO command erases this entry and allows you to give new values for this operation. When an end mill is being used, cutting movements (toolpath) are usually defined as lines and arcs. As a line is programmed, the toolpath is graphically displayed and errors can be corrected instantly. At any time during programming, the command SHOWPATH will show the actual toolpath for each of the programmed tools. The tools will be displayed in the sequence in which they will be used during actual machining. If the sequence of a tool movement needs to be changed, a few keystrokes will to that. Sometimes in CAM the programming sequence is different from the actual machining order. An example would be the machining of a pocket in a part. With CAM, the finished pocket outline is programmed first, then this outline is used to define the roughing cuts to machine the pocket. The roughing cuts are computer generated from inputs such as depth and width of cut and how much material to leave for the finish cut. Different roughing patterns can be tried out to allow the programmer to select the most efllcient one for the actual machining cuts. Since each tool is represented by a different color, it is easy to observe the toolpath made by each one. A CAM system lets the programmer view the graphics model from varying angles, such as a top, front, side, or isometric view. A toolpath that looks correct from a top view, may show from a front view that the depth of the cutting tool is incorrect. Changes can easily be made and seen immediately. When the toolpath and the sequence of operations are satisfactory, machine ready code has to be made. This is as easy as specifying the CNC machine that is to be used to machine the part. The code generator for that specific CNC machine during processing accesses four different files. The JOBPLAN file for the tool information and the GRAPHICE file for the toolpath and cutting sequence. It also uses the MACHINE DEFINE file which defines the CNC code words for that specific machine. This file also supplies data for maximum feed rates, RPM, toolchange times, and so on. The fourth file taking part in the code generating process is the TEMPLATE file. This file acts like a ruler that produces the CNC code with all of its parts in the right place and sequence. When the code generation is complete, a projected machining time is displayed. This time is calculated from values such as feed rates and distances traveled, noncutting movements at maximum feed rates between points, tool change times, and so on. The projected machining time can be revised by changing tooling to allow for higher metal removal rates or creating a more efficient toolpath. This display of total time required can also be used to estimate production costs. If more then one CNC machine tool is available to machine this part, making code and comparing the machining time may show that one machine is more efficient than the others.CAD/CAM Another method of creating toolpath is with the use of a Computer-aided Drafting (CAD) file. Most machine drawings are created using computers with the description and part geometry stored in the computer database. SmartCAM, though its CAM CONNECTION, will read a CAD file and transfer its geometry represents the part profile, holes, and so on. The programmer still needs to prepare a JOBPLAN with all the necessary tools, but instead of programming a profile line by line, now only a tool has to be assigned to an existing profile. Again, using the SHOWPATH function will display the toolpath for each tool and their sequence. Constant research and developments in CAD/CAM interaction will change how they work with each other. Some CAD and CAM programs, if loaded on the same computer, make it possible to switch between the two with a few keystrokes, designing and programming at the same time. The work area around the machine needs to be kept clean and clear of obstructions to prevent slipping or tripping. Machine surfaces should not be used as worktables. Use proper lifting methods to handle heavy workpieces, fixtures, or heavy cutting tools. Make measurements only when the spindle has come to a complete standstill. Chips should never be handled with bare hands. Before starting the machine make sure that the work-holding device and the workpiece are securely fastened. When changing cutting tools, protect the workpiece being machined from damage, and protect your hands from sharp cutting edges. Use only sharp cutting tools. Check that cutting tools are installed correctly and securely. Do not operate any machine controls unless you understand their function and what they will do.The Early Development Of Numerically Controlled Machine Tools The highly sophisticated CNC machine tools of today, in the vast and diverse range found throughout the field of manufacturing processing, started from very humble beginnings in a number of the major industrialized countries. Some of the earliest research and development work in this field was completed in USA and a mention will be made of the UKs contribution to this numerical control development. A major problem occurred just after the Second World War, in that progress in all areas of military and commercial development had been so rapid that the levels of automation and accuracy required by the modern industrialized world could not be attained from the lab our intensive machines in use at that time. The question was how to overcome the disadvantages of conventional plant and current manning levels. It is generally ackonwledged that the earliest work into numerical control was the study commissioned in 1947 by the US government. The studys conclusion was that the metal cutting industry throughout the entire country could not copy with the demands of the American Air Force, let alone the rest of industry! As a direct result of the survey, the US Air Force contracted the Persons Corporation to see if they could develop a flexible, dynamic, manufacturing system which would maximize productivity. The Massachusetts Institute of Technology (MIT) was sub-contracted into this research and development by the Parsons Corporation, during the period 1949-1951,and jointly they developed the first control system which could be adapted to a wide range of machine tools. The Cincinnati Machine Tool Company converted one of their standard 28 inch Hydro-Tel milling machines or a three-axis automatic milling made use of a servo-mechanism for the drive system on the axes. This machine made use of a servomechanism for the drive system on the axes, which controlled the table positioning, cross-slide and spindle head. The machine cab be classified as the first truly three axis continuous path machine tool and it was able to generate a required shape, or curve, by simultaneous slide way motions, if necessary. At about the same times as these American advances in machine tool control were taking Place, Alfred Herbert Limited in the United Kingdom had their first Mutinous path control system which became available in 1956.Over the next few years in both the USA and Europe, further development work occurred. These early numerical control developments were principally for the aerospace industry, where it was necessary to cut complex geometric shapes such as airframe components and turbine blades. In parallel with this development of sophisticated control systems for aerospace requirements, a point-to-point controller was developed for more general machining applications. These less sophisticated point-to-point machines were considerably cheaper than their more complex continuous path cousins and were used when only positional accuracy was necessary. As an example of point-to-point motion on a machine tool for drilling operations, the typical movement might be fast traverse of the work piece under the drills position-after drilling the hole, anther rapid move takes place to the next holes position-after retraction of the drill. Of course, the rapid motion of the slideways could be achieved by each axis in a sequential and independent manner, or simultaneously. If a separate control was utilisec for each axis, the former method of table travel was less essential to avoid any backlash in the system to obtain the required degree of positional accuracy and so it was necessary that the approach direction to the next point was always the same. The earliest examples of these cheaper point-to-point machines usually did not use recalculating ball screws; this meant that the motions would be sluggish, and sliderways would inevitably suffer from backlash, but more will be said about this topic later in the chapter. The early NC machines were, in the main, based upon a modified milling machine with this concept of control being utilized on turning, punching, grinding and a whole host of other machine tools later. Towards the end of the 1950s,hydrostatic slideways were often incorporated for machine tools of highly precision, which to sonic extent overcame the section problem associated with conventional slideway response, whiles averaging-out slideway inaccuracy brought about a much increased preasion in the machine tool and improved their control characteristics allows concept of the machining center was the product of this early work, as it allowed the machine to manufacture a range of components using a wide variety of machining processes at a single set-up, without transfer of workpieces to other variety machine tools. A machining center differed conceptually in its design from that of a milling machine, In that the cutting tools could be changed automatically by the transfer machanism, or selector, from the magazine to spindle, or vice versa.In this ductively and the automatic tool changing feature enabled the machining center to productively and efficiently machine a range of components, by replacing old tools for new, or reselecting the next cutter whilst the current machining process is in cycle. In the mid 1960s,a UK company, Molins, introduced their unique System 24 which was meant represent the ability of a system to machine for 24 hours per day. It could be thought of as a machining complex which allowed a series of NC single purpose machine tools to be linked by a computerized conveyor system. This conveyor allowed the work pieces to be palletized and then directed to as machine tool as necessary. This was an early, but admirable, attempt at a form of Flexible manufacturing System concept, but was unfortunately doomed to failure. Its principal weakness was that only a small proportion of component varieties could be machine at any instant and that even fewer work pieces required the same operations to be performed on them. These factors meant that the utilization level was low, coupled to the fact that the machine tools were expensive and allowed frequent production bottlenecks of work-in-progress to arise, which further slowed down the whole operation. The early to mid-1970s was a time of revolutionary in the area of machine tool controller development, when the term computerized numerical control (CNC) became a reality. This new breed of controllers gave a company the ability to change work piece geometries, together with programs, easily with the minimum of development and lead time, allowing it to be economically viable to machine small batches, or even one-off successfully. The dream of allowing a computerized numerical controller the flexibility and ease of program editing in a production environment became a reality when two ralated factors occurred.These were:the development of integrated circuits, which reduces electronics circuit size, giving better maintenance and allowing more standardization of desing; that general purpose computers were reduced in size coupled to the fact that their cost of production had fallen considerably. The multipie benefits of cheaper electorics with greater reliability have result in the CNC fitted to the machine tools today, with the power and sophistication progtessing considerably in the last few years, allowing an almost artificial intelligence(AI) to the latest systems. Over the years, the machine tools builders have produced a large diversity in the range of applications of CNC and just some of those development will be reviewed in Volume 。 With any capital cost item, such as a CNC machine tool, it is necessary for a company to undergo a feasibility study in order to ascertain whether the purchase of new plant is necessary and can be justified over a relatively short pay-back period. These thoughts and other circial decisions will be the subject of the next section which is concerned with the economic justification for CNC.附录3外文翻译(中文部分)机床实践随着先进科技的硬件变得复杂化,把原料加工成为有用产品的理想的、新的加工手段得到了普遍应用。这已经成为近几年机床加工的发展趋势。先进的机床控制方法和完全不同的材料成形方法还迫使机械设计人员进行前几年还完全没有进行的方向(研究)。其他科技如电子技术和计算机技术的并行发展,使机床设计者有办法让机床具有超过绝大多数经验丰富的机械师(在普通机床上)所具有的加工能力。在这个部分我们来看数控机床切削使用的工具。CNC控制器能被用来驱动和控制多种机床和机构。举几个例子,如刳刨机进行木料加工;激光、离子弧、火焰切削、喷水切削钢板;在制造和装配中机器人的控制等。本书的这个部分仅是一般介绍而不能作为专业机床的设计手册。由于计算机能力和容量的巨大增长,机床的控制技术很频繁地发生着变化。在机床控制发展中的精彩部分是在每个先进技术上的使用变得很容易了。NC的优势人工操作机床可能有和CNC机床一样的物理特性,例如马力和尺寸,其金属切削原理也是一样的。CNC最大的好处是通过计算机控制机床刀具的运动,CNC控制的机床可能简单得象2刀钻床或复杂得象5刀的加工中心(如图O-1)。两轴的加工机床,其特点是低转速、高马力轴有高进给率,高转速轴允许高效的高速切削刀具如钻石和小直径的刀具的使用(如图O-2)。它的切削刀具是标准的刀具如磨床的刀具、钻子、钻探工具或车刀,这些刀具依赖于所使用的机床型号。切削速度和进给量要象在其他操作机床中一样是正确的。CNC机床的最大优势来自无错的和快速的可能运动的控制。数控机床不会在一次加工完成后停下来计划下一次的运动,它不会疲劳,它是不中断的机床,机床只有在它切削的时候才有生产性。当切削过程被适当的进给量和切削速度控制时,时间的节约可以通过快速的进给率来完成。快速进给从60发展到200到400到现在已接近每分1000英寸了。这样高的进给率对在机床工作区的任何人构成了安全威胁。在CNC机床之前,复杂形状的加工是极困难的。CNC使这些形状的加工制造在经济上是可行的。零件的设计变化通过改变控制机床的程序而相对容易实现。CNC机床不需要额外的时间和特别的预防就可生产高精度的严格公差的零件。CNC使机床不需要复杂的夹具,这使零件很快被加工从而节约了时间。一旦程序准备好并加工零件,每个零件都将花与第一个一样的时间。这个一致性允许很精确地控制加工成本。数控机床的另一个优势是大量存货的减少,零件可以在需要时再被加工。在传统制造中,为了增加效率,通常一大批零件被同时加工。有了CNC即使一件也能够被经济地加工。在很多情况下,一个CNC机床完成了要建立几台相同传统机床才能做的操作。CAM和CNC CAM系统改变了CNC程序员的工作,即从手工编制CNC代码到CNC机床的输出最大值。自从手工CNC机床被一大批厂家生产以来,许多不同的CNC控制单元就被使用了。各个不同的厂家的控制单元使用各个不相同的程序与代码。许多CNC代码语句可被不同的控制器识别。但其间还有众多的区别。为了在有着不同控制器(如FAWC、OKUMA、或DYNAPATH)生产一个可互换的零件,将需要完全不同的CNC代码。每个制造商在不断地提高和更新其CNC控制。这些改进通常包括附加的代码语句在已有代码如何工作上的变化。CAM系统允许CNC程序员在高效的加工过程的建立上浓缩、精选、而不重新学习已改变的代码格式。一个CNC程序员看着一个零件的图纸,并且设计必要的机床操作来制造这个零件(如图O-3)。这个设计包括以下每个因素,从可能使用的CNC机床的选择,到机床的使用选择,再到加工时的零件装夹的选择。CNC程序员必须对这个即将写入程序的CNC机床的能力和局限有一个完全的了解。机床主参数如马力主轴马力、最大转速、工作台的重量、工具的尺寸限制、加工变化能力等只是值得考虑的影响程序的因素中的一些。对程序员要求的另一个最重要领域是制造过程的知识。举例如选择最佳的切削工具来完成零件图上所标的公差和表面光洁度。这个加工过程的程序是吹毛求疵地获得符合的结果。机床极限能力必须考虑全面,这就需要刀具材料,刀具类型,和其推荐应用的知识。一个优秀的程序员将花相当数量的时间来研究关于新的、改进的刀具和刀具材料的快速设计者发表的书籍。通常在切削方面使用两年前的技术的刀具现在就是落后的。新刀具的信息来自手册或刀具制造商的刀具之资料。刀具选择或最佳刀具工作条件的帮助同样可在刀具制造商的软件中获得。例如:Kennametals被设计来帮助不同的使用其车间的工厂选择最佳的机床;“TOOCPRO”的另一个很重要的特征是为每个机床选择马力需求等等这些就允许设计者选择一个结合了切削速度、进给率和切削深度等因素的机床。这就胜任于粗选中最佳马力的选择。对于光洁度的加工,零件在加工中最小进给量被选定,接着切削速度直到转速与机床的最佳转速相等时才不变。这就帮助最大提高了机床效率。如果不只一台机床在同时工作的话了解一台机床的功率需求是必要的。为加工中心使用的软件是ENGERSOLL CUTTING TOOL公司的ACTUAL CHIP THICKNESS。程序被用来计算磨床每次进的给量,特别是在微量的光洁度加工中。ENGERSOLL的“精密分析”软件作为机床刚度和机床力的功能来。在这一点上我们观察一些广泛的设计人员应掌握的规格。现在我们测试CAM系统怎样工作。点控公司(POINT CPNTROLL COMPANY)的SMARTCAM 系统使用接下来的手段:首先设计人员使用一个金属零件模型去加工。这包括的加工方式是-车或磨。接着这个零件图被研究来做成机床加工工序,粗加工或精加工、钻、冲、磨等操作。被使用的装夹夹具是虎钳,抓盘还是卡盘?这些考虑之后,计算机输出就可开始了。首先还是工艺卡的建立。这个工艺卡由各种记录(例如:英制或公制,机床类型、零件卡、切削材料类型、安装记录、和所需要机床的描述其第二个编程的步骤是零件的制造。这描述了一个所设计机床操作的生动模型。从已准备好的JOBPLAN中选好机床后,切削加工的参数就被编入。对钻床而言,一旦孔的位置坐标和深度被给出,一个孔就给出现在那点。如果其位置是错的,其撤消命令选择这一记录,并允许你给这个工序新的值。当端面磨时,切削运动通常被定义为弧。当一条直线被编入程序, TOOLPATH就会生动的显示,其错误也可立即被纠正。在程序运行的任意时刻,命令SHOWPATH会显示当前的刀具轨迹,也会显示刀具在实际加工时的使用顺序。当刀具运动顺序需要改变时,可用一个按键来实现它。有
- 温馨提示:
1: 本站所有资源如无特殊说明,都需要本地电脑安装OFFICE2007和PDF阅读器。图纸软件为CAD,CAXA,PROE,UG,SolidWorks等.压缩文件请下载最新的WinRAR软件解压。
2: 本站的文档不包含任何第三方提供的附件图纸等,如果需要附件,请联系上传者。文件的所有权益归上传用户所有。
3.本站RAR压缩包中若带图纸,网页内容里面会有图纸预览,若没有图纸预览就没有图纸。
4. 未经权益所有人同意不得将文件中的内容挪作商业或盈利用途。
5. 人人文库网仅提供信息存储空间,仅对用户上传内容的表现方式做保护处理,对用户上传分享的文档内容本身不做任何修改或编辑,并不能对任何下载内容负责。
6. 下载文件中如有侵权或不适当内容,请与我们联系,我们立即纠正。
7. 本站不保证下载资源的准确性、安全性和完整性, 同时也不承担用户因使用这些下载资源对自己和他人造成任何形式的伤害或损失。

人人文库网所有资源均是用户自行上传分享,仅供网友学习交流,未经上传用户书面授权,请勿作他用。
 川公网安备: 51019002004831号