塑料挂钩注塑模具设计【含8张CAD图纸、说明书】
收藏
资源目录

压缩包内文档预览:(预览前20页/共37页)
编号:19177173
类型:共享资源
大小:3.97MB
格式:ZIP
上传时间:2019-05-13
上传人:机****料
认证信息
个人认证
高**(实名认证)
河南
IP属地:河南
50
积分
- 关 键 词:
-
含8张CAD图纸、说明书
塑料挂钩注塑模具设计【
含CAD图纸】
含CAD图纸
挂钩注塑模具设计【
塑料挂钩注塑模具设计
注塑模具设计
挂钩模具设计
模具设计【含
CAD设计图纸】
- 资源描述:
-



- 内容简介:
-
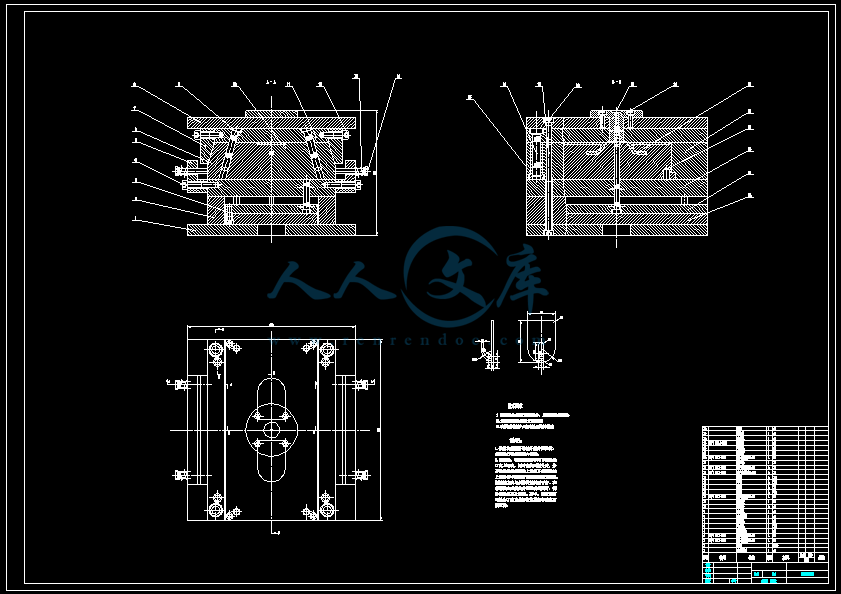
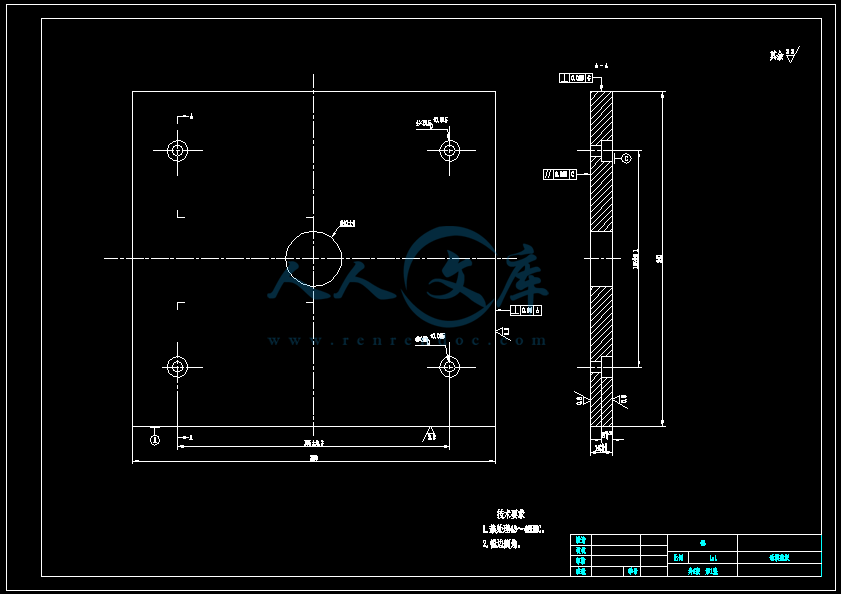
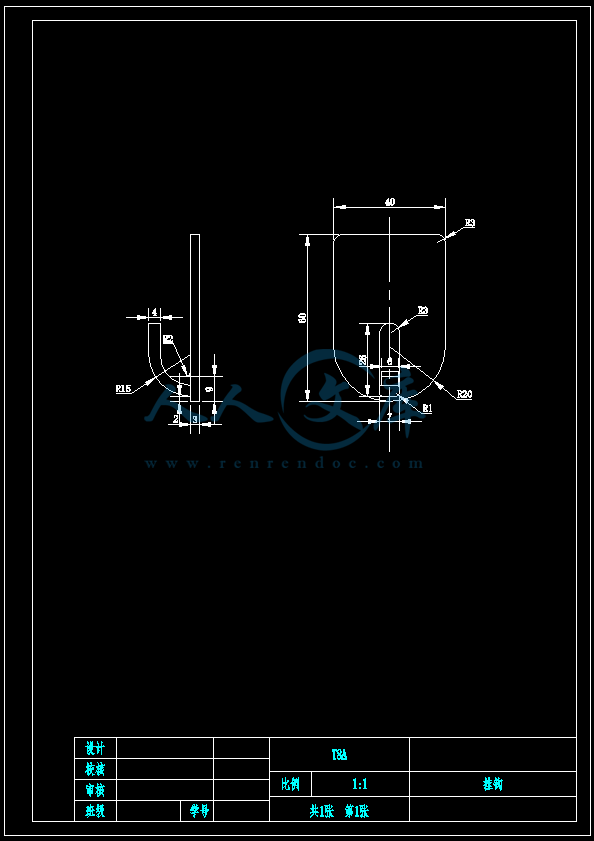
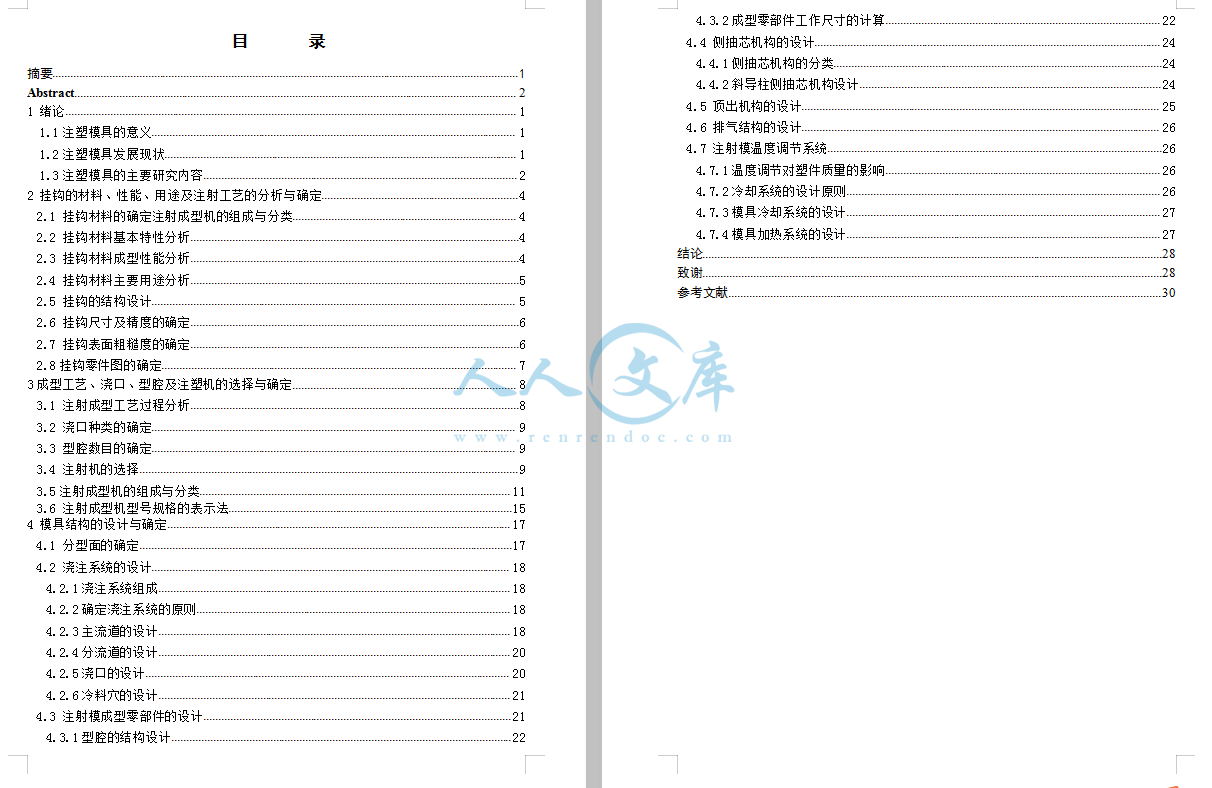
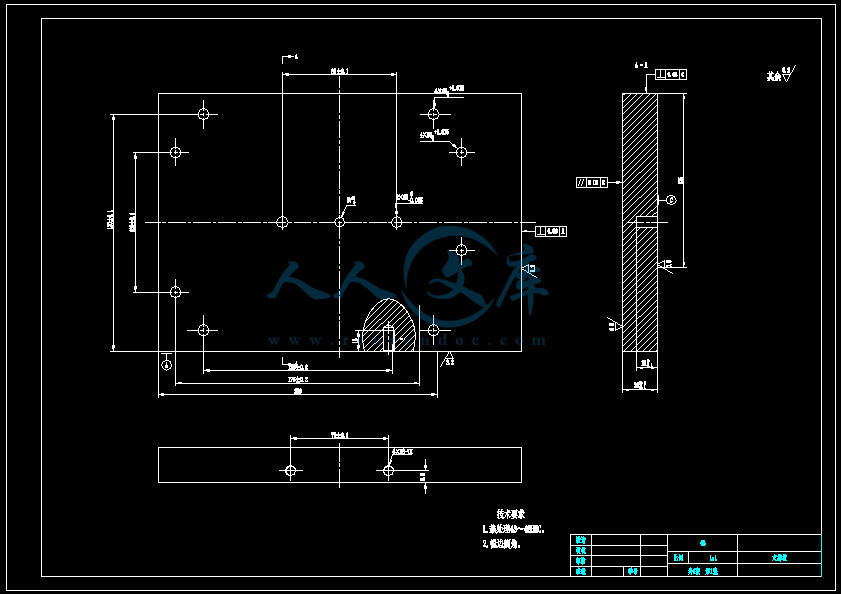
,塑料挂钩注塑模具设计,目录,课题简介,在国内经济飞快发展的当下,中国市场塑料挂钩行业在过去五年用户消费规模越来越大,同比增长速度越来越快,占整个挂钩制造的30%左右,而且在未来几年,塑料挂钩的生产规模将会越来越大,消费需求也会越来越高。现阶段塑料挂钩都采用注塑的加工方法,对塑料挂钩进行注射加工的时候用的最多的机器就是注射机,将塑料颗粒装在注射机里面,温度到了之后,塑料就变成液体了,之后就被注射到模具的腔室里面,将塑料熔体塑化好,之后将这些塑料熔体注射到塑料挂钩模具里面去,在加工好了之后,对模具进行降温,使其满足塑料挂钩的质量要求。国内塑料模具制造业占到整个模具制造的35%左右。塑料模具涉及的领域相当的广泛,例如电视机、冰箱、空调、轮胎等等都是需要采用模具制造。采用模具制造的优点有生产效率比较高、消耗的耗材比较少;制造的零件可以比较复杂;生产精度还有粗糙度也能够得到比较高的要求。所以模具在国内的经济生产中其位置非常重要。,01,注塑成型技术的概述,02,1、注射装置 让塑料颗粒匀称的进行塑化成为液体,在一定的速度还有压力的作用下,这些塑料熔体注射到模腔里面去。 2、合模装置 也就是锁模装置。确保注射模关,还有打开的时候可靠性高,这样模具打开,关闭还有顶出就可以进行工作。 3、液压和电器控制系统 确保注射机在生产的时候按照事先设定好的工艺流程进行,并且对产品的加工程序是非常准确有效的。,往复螺杆式注射成型机组成,注射成型机的组成与分类,03,(1)立式注射成型机 (2)卧式注射成型机 (3)角式注射成型机 (4)多模注射成型机,立式注射成型机示意图,挂钩的材料、性能及用途的分析与确定,04,塑料的主要就是树脂,在温度,还有压力达到一定要求的时候,塑料颗粒就变为塑料熔体了。将这些熔体注入到模具里面,就可以加工成为任何我们需要的产品了,塑料熔体固化之后,产品的结构是不会出现改变的。塑料的好处是很多的,在我们现在的生活还有生产中用的都非常多,它的密度不大,质量很小,并且比强度好,绝缘性也是非常好的,介电损耗不高,化学稳定性非常好,无论是减摩性还是耐磨性都是非常好的,对振动的降低,还有隔绝声音的性能都非常好的。还有,塑料还能够防止水,潮气的渗入,避免透气,避免辐射的功能。 本次设计的挂钩,通过对现有材料的比较。决定选择ABS。ABS的性能是不错的,价格还不高,所以可以进行大量生产,加工起来是比较容易的,论文里面的零件用这个材料来加工是合适的。,挂钩零件图,成型工艺、浇口、型腔及注塑机的选择与确定,05,注射成型前的准备工作 按照塑料产品的构造,原材料还有质量,将成型工艺定下来: 要想注射加工的时候顺利,并且确保加工产品质量好,那么要对加工的机器,还有塑料产品进行准备。 (1)成型前对原材料的预处理 (2)料筒的清洗 (3)脱模剂的选用,注射浇注系统的组成,模具结构的设计与确定,03,1、产品脱离模具的时候要方便一些,模具的结构要简单一点; 2、对产品的外观不能有太大的影响;确保产品的加工精度; 3、要方便将气体排出去;模具的零部件在加工的时候要方便; 4、要注意这个注射机是什么型号;分型面在跟住分型面在工作的时候,要彼此相互配合好。 5、放在塑件外表最大轮廓的地方;模具打开来之后,塑料产品跟动模是在同一边的; 6、分型面的印记不可以印在塑件的外表;浇注系统尤其是浇口也要安排到位; 7、推杆的印记也不可以露在塑件外表上;塑件要方便脱出模来。,塑料挂钩模具图,结论 这次论文设计的塑料模,对于塑料产品成型的性能,模具的结构,还有注射工艺数据等等进行了全面的分析,将相关数据算了出来,这样就刻意从理论上证明操作是可以的,还有,完成了论文之后,对于设计注射模的发展状况有了更深的了解,对注射机也更加熟悉,并且对于注射加工的原理加深了理解。 对模具进行设计,还有绘制图纸的时候,不是一点问题都没有的,对问题进行分析,然后查找资料进行克服,论文里面确定个过程里面我知道了,设计模具的每一步都是非常重要的,必须要非常严谨才行。 现在经济发展的这么快,尤其是汽车,机械,电子行业发展的更快,论文里面确定样的背景下,模具的需求量就更加大,所以现在对于模具的重视度就更高。通过完成毕业论文之后,对于学习还有工作都是非常有帮助的。, 毕业设计(论文)外文翻译学生姓名年05 月26 日A Parametric-Controlled Cavity Layout Design System for a Plastic Injection MouldM. L. H. Low and K. S. LeeDepartment of Mechanical Engineering, National University of Singapore, SingaporeToday, the time-to-market for plastic products is becoming shorter, thus the lead time available for making the injection mould is decreasing. There is potential for timesaving in the mould design stage because a design process that is repeatable for every mould design can be standardised. This paper presents a methodology for designing the cavity layout for plastic injection moulds by controlling the geometrical parameters using a standardisation template. The standardization template for the cavity layout design consists of the configurations for the possible layouts. Each configuration of the layout design has its own layout design table of all the geometrical parameters. This standardisation template is pre-defined at the layout design level of the mould assembly design. This ensures that the required configuration can be loaded into the mould assembly design very quickly, without the need to redesign the layout. This makes it useful in technical discussions between the product designers and mould designers prior to the manufacture of the mould. Changes can be made to the 3D cavity layout design immediately during the discussions, thus saving time and avoiding miscommunication. This standardisation template for the cavity layout design can be customised easily for each mould making company to their own standards.Keywords: Cavity layout design; Geometrical parameters;Mould assembly; Plastic injection mould design; Standardisation template1. IntroductionPlastic injection moulding is a common method for the mass production of plastic parts with good tolerances. There are two main items that are required for plastic injection moulding. They are the injection-moulding machine and the injection mould. The injection-moulding machine has the mould mountedon it and provides the mechanism for molten plastic transfer from the machine to the mould, clamping the mould by the application of pressure and the ejection of the formed plastic part. The injection mould is a tool for transforming the molten plastic into the final shape and dimensional details of the plastic part. Today, as the time-to-market for plastic parts is becoming shorter, it is essential to produce the injection mould in a shorter time.Much work had been done on applying computer technologies to injection mould design and the related field. Knowledge-based systems (KBS) such as IMOLD 1,2, IKMOULD3, ESMOLD 4, the KBS of the National Cheng Kang University, Taiwan 5, the KBS of DrexelUniversity 6, etc. were developed for injection mould design. Systems such as HyperQ/Plastic 7, CIMP 8, FIT 9, etc. are developed for the selection of plastic materials using a knowledge-based approach. Techniques have also been developed for parting design in injection moulding 1012.It has been observed that although mould-making industries are using 3D CAD software for mould design, much time is wasted in going through the same design processes for every project. There is great potential for timesaving at the mould design stage if the repeatable design processes can be standardized to avoid routine tasks. A well-organised hierarchical design tree in the mould assembly is also an important factor 13,14.However, little work has been done in controlling the parameters in the cavity layout design; thus this area will be our main focus. Although there are many ways of designing the cavity layout 15,16, mould designers tend to use only conventional designs, thus there is a need to apply standardisation at the cavity layout design level.This paper presents a methodology for designing the cavity layout for plastic injection moulds by controlling the parameters based on a standardisation template. First, a well-organised mould assembly hierarchy design tree had to be established. Then, the classification of the cavity layout configuration had to be made to differentiate between those with standard configurations and those with non-standard configurations. The standard configurations will be listed in a configuration database and each configuration has its own layout design table that controls its own geometrical parameters. This standardization template is pre-defined at the layout design level of the mould assembly design. 2. Cavity Layout Design for a Plastic Injection MouldAn injection mould is a tool for transforming molten plastic into the final shape and dimensional details of a plastic part. Thus, a mould contains an inverse impression of the final part. Most of the moulds are built up of two halves: the front insert and the back insert. In certain mould-making industries, the front insert is also known as the cavity and the back insert is known as the core. Figure 1 shows a front insert (cavity) and a back insert (core). Molten plastic is injected into the impressionto fill it. Solidification of the molten plastic then forms the part. Figure 2 shows a simple two-plate mould assembly.2.1 Difference Between a Single-Cavity and a Multi-Cavity MouldVery often, the impression in which molten plastic is being filled is also called the cavity. The arrangement of the cavities is called the cavity layout. When a mould contains more than one cavity, it is referred to as a multi-cavity mould. Figures 3(a) and 3(b) shows a single-cavity mould and a multi-cavity mould.A single-cavity mould is normally designed for fairly large parts such as plotter covers and television housings. For smaller parts such as hand phone covers and gears, it is always more economical to design a multi-cavity mould so that more parts can be produced per moulding cycle. Customers usually determine the number of cavities, as they have to balance the investment in the tooling against the part cost.2.2 Multi-Cavity LayoutA multi-cavity mould that produces different products at the same time is known as a family mould. However, it is not usual to design a mould with different cavities, as the cavities may not all be filled at the same time with molten plastic of the same temperature.On the other hand, a multi-cavity mould that produces the same product throughout the moulding cycle can have a balanced layout or an unbalanced layout. A balanced layout is one in which the cavities are all uniformly filled at the same time under the same melt conditions 15,16. Short moulding can occur if an unbalanced layout is being used, but this can be overcome by modifying the length and cross-section of the runners (passageways for the molten plastic flow from the sprue to the cavity). Since this is not an efficient method, it is avoided where possible. Figure 4 shows a short moulding situation due to an unbalanced layout.A balanced layout can be further classified into two categories: linear and circular. A balanced linear layout can accommodate 2, 4, 8, 16, 32 etc. cavities, i.e. it follows a 2n series. A balanced circular layout can have 3, 4, 5, 6 or more cavities, but there is a limit to the number of cavities that can be accommodated in a balanced circular layout because of space constraints. Figure 5 shows the multi-cavity layouts that have been discussed.3. The Design ApproachThis section presents an overview of the design approach for the development of a parametric-controlled cavity layout design system for plastic injection moulds. Aneffective working method of mould design involves organising the various subassemblies and components into the most appropriate hierarchy design tree. Figure 6 shows the mould assembly hierarchy design tree for the first level subassembly and components. Other subassemblies and components are assembled from the second level onwards to the nth level of the mould assembly hierarchy design tree. For this system, the focus will be made only on the “cavity layout design”.3.1 Standardisation ProcedureIn order to save time in the mould design process, it is necessary to identify the features of the design that are commonly used. The design processes that are repeatable for every mould design can then be standardised. It can be seen from Fig. 7 that there are two sections that interplay in the standardization procedure for the “cavity layout design”: component assembly standardisation and cavity layout configuration standardisation.3.1.1 Component Assembly StandardisationBefore the cavity layout configuration can be standardised, there is a need to recognise the components and subassemblies that are repeated throughout the various cavities in the cavity layout. Figure 8 shows a detailed “cavity layout design” hierarchy design tree. The main insert subassembly (cavity) in thesecond level of the hierarchy design tree has a number of subassemblies and components that are assembled directly to it from the third level onwards of the hierarchy design tree. They can be viewed as primary components and secondary components. Primary components are present in every mould design. The secondary components are dependent on the plastic part that is to be produced, so they may or may not be presentin the mould designs.As a result, putting these components and subassemblies directly under the main insert subassembly, ensures that every repeatable main insert (cavity) will inherit the same subassemblies and components from the third level onwards of the hierarchy design tree. Thus, there is no need to redesign similar subassemblies and components for every cavity in the cavity layout.3.1.2 Cavity Layout Configuration StandardisationIt is necessary to study and classify the cavity layout configurations into those that are standard and those that are nonstandard. Figure 9 shows the standardisation procedure of the cavity layout configuration.A cavity layout design, can be undertaken either as a multicavity layout or a single-cavity layout, but the customers always determine this decision. A single-cavity layout is always considered as having a standard configuration. A multi-cavity mould can produce different products at the same time or the same products at the same time. A mould that produces different products at the same time is known as a family mould, which is a non-conventional design. Thus, a multicavity family mould has a non-standard configuration.A multi-cavity mould that produces the same product can contain either a balanced layout design or an unbalanced layout design. An unbalanced layout design is seldom used and, as a result, it is considered to possess a non-standard configuration. However, a balanced layout design can also encompass either a linear layout design or a circular layout design. This depends on the number of cavities that are required by the customers. It must be noted, however, that a layout design that has any other non-standard number of cavities is also classified as having a non-standard configuration.After classifying those layout designs that are standard, their detailed information can then be listed into a standardization template. This standardisation template is pre-defined in the cavity layout design level of the mould assembly design and supports all the standard configurations. This ensures that the required configuration can be loaded very quickly into the mould assembly design without the need to redesign the layout.3.2 Standardisation TemplateIt can be seen from Fig. 10 that there are two parts in the standardisation template: a configuration database and a layoutde sign table. The configuration database consists of all the standard layout configurations, and each layout configuration has its own layout design table thatcarries the geometrical parameters. As mould-making industries have their own standards, the configuration database can be customised to take into account those designs that are previously considered as non-standard.3.2.1 Configuration DatabaseA database can be used to contain the list of all the different standard configurations. The total number of configurations in this database corresponds to the number of layout configurations available in the cavity layout design level of the mould design assembly. The information listed in the database is the configuration number, type, and the number of cavities. Table 1 shows an example of a configuration database. The configuration number is the name of each of the available layout configurations with the corresponding type and number of cavities. When a particular type of layout and number of cavities is called for, the appropriate layout configuration will be loaded into the cavity layout design.3.2.2 Layout Design TableEach standard configuration listed in the configuration database has its own layout design table. The layout design table contains the geometrical parameters of the layout configuration and is independent for every configuration. A more complex layout configuration will have more geometrical parameters to control the cavity layout.Figures 11(a) and 11(b) show the back mould plate (core plate) with a big pocket and four small pockets for assembling the same four-cavity layout. It is always more economical and easier to machine a large pocket than to machine individual smaller pockets in a block of steel. The advantages of machining a large pocket are:1. More space between the cavities can be saved, thus a smaller block of steel can be used.2. Machining time is faster for creating one large pocket compared to machining multiple small pockets.3. Higher accuracy can be achieved for a large pocket than for multiple smaller pockets.As a result, the default values of the geometrical parameters in the layout design table results in there being no gap between the cavities. However, to make the system more flexible, the default values of the geometrical parameters can be modified to suit each mould design where necessary.3.3 Geometrical ParametersThere are three variables that establish the geometrical parameters:1. Distances between the cavities (flexible). The distances between the cavities are listed in the layout design table and they can be controlled or modified by the user. The default values of the distances are such that there are no gaps between the cavities.2. Angle of orientation of the individual cavity (flexible). The angle of orientation of the individual cavity is also listed in the layout design table which the user can change. For a multi-cavity layout, all the cavities have to be at the same angle of orientation as indicated in the layout design table. If the angle of orientation is modified, all the cavities will be rotated by the same angle of orientation without affecting the layout configuration.3. Assembly mating relationship between each cavities (fixed). The orientation of the cavities with respect to each other is pre-defined for each individual layout configuration and is controlled by the assembly mating relationship between cavities. This is fixed for every layout configuration unless it is customised.Figure 12 shows an example of a single-cavity layout configuration and its geometrical parameters. The origin of the main insert/cavity is at the centre. The default values of X1 and Y1are zero so that the cavity is at the centre of the layout (both origins overlap each other). The user can change the values of X1 and Y1, so that the cavity can be offset appropriately.Figure 13 shows an example of an eight-cavity layout configuration and its geometrical parameters. The values of X and Y are the dimensions of the main insert/cavity. By default, the values of X1 and X2 are equal to X, the value of Y1 is equal to Y, and thus there is no gap between the cavities. The values of X1, X2, and Y1 can be increased to take into account the gaps between the cavities in the design. These values are listed in the layout design table.If one of the cavities has to be oriented by 90, the rest of the cavities will be rotated by the same angle, but the layout design remains the same. The user is able to rotate the cavities by changing the parameter in the layout design table. The resultant layout is shown in Fig. 14.A complex cavity layout configuration, which has more geometrical parameters, must make use of equation to relate the parameters.4. System ImplementationA prototype of the parametric-controlled cavity layout design system for a plastic injection mould has been implemented using a Pentium III PC-compatible as the hardware. This prototype system uses a commercial CAD system (SolidWorks 2001) and a commercial database system (Microsoft Excel ) as the software. The prototype system is developed using the Microsoft Visual C+ V6.0 programming language and the SolidWorks API (Application Programming Interface) in a Windows NT environment. SolidWorks is chosen primarily for two reasons:1. The increasing trend in the CAD/CAM industry is to move towards the use of Windows-based PCs instead of UNIX workstations mainly because of the cost involved in purchasing the hardware.2. The 3D CAD software is fully Windows-compatible, thus it is capable of integrating information from Microsoft Excel files into the CAD files (part, assembly, and drawing) smoothly 17.This prototype system has a configuration database of eight standard layout configurations that are listed in an Excel file. This is shown in Fig. 15(a). Corresponding to this configuration database, the layout design level, which is an assembly file in SolidWorks (layout.sldasm), has the same set of layout configurations. The configuration name in the Excel file corresponds to the name of the configurations in the layout assembly file, which is shown in Fig. 15(b).Every cavity layout assembly file (layout.sldasm) for each project will be pre-loaded with these layout configurations. When a required layout configuration is requested via the user interface, the layout configuration will be loaded. The user interface shown in Fig. 16 is prior to the loading of the requested layout configuration. Upon loading the requested layout configuration, the current layout configuration information will be listed in the list box.The user is then able to change the current layout configuration to any other available layout configurations that are found in the configuration database. This is illustrated in Fig. 17.The layout design table for the current layout configuration that contains the geometrical parameters can be activated when the user triggers the push button at the bottom of the user interface. When the values of the geometrical parameters are changed, the cavity layout design will be updated accordingly. Figure 18 shows the activation of the layout design table of the current layout configuration.5. A Case StudyA CAD model of a hand phone cover, shown in Fig. 19, is used in the following case study.Prior to the cavity layout design stage, the original CAD model has to be scaled according to the shrinkage value of the moulding resin to be used. The main insert is then created to encapsulate the shrunk part. This entire subassembly is known as the main insert subassembly (xxx cavity. sldasm), where “xxx” is the project name. Figure 20 shows the main insert subassembly. After the main insert subassembly is created, the cavity layout design system can be used to prepare the cavity layout of the mould assembly.5.1 Scenario 1: Initial Cavity Layout DesignIn a mould design, the number of cavities to be built in a mould is always suggested by the customers, as they have to balance the investment in the tooling against the part cost. Initially, the customers had requested a two-cavity mould to be designed for this hand phone cover. After the creation of the main insert subassembly, the mould designer loads a layout configuration that is of a linear type which has two cavities using this cavity layout design system. The corresponding configuration name is L02 and is listed in the user interface as shown in Fig. 21.5.2 Scenario 2: Modification in the Cavity Layout DesignTechnical discussion sessions between the customers and mould designers are common. This enables changes to be made to the 3D CAD files of both the product and mould as soon as possible, prior to mould manufacture. Changes are almost always inevitable and mould designers are never given any extension in the lead time.In this case, during a technical discussion session, the customers changed their minds and needed a linear four-cavity mould instead of a two-cavity mould so that the production rate of the hand phone covers can be increased. The mould designer can use the cavity layout design system to modify the existing cavity layout design to a linear four-cavity mould. The required new layout configuration can be selected from the available layout configurations that are listed in the configuration database. This is shown in Fig. 22. 5.3 Scenario 3: Gap is Required Between CavitiesFinally, in another technical discussion session, the mould designer is required to introduce a gap of 20 mm between the cavities in the longitudinal direction, as shown in Fig. 23.In the cavity layout subassembly level, the mould designer uses the cavity layout system to activate the layout design table of the current layout configuration. The value of Y1 is changed from 50 mm to 70 mm to introduce a gap of 20 mm between the cavities in the longitudinal direction. Figure 24 shows the change of the value of Y1 in the layout design table. The result of the final design, after addition of the gap, is shown in Fig. 25. 6. ConclusionsIn this paper, an approach using a standardisation template is proposed for the development of a parametric-controlled cavity layout design system. Since this approach makes use of standardisation, it can be further applied to other components for mould assembly design if their design processes are repeatable or they have features that are commonly used for every mould design. The advantages of the developed cavity layout system are as follows:1. The developed system has user-friendly interfaces.2. Since it makes use of databases, it is highly flexible, and mould-making industries that have their own standards can customise the databases to suit their needs.3. Because a pre-defined standardisation template is available in the layout design level of the mould assembly design, the required layout configuration can be loaded very quickly into the mould assembly design without the need to redesign the layout.4. This system enables product designers and mould designers to have more useful technical discussions prior to mould manufacture as changes to the layout can be made immediately during the discussions.5. This system saves time in the mould design process because it removes redundant work. This is very important for the mould-making industries since the lead time for mould making is decreasing.The developed system has some limitations. Although the databases and layout design tables can be customised, customization will be more difficult for more complex non-standard configurations because the correct geometrical parameters have to be determined. We are currently working on applying a standardisation template for other components in mould design.References1. K. S. Lee, J. Y. H, Fuh, Y. F. Zhang, A. Y. C. Nee and Z. Li, “IMOLD: an intelligent plastic injection mold design and assembly system”, Proceedings of the 4th International Conference On Die and Mould Technology, pp. 3037, Malaysia, 46 June 1997.2. K. S. Lee, Z. Li, J. Y. H, Fuh, Y. F. Zhang and A. Y. C. Nee, “Knowledge-based injection mold design system”, CIRP International Conference and Exhibition on Design and Production of Dies and Moulds, pp. 4550, Turkey, 1921 June 1997.3. C. K. Mok, K. S. Chin and John K. L. Ho, “An interactive knowledge-based CAD system for mould design in injection moulding processes”, International Journal of Advanced Manufacturing Technology, 17, pp. 2738, 2001.4. Kwai-Sang Chin and T. N. Wong, “Knowledge-based evaluation for the conceptual design development of injection molding parts”, Engineering Application of Artificial Intelligence, 9(4), pp. 359376, 1996.5. Rong-Shean Lee, Yuh-Min Chen and Chang-Zou Lee, “Development of a concurrent mold design system: a knowledge-based approach”, Computer Integrated Manufacturing Systems, 10(4), pp. 287307, 1997.6. A. A. Tseng, J. D. Kaplan, O. B. Arinze and T. J. Zhao, “Knowledge-based mold design for injection molding processing”, Proceedings of the 5th International Symposium on Intelligent Control, pp. 11991204, 1990.7. K. Beiter, S. Krizan and K. Ishii, “HyperQ/Plastics: an expert system for plastic material and process selection”, Proceedings Computers in Engineering, ASME, 1, pp. 7176, 1991.8. W. R. Jong and K. K. Wang, “An intelligent system for resin selection”, Proceedings ANTEC89, SPE, pp. 367370, 1989.9. M. Wiggins, “Expert systems in polymer selection”, Proceedings ANTEC86, SPE, pp. 13931395, 1986.10. L. L. Chen, S. Y. Chou and T. C. Woo, “Parting directions for mould and die design”, Computer-Aided Design, 25(12), pp. 762768, 1993.11. A. Y. C. Nee and M. W. Fu, “Determination of optimal parting directions in plastic injection mold design”, Annals CIRP, 46(1),pp. 429432, 1997. 12. B. Ravi and M. N. Srinivasan, “Decision criteria for computeraided parting surface design”, Computer-Aided Design, 22(1), pp. 1118, 1990.13. X. G. Ye, “Feature and associativity-based computer-aided design for plastic injection moulds”, PhD thesis, National University of Singapore, 2000.14. X. G. Ye, J. Y. H. Fuh and K. S. Lee, “Automated assembly modeling for plastic injectionmoulds”, International Journal of Advanced Manufacturing Technology, 16, pp. 739747, 2000.15. G. Menges, How to Make Injection Molds, Chapter 4, Hanser, Munich, 1986.16. Joseph B. Dym, Injection Molds and Molding: A Practical Manual, Chapter 7, Van Nostrand Reinhold, New York, 1989.17. SolidWorks 2001 Training Manual, “SolidWorks Essentials parts assemblies anddrawings”, SolidWorks Corporation, Concord, Massachusetts 01742, 2001.注塑模的参数控制型腔布局设计系统M. L. H. Low and K. S. Lee机械工程系,新加坡大学,新加坡如今,塑料产品的上市时间变的越来越短,因此,制造注塑模的可用交货时间也变的少了。在模具的设计阶段有个省时的潜在方法,因为由于每个模具设计可以是标准化的,所以一个设计程序可以被重复使用。本文提出了一种通过使用标准模版来控制几何参数的方法来设计注塑模的型腔布局。标准模版的型腔布局设计包括可能布局的配置。每个布局设计的配置都有其特有的由所有几何参数构成的布局设计表格。这个标准模版是预定义在合型设计的布局设计的级别时的。这样就能够确保要求的配置能够被快速地输入到模具装配设计中,而不需要重新设计布局。这使得它在模具制造前产品设计师和模具设计师之间的技术讨论上更有用。在讨论时直接改变 3D 型腔的布局设计,这样可以节省时间和避免错误传达。型腔设计的标准模版便于各个模具制造公司依照顾客具体要求而制造他们各自的规格。关键词:型腔布局设计;几何参数;合型;注塑模设计;标准模板1. 简介注塑法是在一个较好的公差范围内生产大量塑料零件的最简单的方法。在注塑法中有两个主要的要求。那就是注塑设备和注塑模。注塑制模机上有安装好的模具并且提供有将熔融的塑料从机器中转移到模具中的机械设,利用压力应用程序来加紧模具来喷出成型的塑料部件。注塑模是将熔融的塑料转变成最终具有详细尺寸形状的塑料部件的工具。如今,随着塑料部件的上市时间变得越来越短, 在一个更短的时间里生产注塑模变得更加必要。注塑模具的设计及其相关的领域有很多工作都是依靠电脑技术来完成的。知识库系统例如 IMOLD1.2,IKMOULD3,ESMOLD4,台湾5的国家程康大学6的知识库系统,德雷塞尔大学的知识库系统等都是注塑模具设计较发达的。如 HyperQ/Plastic7,CIMP8,FIT9系统等,通过使用知识库系统在挑选塑性材料方面有了发展。在注塑法10-12的分离设计技术上也同样有所提高。据观察尽管模具制造公司仍在使用 3D CAD 软件来进行模具设计,大量的时间都浪费在了仔细检查每个项目的同一设计程序。在模具设计阶段如果重复的设计程序能够标准化进而避免了常规任务就能够更好的节省时间。在合型方面一个有条理的树形分层设计也同样是个重要因素13,14。然而,在型腔的布局设计中有极少的工作是控制参数,这样,这片领域将是我们主要的焦点。尽管在设计型腔的布局时有很多的方法15,16,模具设计师们更倾向于使用最常见的设计方法,这样就有必要在型腔布局设计层面上制定标准。本文介绍了基于标准模板通过控制参数来设计注塑模的型腔布局设计的方法。首先,必须确定一个有条理的树形合型分层设计。其次,对标准配置和不标准配置之间不同型腔配置进行分类。在配置数据库中将标准配置列表,并且每个配置有其自己的布局设计表来控制它自身的几何参数。这个标准模板在模具合型设计的布局设计阶段进行先验。图 1.前嵌入(型腔)和后嵌入(型芯)2. 注塑模的型腔布局设计注塑模是将熔融的塑料转变成最终具有详细尺寸形状的塑料部件的工具。这样,一个模具的最后部分要包含有推出机构。大多数的模具由两部分构成:动模板和定模板。在有些模具制造公司,动模板也被称为凹模,定模板也被称为凸模。表一所示为动模板(凹模)和定模板(凸模)。熔融的塑性材料被注射进型腔中。熔融的塑性材料固化后就形成了部件。表二所示为一个简单的两板式注塑模。2.1 单型腔和多型腔的区别图 2 单型腔合型通常,熔融塑性材料所注入的空间被称为型腔。型腔的排列被称为型腔的布置。当模具包含有超过一个的型腔时被称为多型腔模具。图 3(a)和图 2(b) 所示为一个单型腔模具和一个多型腔模具。单型腔模具通常用来制造大的直方的部件例如打印机的外壳和电视机的外壳。对于较小的部件如手机外壳和齿轮,一般更经济的用多型腔模具来生产,这样每个模具周期能够生产更多的部件。顾客通常决定型腔的数目,所以他们不得不平衡机器设备的费用和部件的费用。2.2 多型腔的布局同时能生产不同产品的多型腔模具称为一个系列模具。然而,它并不经常用来设计有不同型腔的模具,因为型腔不一定能同时在同一个温度下被熔融的塑性材料填充满。另一方面,一个多型腔模具在整个的模具周期中生产相同的产品会用到平衡布局和不平衡布局。平衡布局是指型腔能够在相同的熔融条件下同时全部被填充满15,16。当使用不平衡布局时可能会产生成型不完全的模具,但是可以通过修改分型面的浇流道(熔融塑性材料从浇口流到型腔的通道)的长度来克服。然而这不是一个高效的方法,在可能的情况下避免使用。图 4 所示为由于使用不平衡布局而导致了成型不完全的情况。平衡布局能更进一步的分为两类:线形和环形。平衡线形布局适用于 2、4、8、16、32 等型腔,也就是说它遵循2n 系列。平衡环形布局可以有 3、4、5、6或者更多的型腔,但是由于空间限制在平衡环形布局的型腔布置上有数量的限制。图 5 所示是讨论过的多型腔布局。3. 设计方法本章概况地介绍注塑模的高级参数控制型腔布局设计系统的设计方法。模具设计的有效工作方法包括将大量的组件和部件安排到设计树的最合适的层次上。图 6 所示为第一级的组件和部件在设计树的合型层。设计树的第二层向前直到第N 层的合型层上的组件和部件将被组合。在这个系统中,重点“型腔的布局设计”。图 3(a)单型腔模具。(b)多型腔模具3.1 标准化程序图 4 不平衡布局而导致了成型不完全在模具设计过程中为节约时间,有必要鉴别通常使用的设计方法的特点。每个模具设计中重复使用的设计步骤可以被标准化。从图 7 中可以看出在型腔布局设计的标准化程序中有两个部分是互相影响的:零部件装配的标准化和型腔布局配置的标准化。图 5 多型腔布局图 6 合型分层设计树3.1.1 零件装配标准化图 7 在标准化程序中的相互关系在型腔布局配置标准化前,有必要识别在型腔布局中在大量型腔中重复使用的零部件。表 8 所示为一个详细的型腔布局设计的树形层次设计结构图。在树形层次设计结构图的第二层中主要的嵌入部件有大量在层次设计树中第三层以前的被直接装配的零部件。它们可以被看做是主要成分和次要成分。主要成分存在于每个模具设计中。次要成分取决于所生产的塑料部件,所以它们可能出现也可能不出现在模具设计中。图 8 详细型腔布局设计的树形层次设计结构图结果,将这些零部件直接放到主要嵌入部件下,确保每个重复使用的主要嵌入(型腔)将延续层次设计树第三层以前的相同零部件的使用。这样,就没有必要重复设计在型腔布局中的每个型腔中的相同零部件了。3.1.2 型腔布局的结构标准化有必要学习和将型腔布局标准化分类为标准化和非标准化。图 9 所示为型腔布局结构的标准化程序。图 9 型腔布局结构的标准化程序。一个型腔布局设计,可以被理解为或者是多腔布局或者是单腔布局,但是通常是顾客来决定这个。单型腔布局总是被认为有一个标准的配置。多型腔模具可以同时生产不同产品或者同时生产相同产品。一个模具同时生产不同产品被认为是同系列的模具,这是不常见的设计。这样,一个多型腔系列模具就有一个非标准配置。多型腔模具生产相同产品可以包含要么平衡布局设计要么非平衡布局设计。非平衡布局设计很少使用,结果它被认为是有一个非标准配置。然而,一个平衡布局设计也可以包含有一个线性布局设计或者是一个环形布局设计。这个取决于顾客要求的型腔的数目。这个必须注意,然而,布局设计也有其他非标准型腔数目也被分类在非标准配置中。将这些布局设计分为标准化后,他们的详细信息就可以列入标准模板中。在合型设计和支持所有的标准配置的型腔布局设计阶段标准模板要进行先验。这样就能确保要求的配置能够很快的载入到合型设计中而不用再次设计布局。3.2 标准化模板从图 10 中可以看出在标准模板中有两部分:配置数据库和部件设计表。配置数据库包括有所有的标准布局配置,每个布局配置都有它自己的带有几何参数的布局设计表。由于模具
- 温馨提示:
1: 本站所有资源如无特殊说明,都需要本地电脑安装OFFICE2007和PDF阅读器。图纸软件为CAD,CAXA,PROE,UG,SolidWorks等.压缩文件请下载最新的WinRAR软件解压。
2: 本站的文档不包含任何第三方提供的附件图纸等,如果需要附件,请联系上传者。文件的所有权益归上传用户所有。
3.本站RAR压缩包中若带图纸,网页内容里面会有图纸预览,若没有图纸预览就没有图纸。
4. 未经权益所有人同意不得将文件中的内容挪作商业或盈利用途。
5. 人人文库网仅提供信息存储空间,仅对用户上传内容的表现方式做保护处理,对用户上传分享的文档内容本身不做任何修改或编辑,并不能对任何下载内容负责。
6. 下载文件中如有侵权或不适当内容,请与我们联系,我们立即纠正。
7. 本站不保证下载资源的准确性、安全性和完整性, 同时也不承担用户因使用这些下载资源对自己和他人造成任何形式的伤害或损失。

人人文库网所有资源均是用户自行上传分享,仅供网友学习交流,未经上传用户书面授权,请勿作他用。
 川公网安备: 51019002004831号