1LUS070005-LFE_RemRepWeldCov.doc
4T焊接滚轮架机械设计【13张图纸】【优秀Word+CAD全套设计】
收藏
资源目录

压缩包内文档预览:
编号:447182
类型:共享资源
大小:8.14MB
格式:ZIP
上传时间:2015-07-03
上传人:小***
认证信息
个人认证
林**(实名认证)
福建
IP属地:福建
45
积分
- 关 键 词:
-
焊接
轮架
机械设计
- 资源描述:
-
摘 要
焊接装备就是在焊接生产中与焊接工序相配合,有利于实现焊接生产机械化,自动化,有利于提高装配焊接质量,促使焊接生产过程加速进行的各种辅助装置和设备。焊接滚轮架是借助主动滚轮与焊件之间的摩接力带动焊接旋转的变位机械。焊接滚轮架主要用于筒形焊件的装配与焊接。焊接滚轮架按结构形式分为两类:第一类是长轴式滚轮架。第二类是组合式滚轮架。本文主要对组合式4T焊接滚轮架进行设计,并对轴、键等主要构件进行了校核。结果表明各主要部件符合要求。该滚轮架结构简单,使用方便灵活,对焊件的适应性很强。设计中充分的考虑了滚轮架的合理性和经济性等因素。
关键词:焊接;工装夹具;滚轮架
Abstract
Welding equipment is a machine which is used in welding production and welding processes, and it is conducive to welding production mechanization and automation, to improving assembly welding-quality. Then it could prompte to speed up the process of welding production of the various assistive devices and equipment. Welding roller is used initiative and welding pieces of the wheel between the Mount relay driven welding rotating mechanical deformation. Welding roller stands for the main pieces of tube welding and welding assembly. Welding roller standing by structural form is divided into two categories : the first category is long axis-wheel frame., the second category is modular roller frame. In this paper, four pairs of modular T-welded wheel for the design, as well as axial, bond and other main component of checking. The results showed that the main components to meet the requirements. The roller frame structure is simple, flexible, adaptive welded pieces of a strong, which is the most widely used form of the structure. And it could be fully considered the roller frame reasonable and economic, and other factors.
【Key words】:weld, frock clamp, turning rolls
目 录
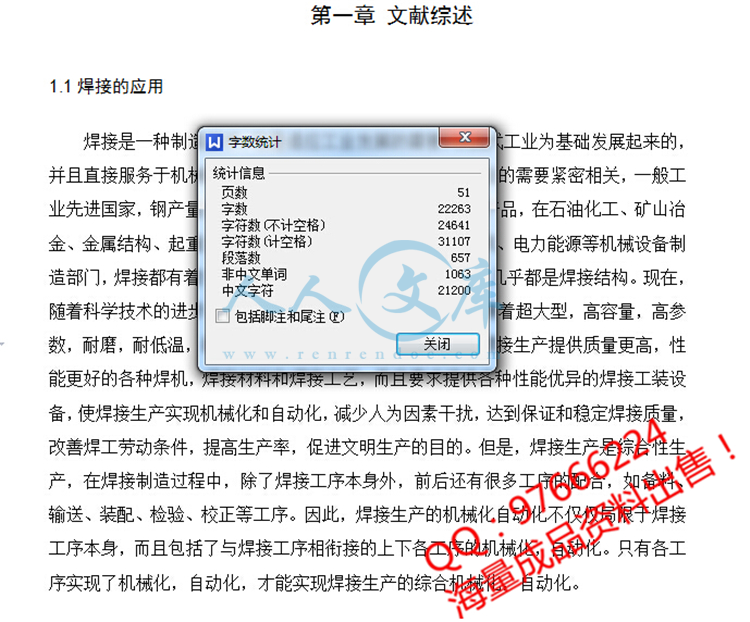
第一章 文献综述1
1.1焊接的应用1
1.2焊接机械装备1
1.2.1焊接机械设备的分类2
1.2.2焊接机械装备对焊接生产的作用2
1.3焊接自动化:3
1.4焊接工装夹县4
1.4.1焊接工装夹具的特点5
1.4.2焊接工装夹具的分类6
1.4.3对焊接工装夹具的设计要求6
1.4.4焊件在焊接工装夹具中的定位方法7
1.5焊接变位机械8
1.5.1焊接变位机械的分类8
1.5.2焊接变位机械应具备的性能9
1.6几类焊接机械设备的具体介绍10
1.6.1焊接变位机10
1.6.2焊接翻转机11
1.6.3焊接操作机12
1.6.4焊接滚轮架13
1.6.5关于滚轮架轴向窜动的问题16
第二章 方案的选择与确定18
2.1组合式滚轮架的特点:18
2.2滚轮驱动方案20
2.3减速器的选择:20
2.4连轴器的选用:21
2.5滚轮架滚轮的设计21
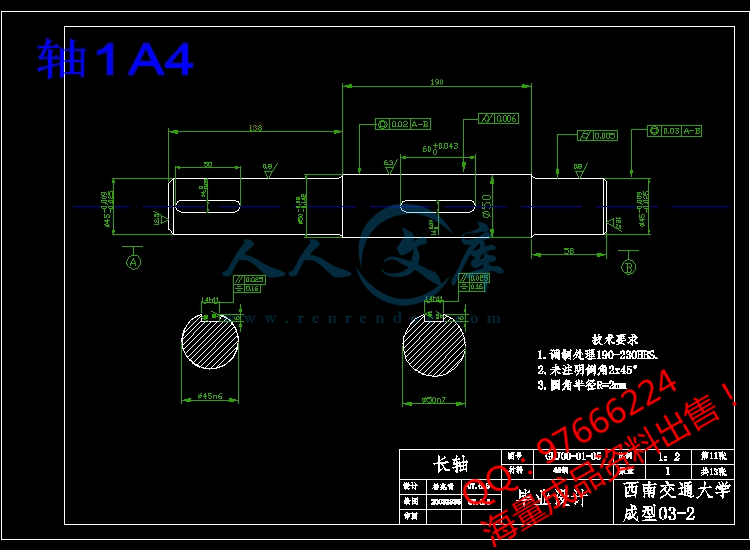
2.6轴的设计23
2.7轴承的选用24
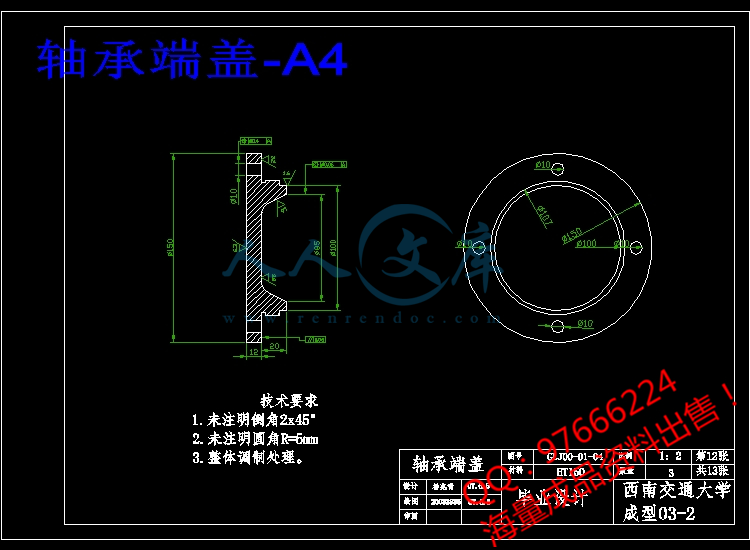
2.8轴承端盖的设计25
2.9丝杠的设计26
2.10键的设计27
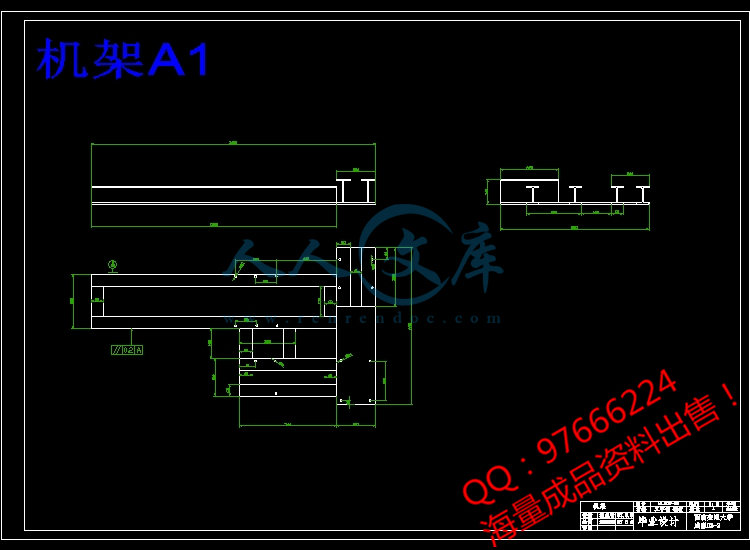
2.11机架的设计27
2.12表面粗糙度29
第三章 计算与校核30
3.1焊接滚轮架的设计计算30
3.1.1驱动圆周力与支反力的分析及中心角的确定30
3.1.2 焊接滚轮架的受力分析33
3.1.3滚轮支反力的计算34
3.2电动机的选定36
3.3轴的校核37
3.4滚轮处键的校核38
3.5轴承寿命计算38
3.6轴承的强度计算39
结论41
致谢42
参考文献43


- 内容简介:
-
Removing and Replacing Welded-On Covers Technical Data 1LUS070005-LFE Rev 5 October 15, 2003 Instruction Leaflet Scope This leaflet contains general procedures to be followed from the time the transformer and its accessories are received, until it is put into operation. These instructions do not purport to cover all possible contingencies that may arise during installation, operation, maintenance, and all details and variations of this equipment. If you require additional information, contact ABB Small Power Transformers in South Boston, Virginia. The welded-on cover of a small power transformer may be removed by chipping out the joining weld or by cutting out the weld with an arc-air torch or grinder. The following procedures also include recommended equipment. Chipping Out a Weld Recommended Equipment 1. Pneumatic chipping hammer. 2. Diamond-pointed chisels, 3/8 and 1/8-inch. The chisels should be forged tools, hardened and tempered so that the edges will not turn or spall. The cutting edges of the diamond-pointed chisels should be ground straight with no chamfer. 3. Flat chisels. The flat chisel should have the flat side relieved 1/64-inch, approximately 1/8-inch back from the cutting edge. This prevents the chisel from “digging in” and allows the operator better control of its cutting. 4. Gloves and safety glasses. Procedure It is important to cover any openings in the tank to avoid entry of chips. To remove a weld by chipping, apply machine oil or grease to the surface of the weld to lubricate the cutting. A 3/8-inch diamond-point chisel is used in pneumatic hammer and the chisel is held so that the diamond is pointed to the root of the joint. The chisel should cut 1/8-inch back of the vertical edge of the weld and along the face of the horizontal flange to remove as much of the weld as possible. Should the weld not be completely removed in one pass with the 3/8-inch diamond-point chisel, more oil or grease should be spread over the remaining weld and the flat chisel used to cut the weld flush with the horizontal and vertical surfaces of the joint. Use the small diamond-point chisel to remove any remaining weld metal from the root of the joint. Drive the flat chisel into the root of the joint to crack the seal. Move it slowly to prevent the chisel driving into the joint and deforming the plates. A lifting force on the cover will help break the seal. ntsArc Air Cutting Recommended Equipment 1. An AC or DC welding machine. 2. A manual “Arc Air” torch. 3. Copper-clad AC or DC carbon electrodes. 4. An air supply-80lb. gauge. 5. Flat chisel and hammer. 6. CO2 fire extinguisher, welding helmet, safety goggles, gloves. Procedure Raise the liquid level up to the highest possible point. Cover external bushings, gauges and lighting arrestors. Connect the supply of dry nitrogen to the filling plug and flush the gas space with nitrogen. Loosen hand hole cover for nitrogen to escape. Keep the nitrogen flowing while the weld is being removed to blanket the core and coils and to prevent combustible gases from collecting. Strike an arc at one corner of the tank forming a molten pool of metal. Introduce the air and start moving the torch. Keep the driving force of the arc parallel to the weld path. Remove the complete weld in one pass. If the weld is too large to remove in one pass, reduce the size of the electrode and repeat. Clamp the side or sides to prevent the joint opening before all the weld is removed. Remove C-clamps and break the seal with flat chisel. Dont damage the tank flange or cover. Replacing a Welded-On Cover Preparing the Cover 1. Chip or grind any irregularities around the cover edge left during the weld removal operation when the cover was removed from the tank. The cover edge should be square and expose clean metal. 2. Clean the underside of the cover three inches back from the cover edge to a smooth surface. A disc grinder is recommended. 3. Remove and wipe all foreign material from the cover, especially from the underside to prevent dirt falling into the transformer when the cover is placed in position on the transformer tank. Preparing the Tank Flange 1. Place a blanket of clean paper or cloth over the entire transformer a few inches below the tank flange. This blanket should be attached and sealed with wide masking tape. This is necessary to prevent any foreign material falling into the transformer. 2. Remove any raised irregularities from the top surface of the flange by chipping or grinding. A sanding disc will do the job very effectively, or a grinder may be used. In either case, it should be used so that the material removed from the flange will be thrown away from the transformer tank rather than into it. This surface must be smooth to permit the cover to fit tightly and uniformly around the tank. nts3. Gently brush cuttings and debris collected on the blanket over the transformer to the center of the blanket. Remove this debris, then carefully pull the sealing tape from the tank walls to free the blanket. Make certain that the edges of the blanket are kept above the center of the blanket at all times so that any debris will not roll into the transformer. Applying the Braided Glass Sleeve Sealing Gasket to the Tank Flange 1. Brush on a -inch wide coating of gasket cement 1-1/2 to 2-inches back from the edge of the flange completely around the tank. Care must be observed to prevent any cement extended onto the weld area as it will cause weld porosity. 2. Place 1/8-inch dia. Braided glass sleeve completely around the tank flange in the center of the freshly-applied cement. There must not be any openings in the gaskets. Use a butt joint, or allow one end to extend a little in the back of the other. Positioning the Cover and Preparing for Welding 1. Lower the cover onto the tank flange so that it is in its approximate final position without sliding across the braided glass sleeve gasket. Normally the flange will extend approximately -inch beyond the cover edge. 2. Clamp the cover and flange tightly together around its entire periphery with C-clamps. Place the C-clamps near the edge of the cover so that the operator can weld under the clamps. The cover edge should be tight against the flange before any welding is done. Welding the Cover to the Flange 1. Cover all openings in the cover. 2. Apply a 1/8-inch fillet sealing weld around the cover starting at one corner of the tank and welding around it. Use ZIP 14 (AWS 7040) AWS 6013 welding electrode. Either AC or DC current may be used. Use the current setting recommended for the electrode. 3. Remove the C-clamps from the cover and flange. 4. Remove the slag from the weld bead and wire brush. 5. Weave a -inch fillet weld over the 1/8-inch fillet weld using 5/32-inch diameter FP electrodes and a welding current of 150 to 160 amperes. This is also a coated electrode, an American Welding Society Type E-6012, and may be used with AC or DC (straight polarity preferred) current. 6. Clean the slag from the weld. Paint the weld, flange and the covers edge with primer and touch-up paint. Renewal Parts Contact ABB Small Power Transformers in South Boston, Virginia, for repair and replacement information at (434) 572 5695. nts Disclaimer of Warranties and Limitation of Liability THERE ARE NO UNDERSTANDINGS, AGREEMENTS, REPRESENTATIONS, OR WARRANTIES, EXPRESSED OR IMPLIED, INCLUDING WARRANTIES OF MERCHANTABILITY OR FITNESS FOR A PARTICULAR PURPOSE OTHER THAN THOSE SPECIFICALLY SET OUT BY AN EXISTING CONTRACT BETWEEN THE PARTIES. ANY SUCH CONTRACT STATES THE ENTIRE OBLIGATION OF THE SELLER. THE CONTENTS OF THIS DOCUMENT SHALL NOT BECOME PART OF OR MODIFY ANY PRIOR OR EXISTING AGREEMENT, COMMITMENT OR RELATIONSHIP. The information, recommendations, description and safety notations in this document are based on our experience and judgment with respect to Transformers. THIS INFORMATION SHOULD NOT BE CONSIDERED TO BE ALL INCLUSIVE OR COVERING ALL CONTINGENCIES. If further information is required, ABB Inc. should b
- 温馨提示:
1: 本站所有资源如无特殊说明,都需要本地电脑安装OFFICE2007和PDF阅读器。图纸软件为CAD,CAXA,PROE,UG,SolidWorks等.压缩文件请下载最新的WinRAR软件解压。
2: 本站的文档不包含任何第三方提供的附件图纸等,如果需要附件,请联系上传者。文件的所有权益归上传用户所有。
3.本站RAR压缩包中若带图纸,网页内容里面会有图纸预览,若没有图纸预览就没有图纸。
4. 未经权益所有人同意不得将文件中的内容挪作商业或盈利用途。
5. 人人文库网仅提供信息存储空间,仅对用户上传内容的表现方式做保护处理,对用户上传分享的文档内容本身不做任何修改或编辑,并不能对任何下载内容负责。
6. 下载文件中如有侵权或不适当内容,请与我们联系,我们立即纠正。
7. 本站不保证下载资源的准确性、安全性和完整性, 同时也不承担用户因使用这些下载资源对自己和他人造成任何形式的伤害或损失。

人人文库网所有资源均是用户自行上传分享,仅供网友学习交流,未经上传用户书面授权,请勿作他用。
|
2:不支持迅雷下载,请使用浏览器下载
3:不支持QQ浏览器下载,请用其他浏览器
4:下载后的文档和图纸-无水印
5:文档经过压缩,下载后原文更清晰
|
 川公网安备: 51019002004831号